Dresses, Sewing Tutorials
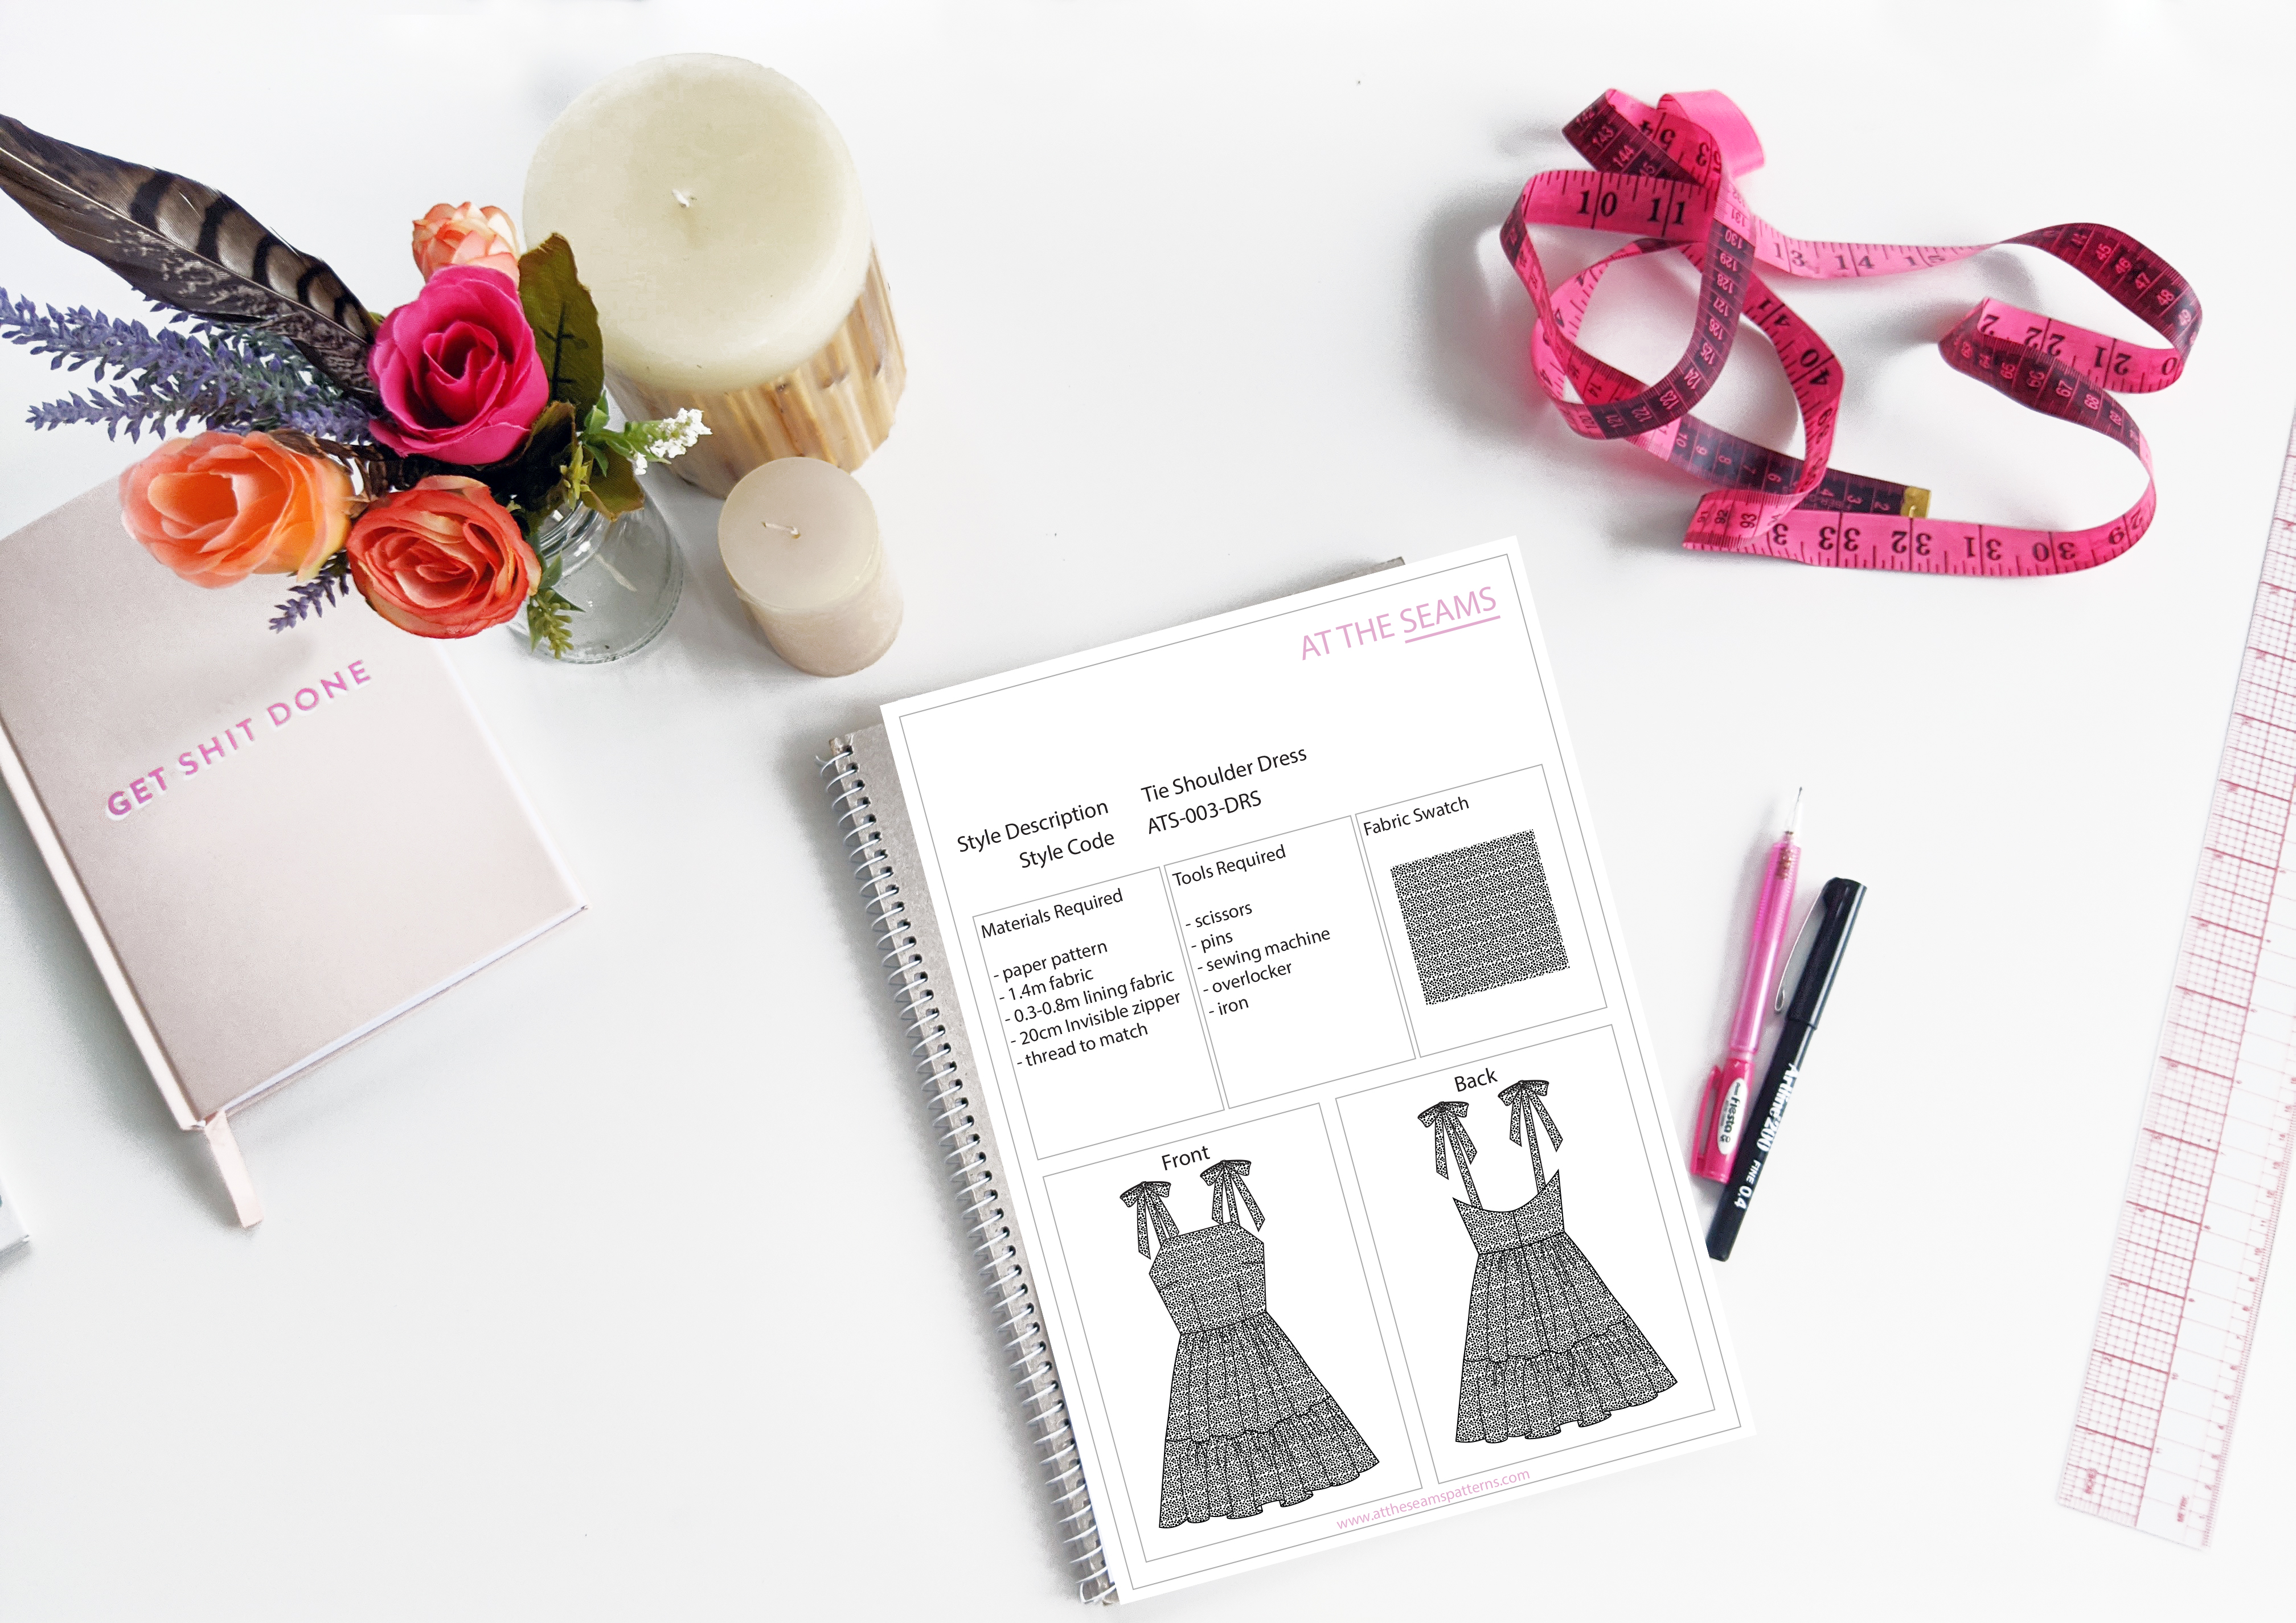
Sewing Tutorial: Emily Tie Shoulder Dress
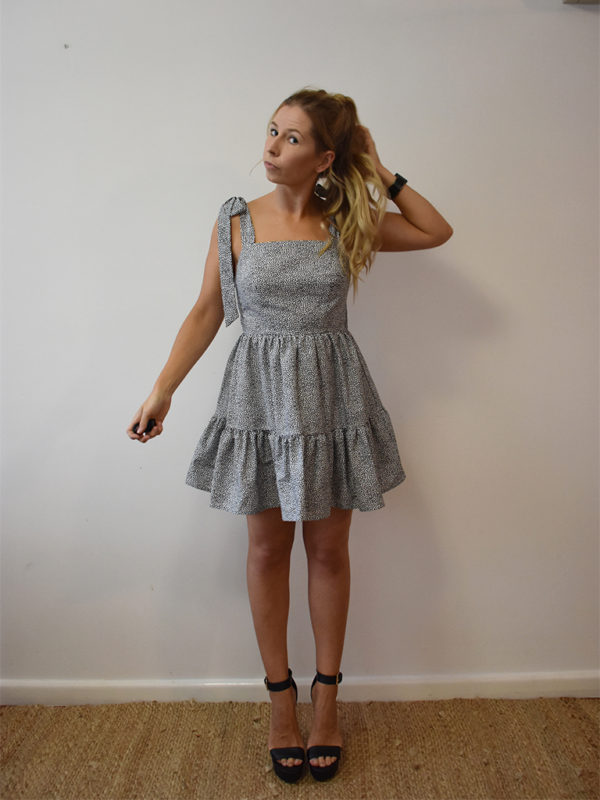
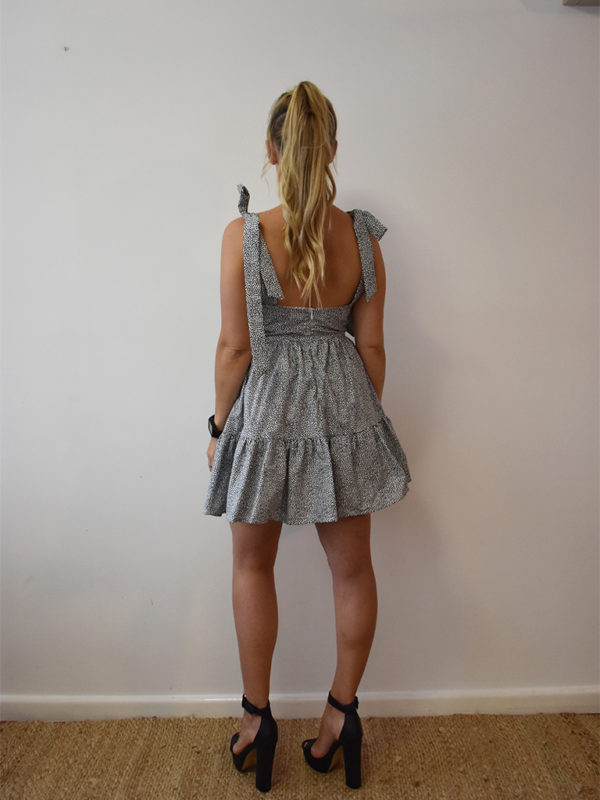
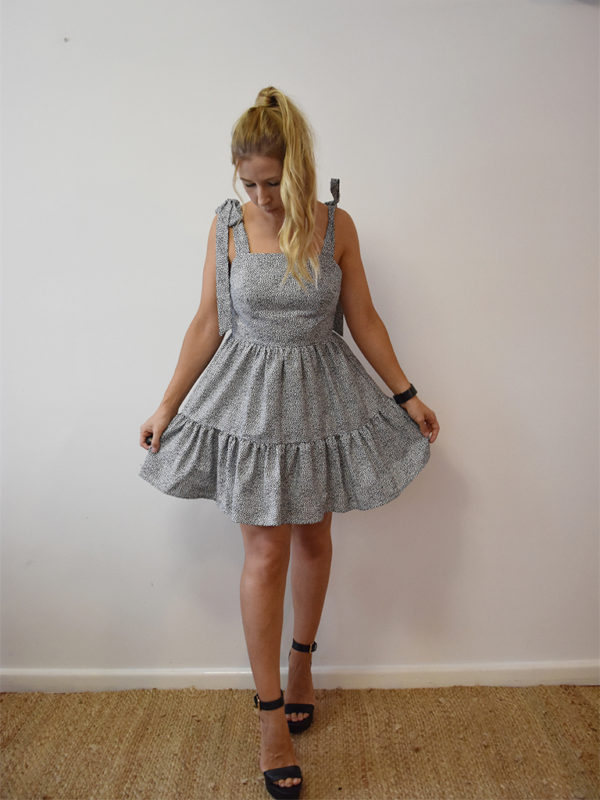
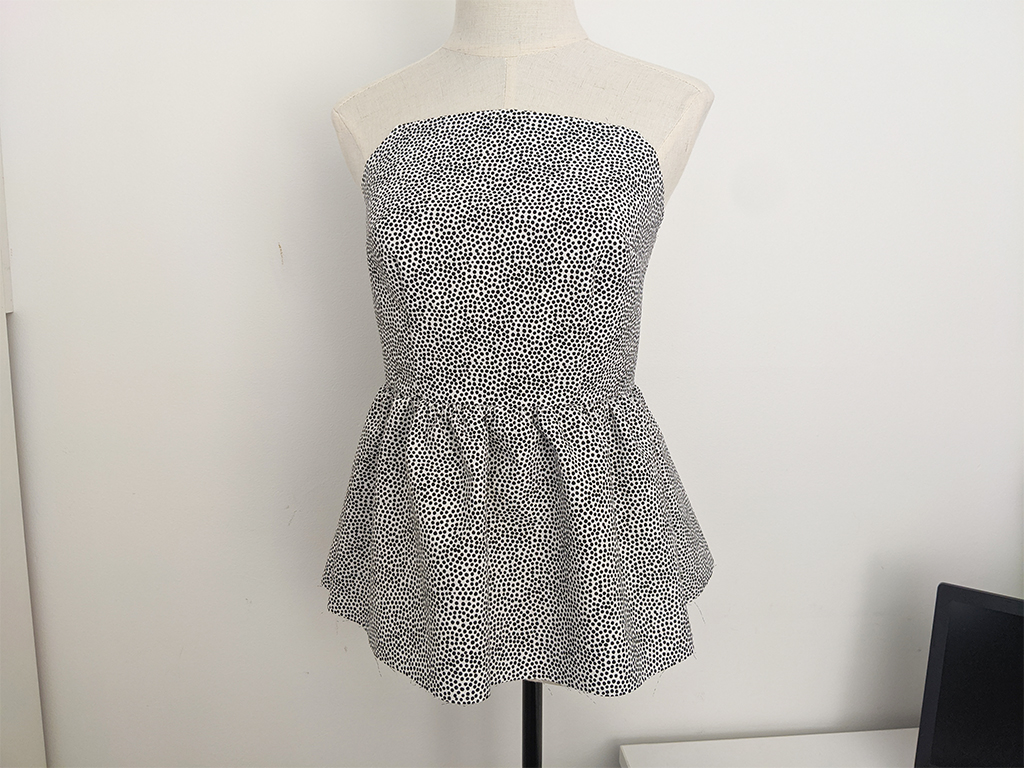
The Emily Tie Shoulder Dress is easier to make than it looks. Designed from the Simple Fitted Mini Dress, this style has a fitted, fully lined bodice that then flares out from the waist with a gathered, tiered skirt. The straps are bagged out and made to tie at the shoulder. The dress closes with a center-back invisible zipper.
Dress length(measured from CF neck to hem)
6/XS 65.5cm
10/M 67.5cm
14/XL 69.5cm
SEWING ABILITY
Intermediate (must be able to sew an invisible zipper)
Don’t be afraid to ask questions in the comments below if you need. I’m here to help. So let’s get started.
To begin you will need the following things
Materials
- Emily Tie Shoulder Dress (XS-XL) paper pattern
- Emily Tie Shoulder Dress (XL-5XL) paper pattern
- 1.4m fabric (XS-XL) 1.7m fabric (XL-5XL)
- 0.3-0.8m lining fabric
- 25cm Invisible zipper
- cotton thread (enough to also thread your overlocker)
Tools
- scissors
- pins
- sewing machine with a regular and invisible zipper foot
- overlocker
- iron
Tips
- Ensure your fabric is washed, dried, and pressed before you start cutting. There is nothing worse than washing your beautiful garment and it shrinks, or even more annoying the lining shrinks and the main doesn’t so it’s all pulled out and shape and is unwearable.
Step 1
Cut all main and lining pieces accurately on the correct grain, ensuring all notches are clipped.
Beginner tip* If you can afford to purchase a rotary cutter and cutting mat, I find this more accurate and time-efficient.
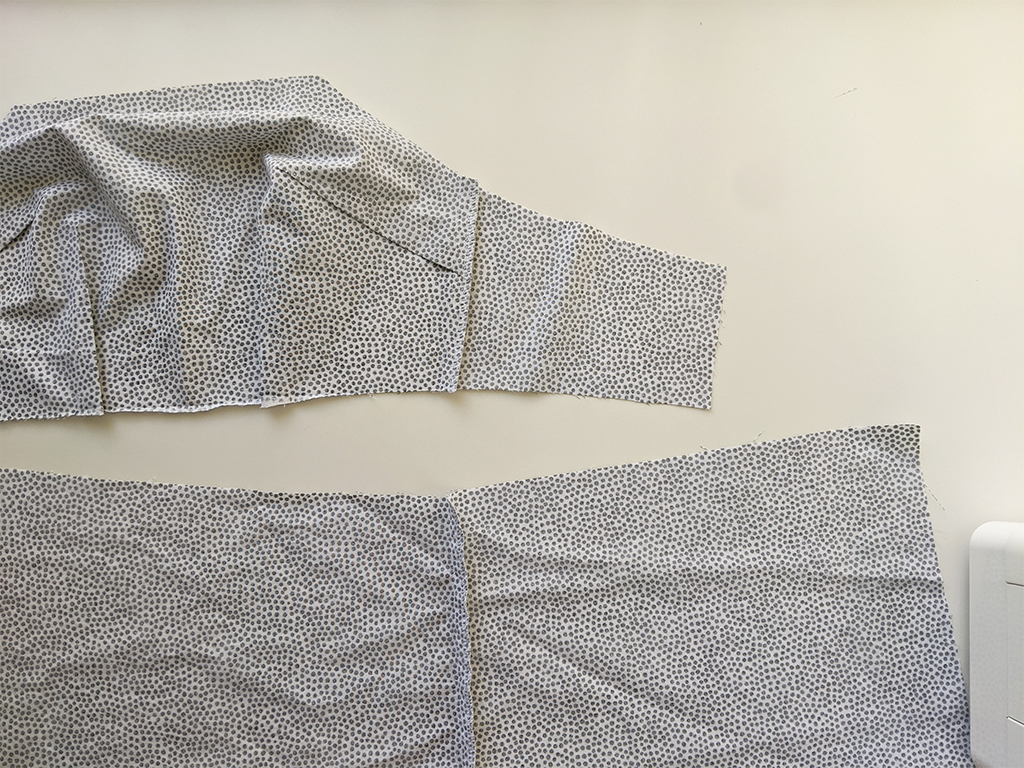
Step 2
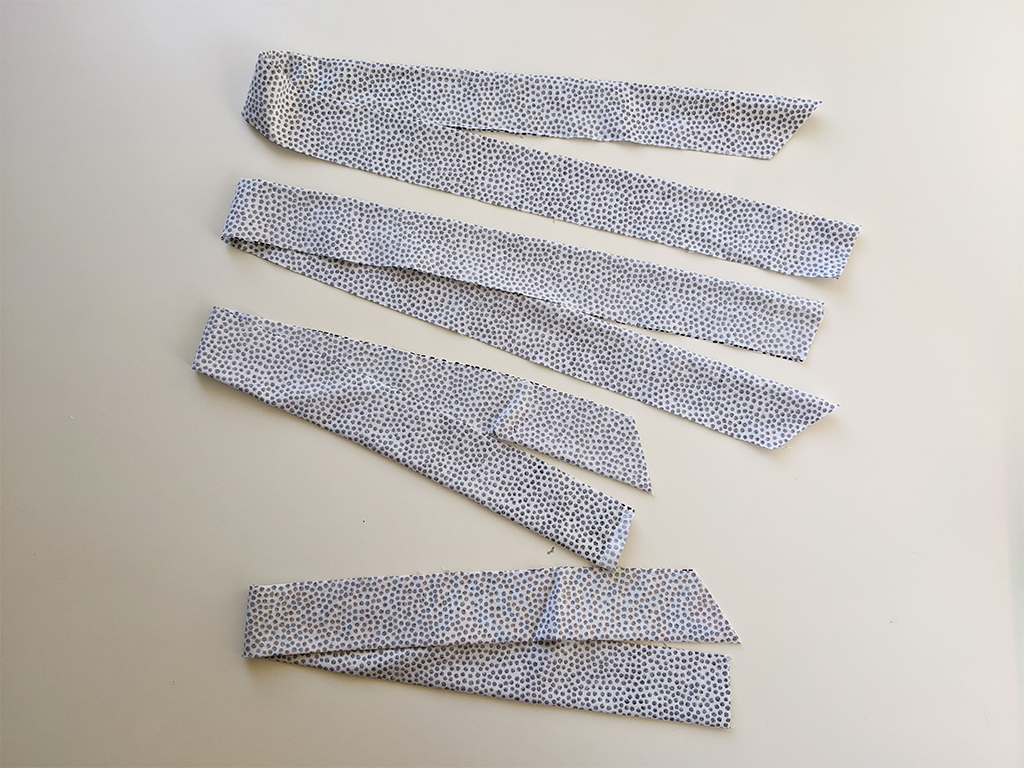
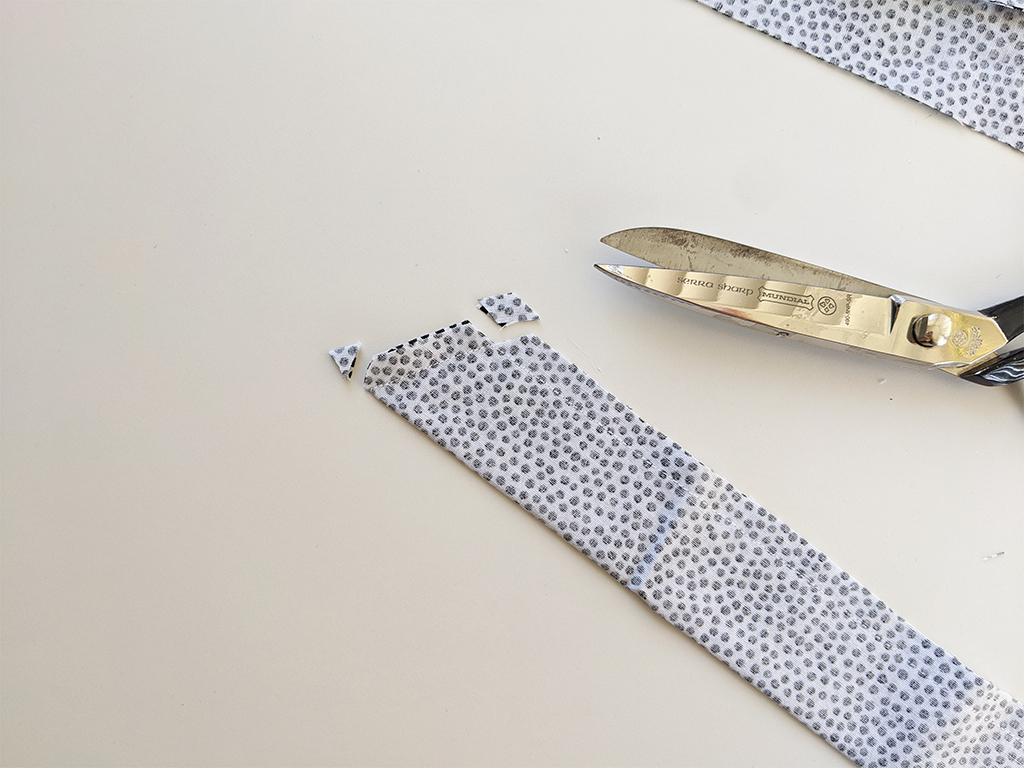
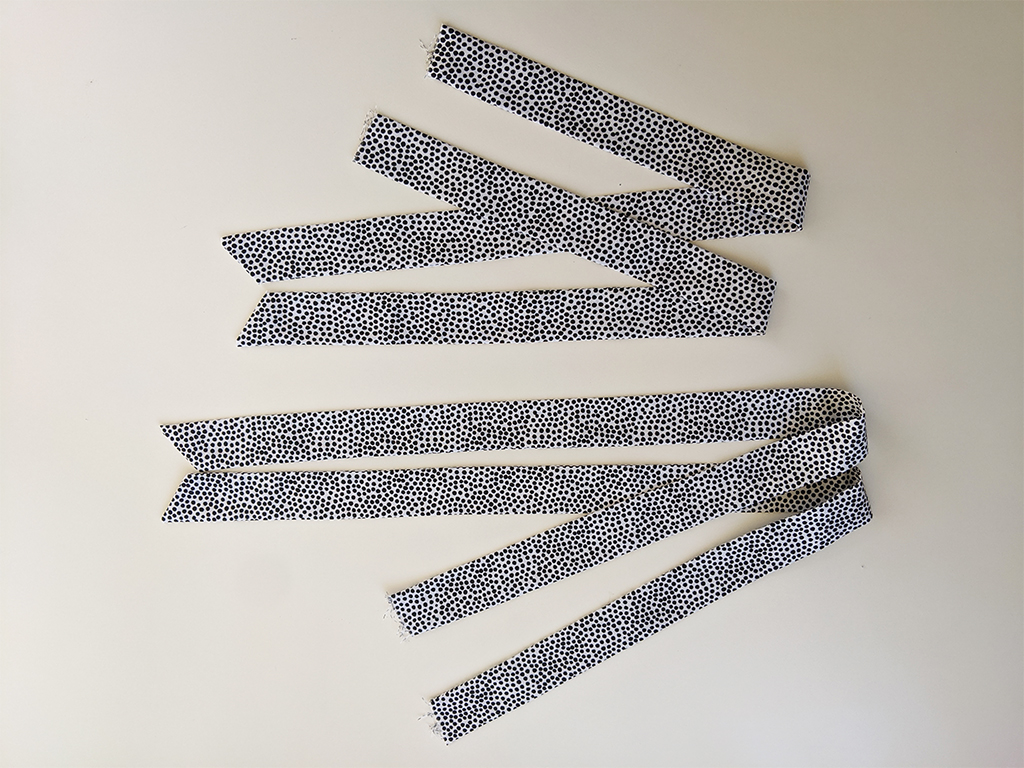
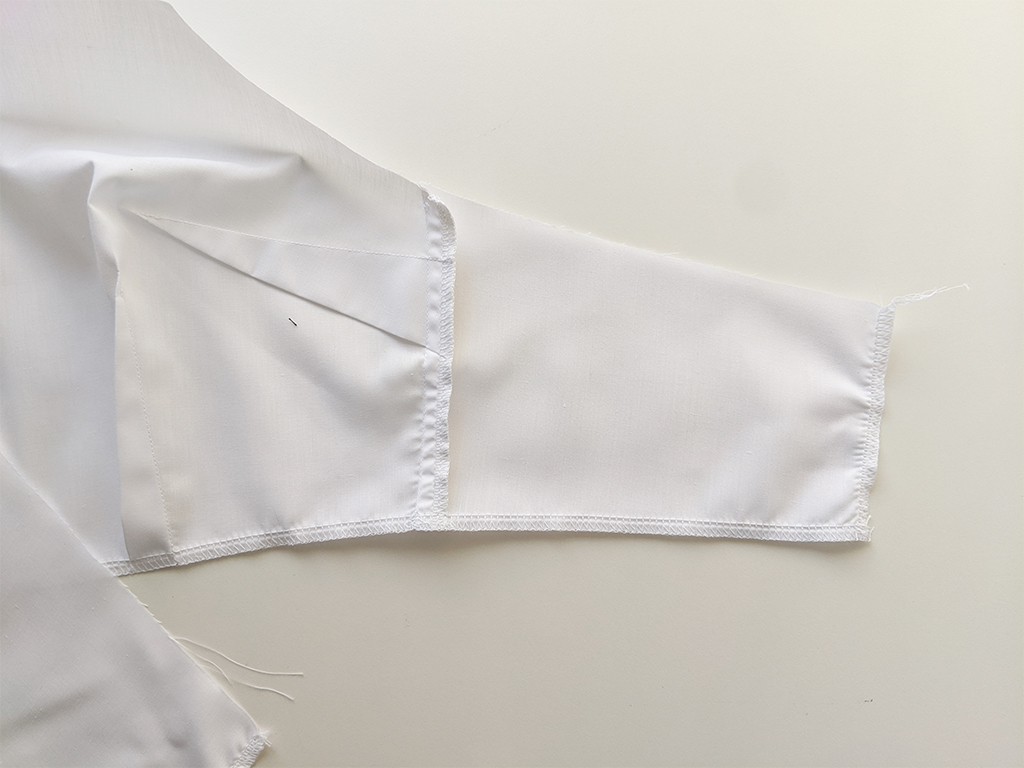
Fold straps right side together and stitched closed. Clip corners and turn through. Press then topstitch if desired. Then set-aside.
Beginner tip* Don’t skip clipping your corners, by clipping the corners the seams sit neatly inside and your corners will be neat and sharp instead of bulky.
Step 3
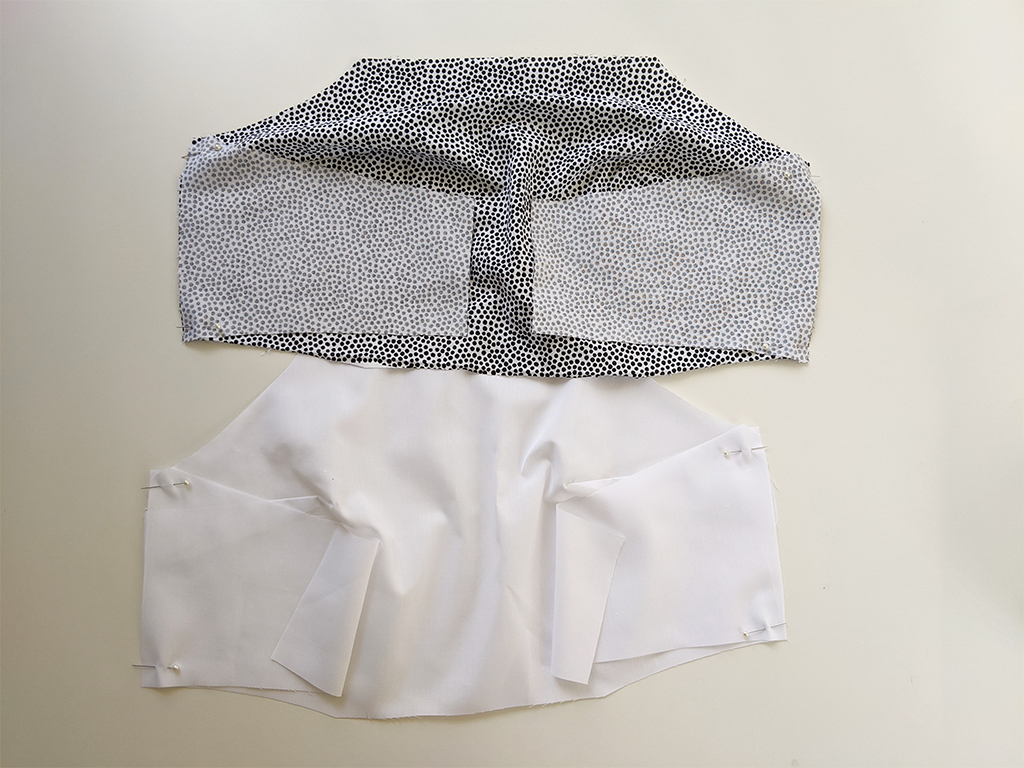
Sew darts on main and lining of the front bodice. Press darts inwards and
down.
Beginner tip* If needed you can draw the dart lines onto the fabric with dressmaker’s chalk to ensure you sew a neat straight dart.
Step 4
Sew side seams together of bodice on main and lining. Overlock closed and press back.
Repeat the same on the skirt upper and lower skirt tiers.
If sewing plus size, also sew together center front seam and center back seam of the lower skirt tier.
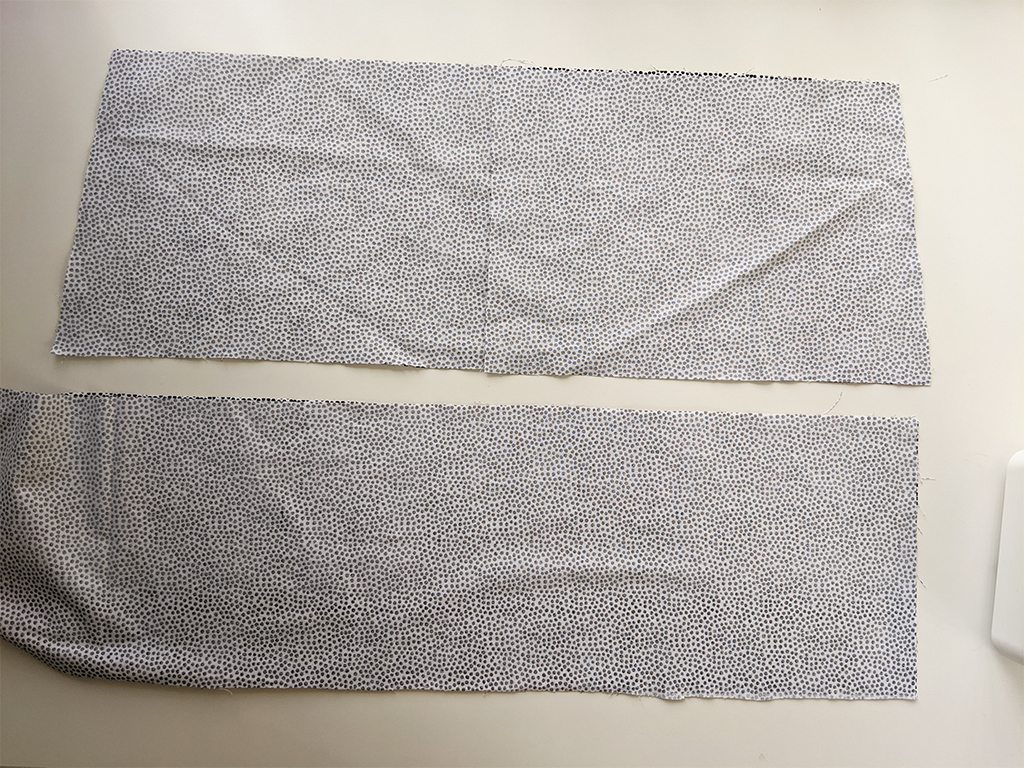
If using skirt lining – Also sew skirt lining side seams.
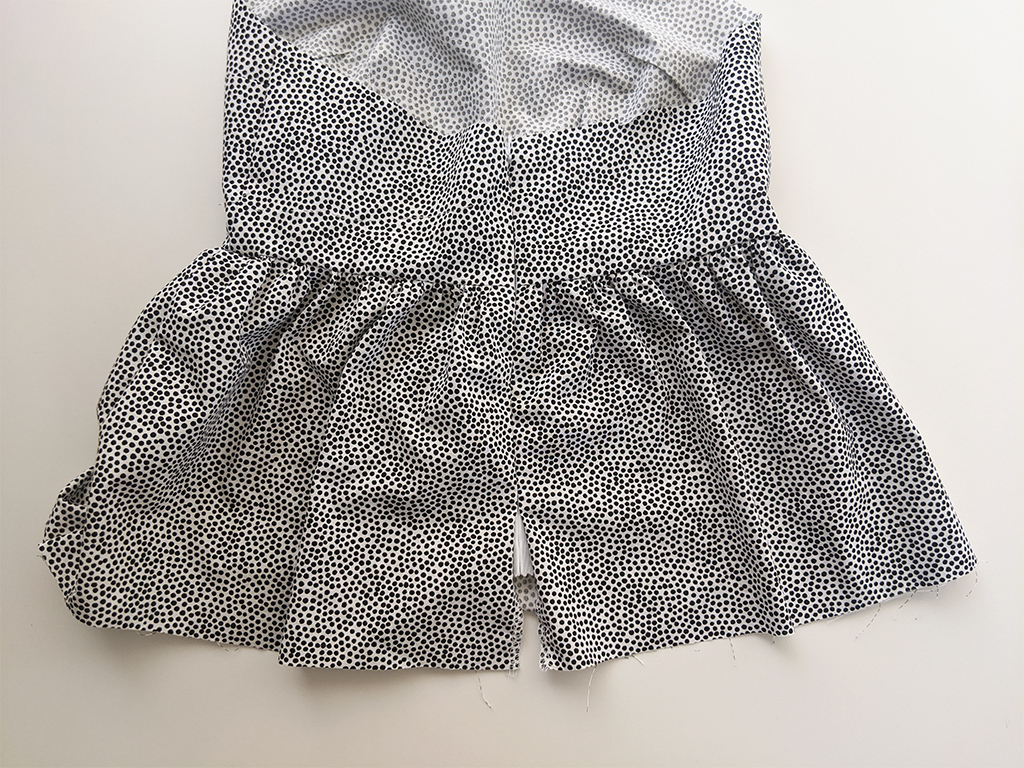
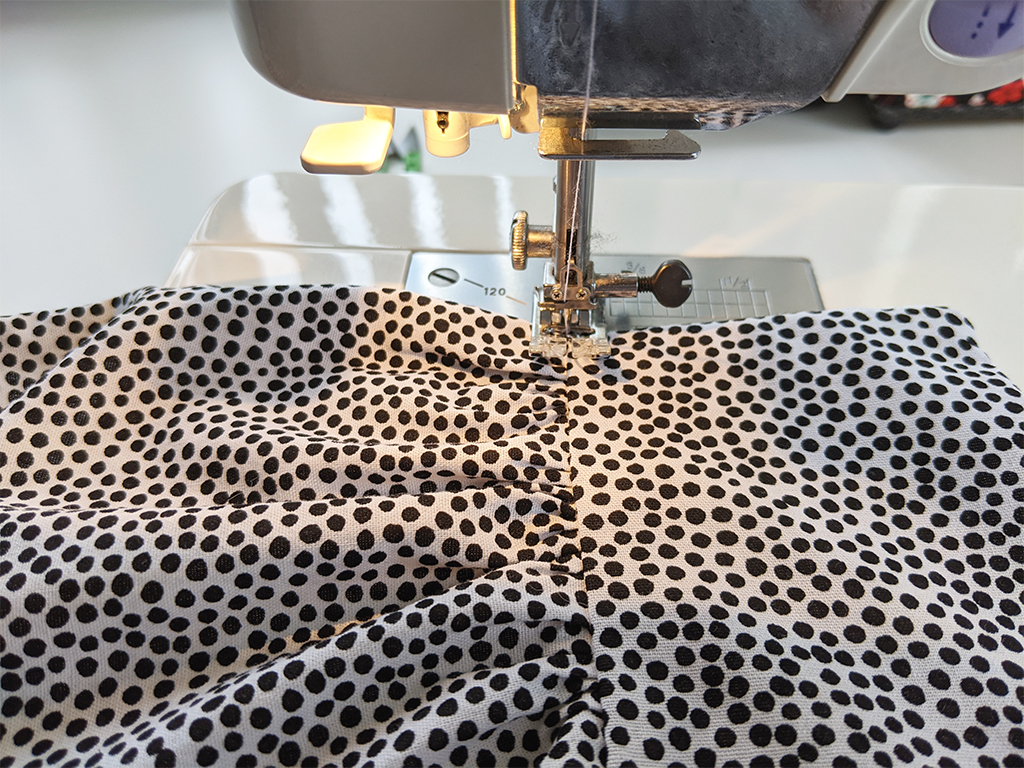
Step 5
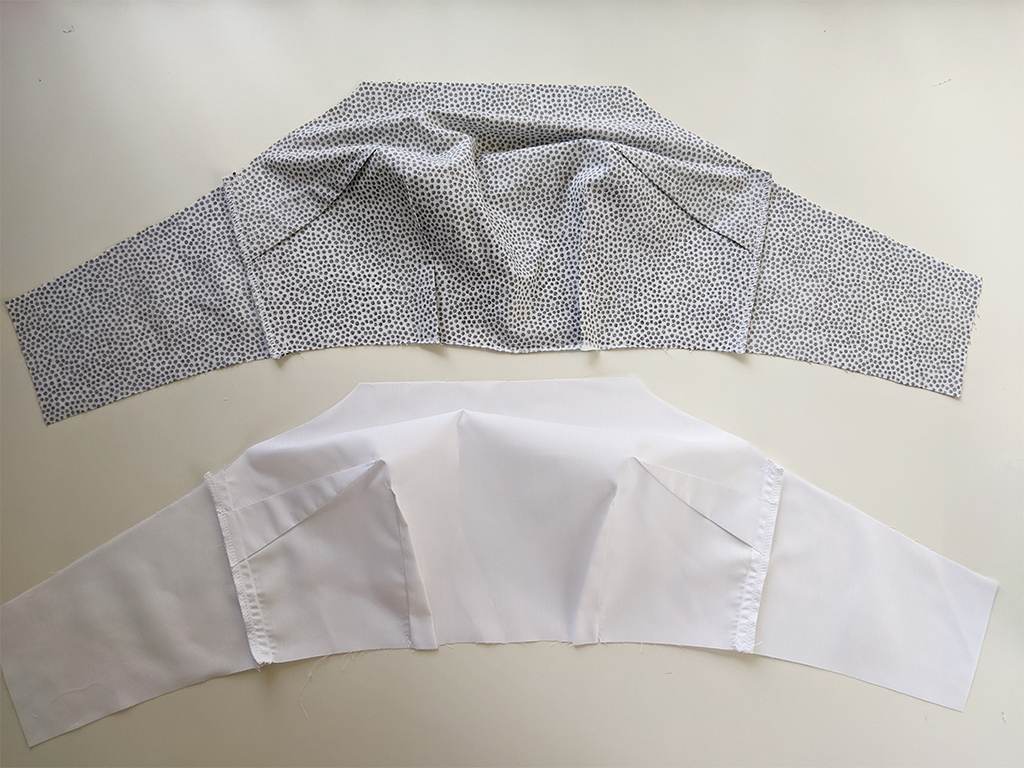
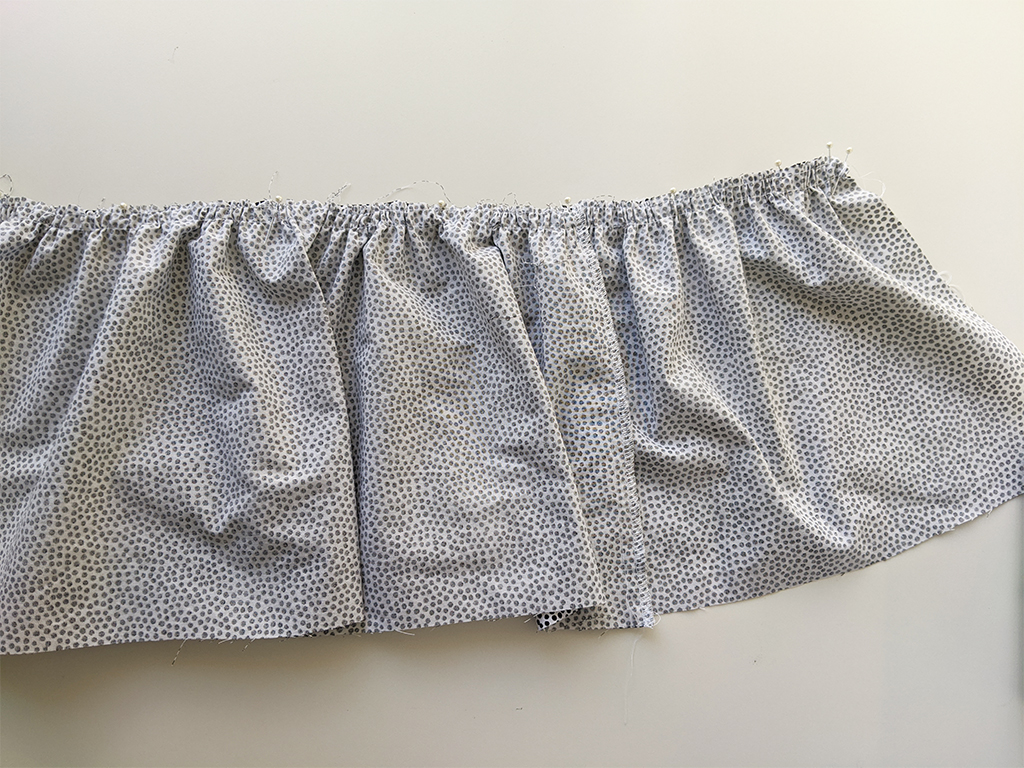
Next sew gathering stitches on the top edges of the skirt pieces (see red wavey line on patterns) take the top tier of the skirt and attach to the bodice. Overlock closed. Set bottom tier aside.
If you need extra help with gathering, please see the more in-depth gathering tutorial here.

Step 6
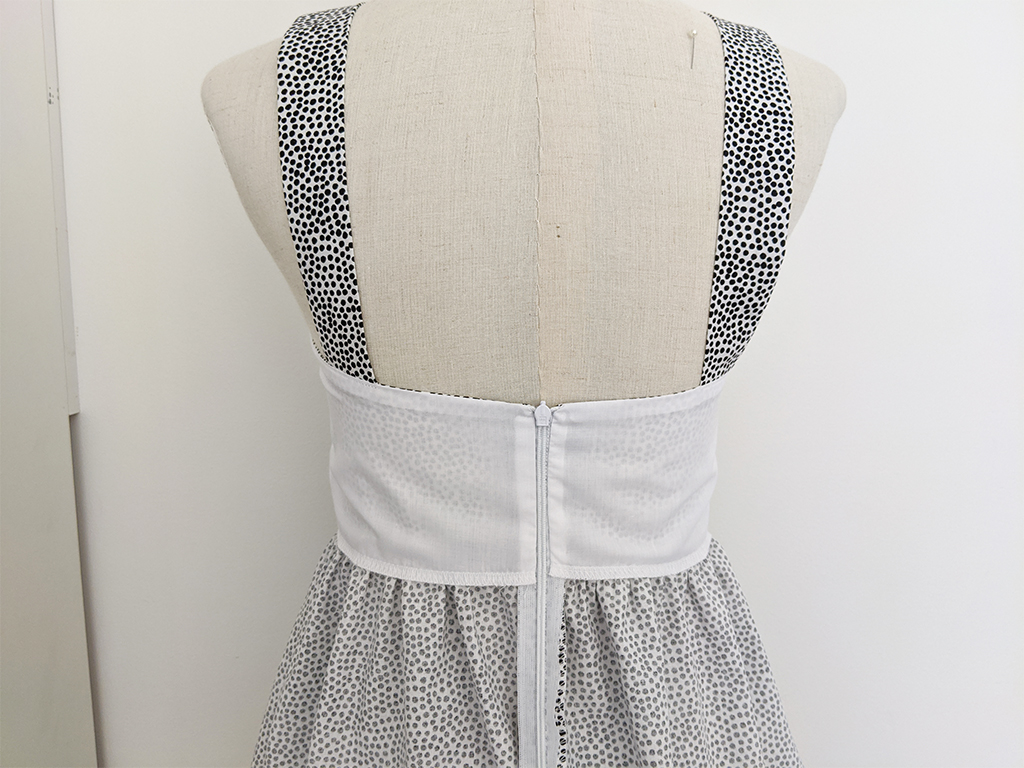
Overlock the center back edges separately. Also overlock the bottom edge of the lining.
Step 7
Insert invisible zipper into CB seam. Close bottom seam from the bottom of the zipper to the hem, and press open.
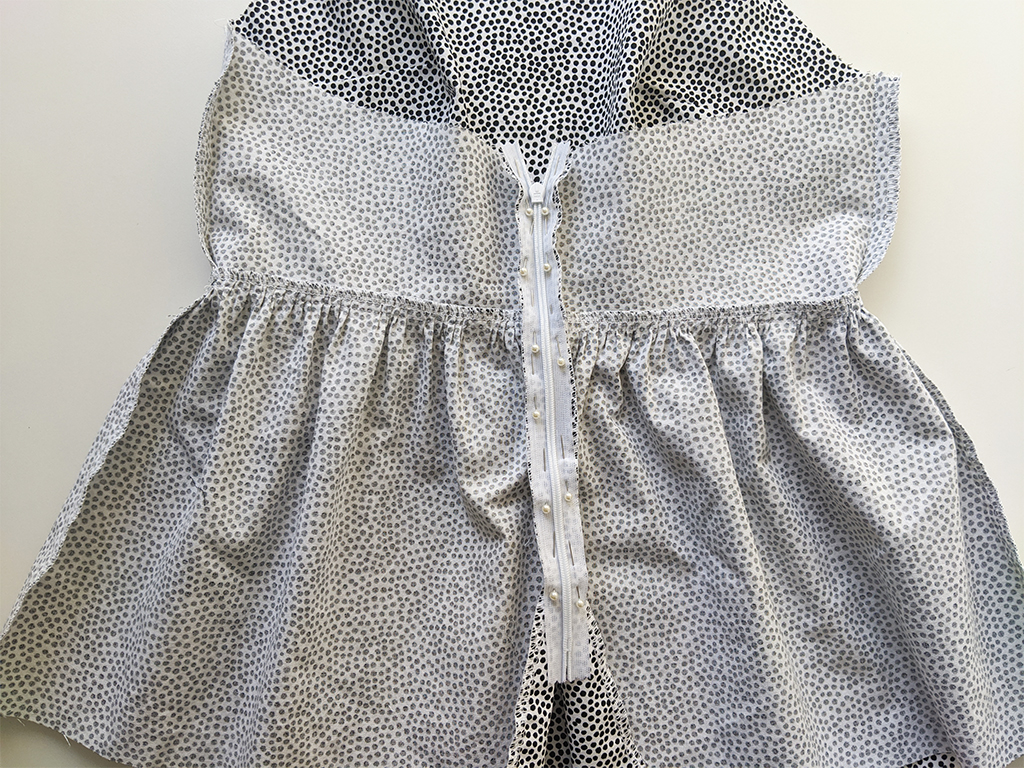
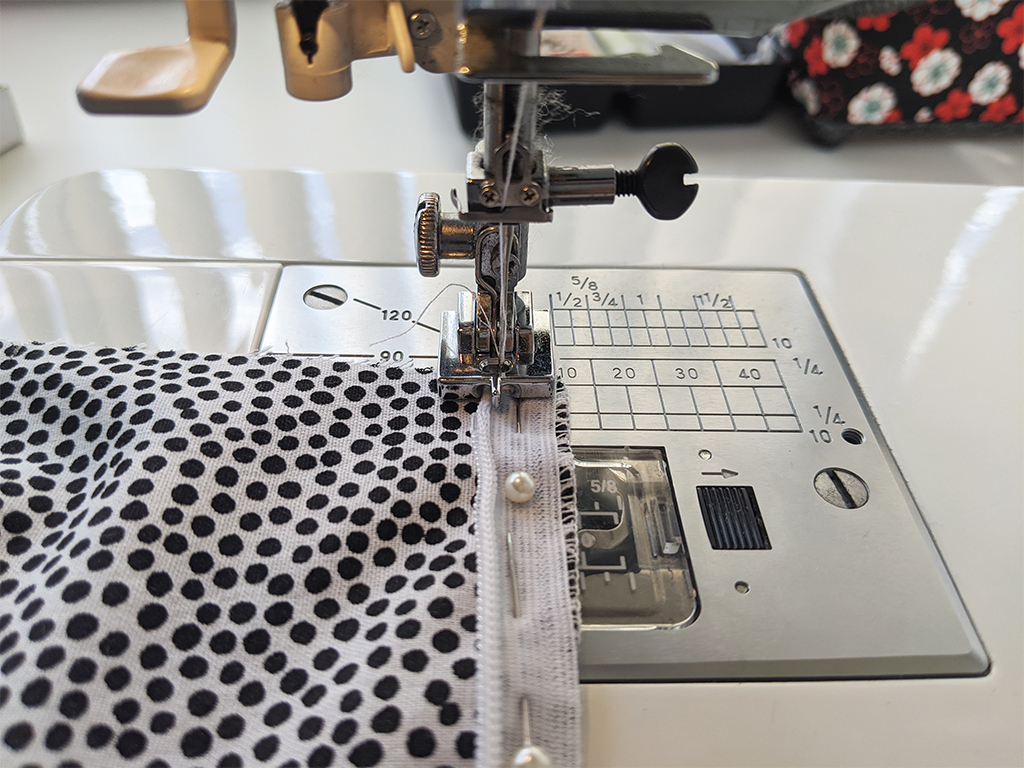

If you need extra help sewing the invisible zipper, there is a more in-depth tutorial here.
Step 8
Pin straps into position on main, on front and back of dress ensuring they facing the correct way.
Beginner tip* Placement of front straps needs to be accurate, sewing or drawing a guide can help ensure this is correct.
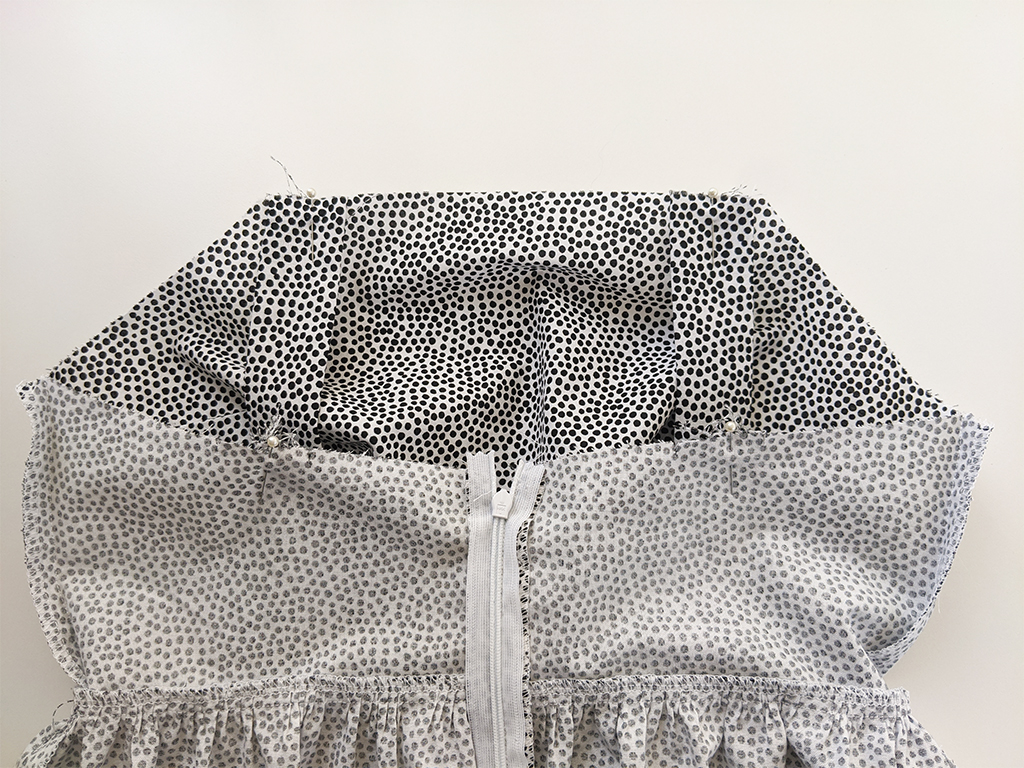
Beginner tip* In the following steps ensure your lining is facing the correct way. You want to be able to turn your garment inside out and see no seam allowances. So main fabric seam allowances will face inwards and lining seam allowances will face outwards.
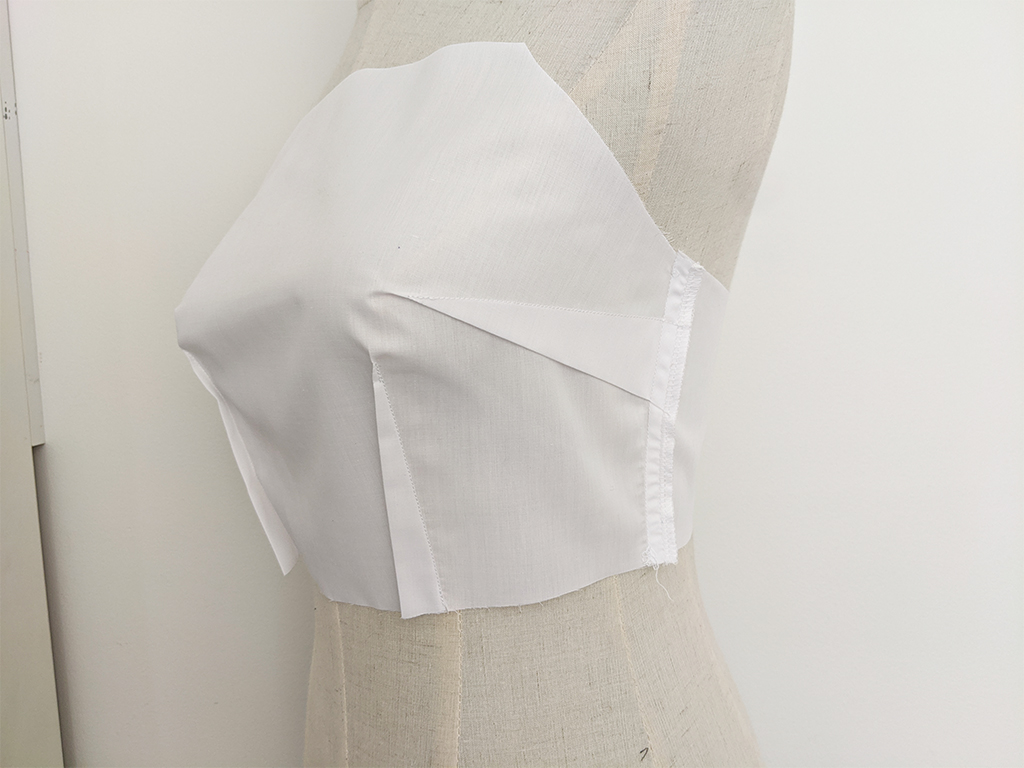
Step 9
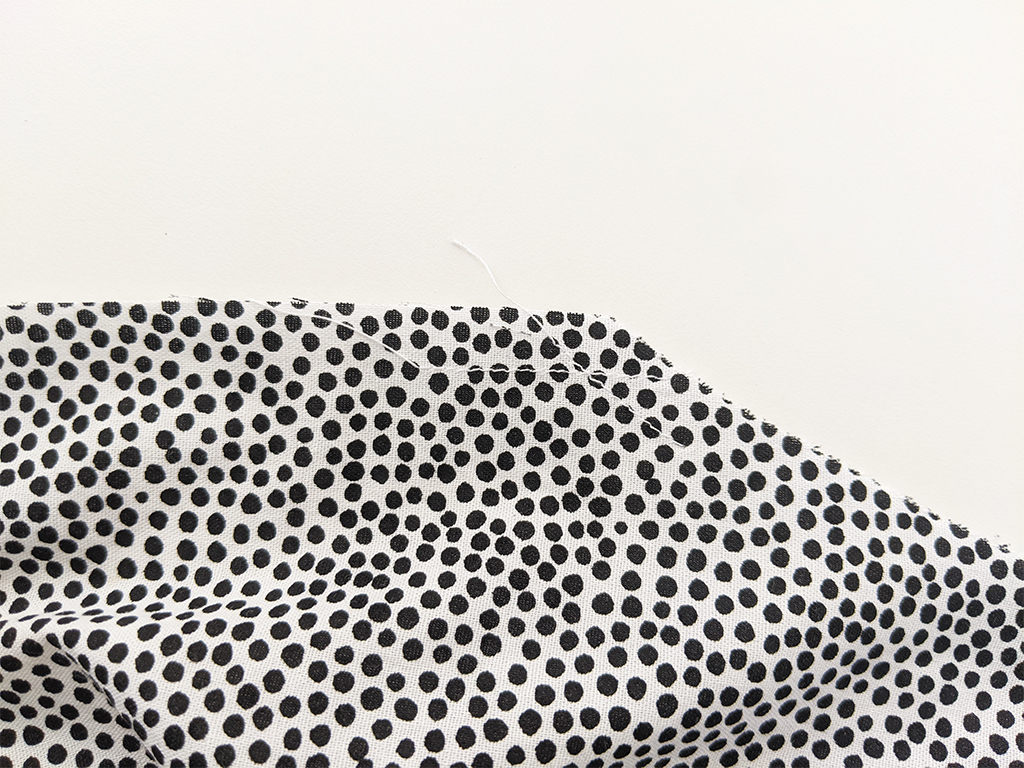
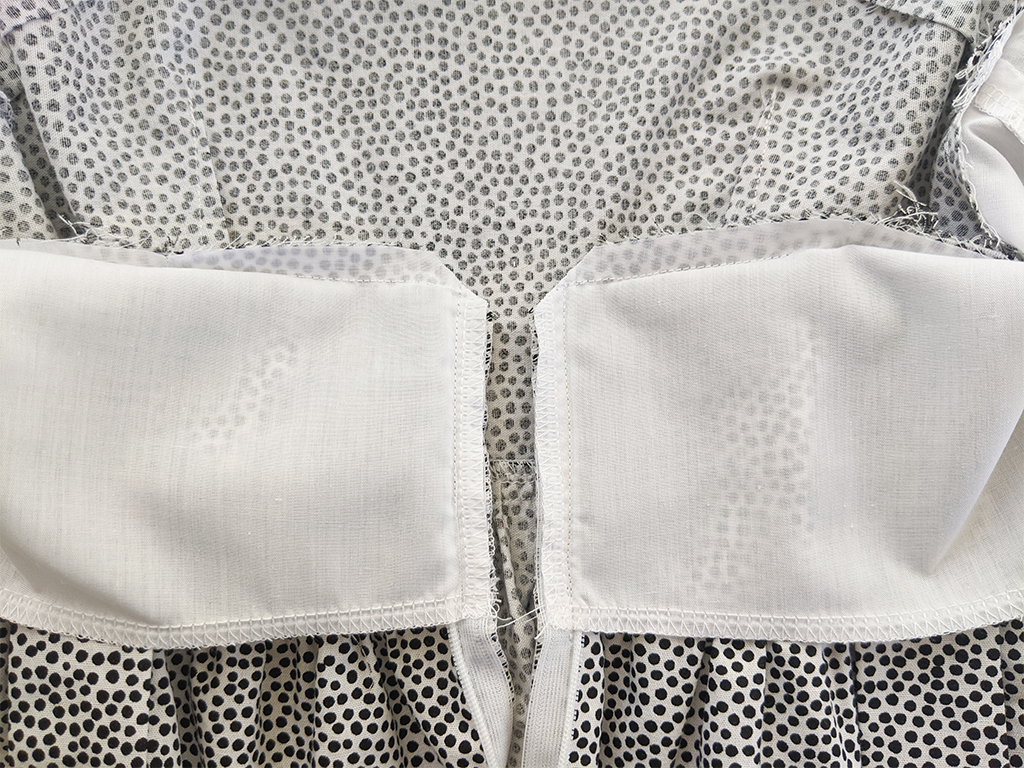
Pin bodice main and lining right sides together around top edge then stitched closed. Clip armhole and front neck corners
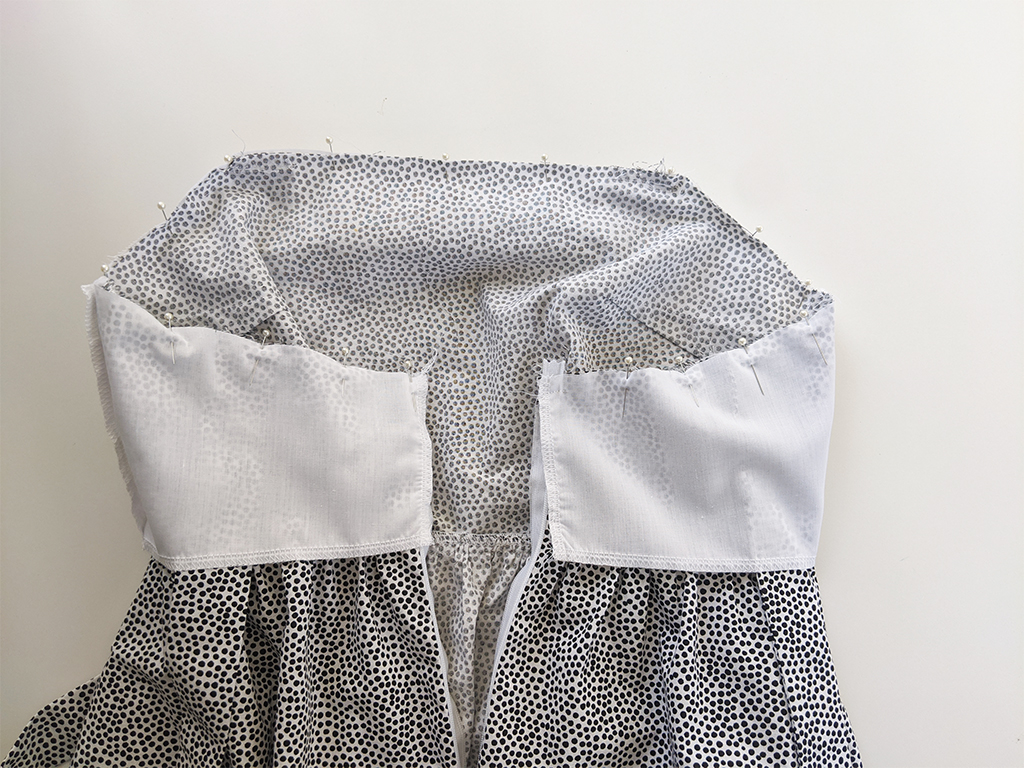
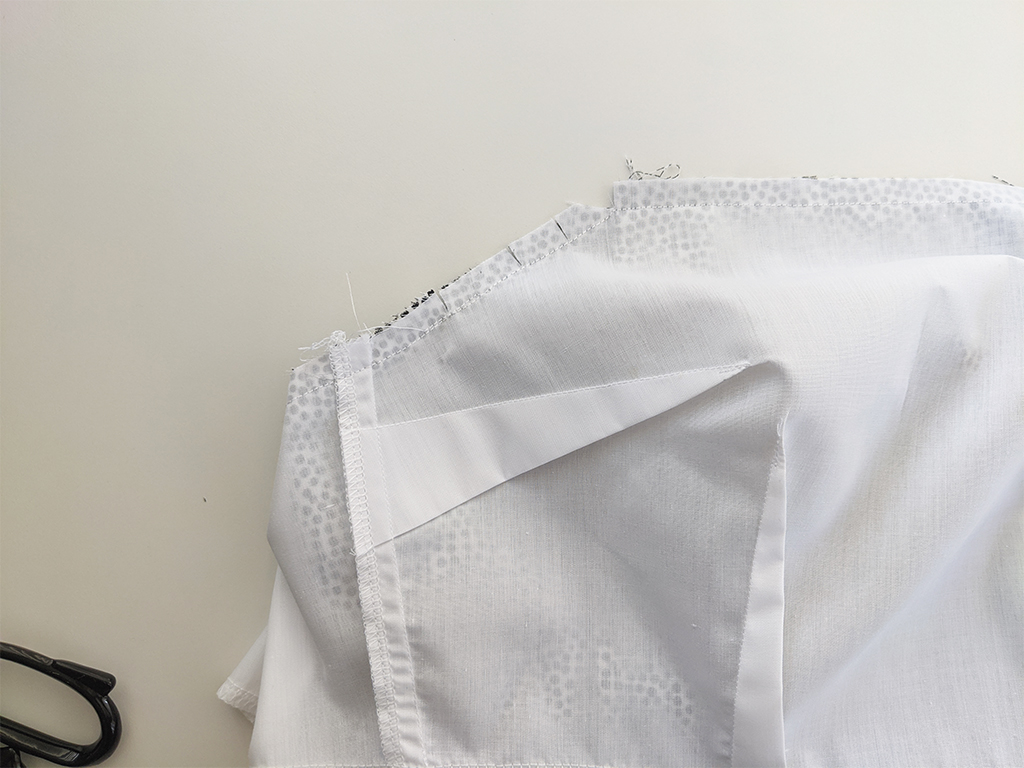
Step 10
Kepping right sides together, sew lining to zipper. Clip corners and turn through.
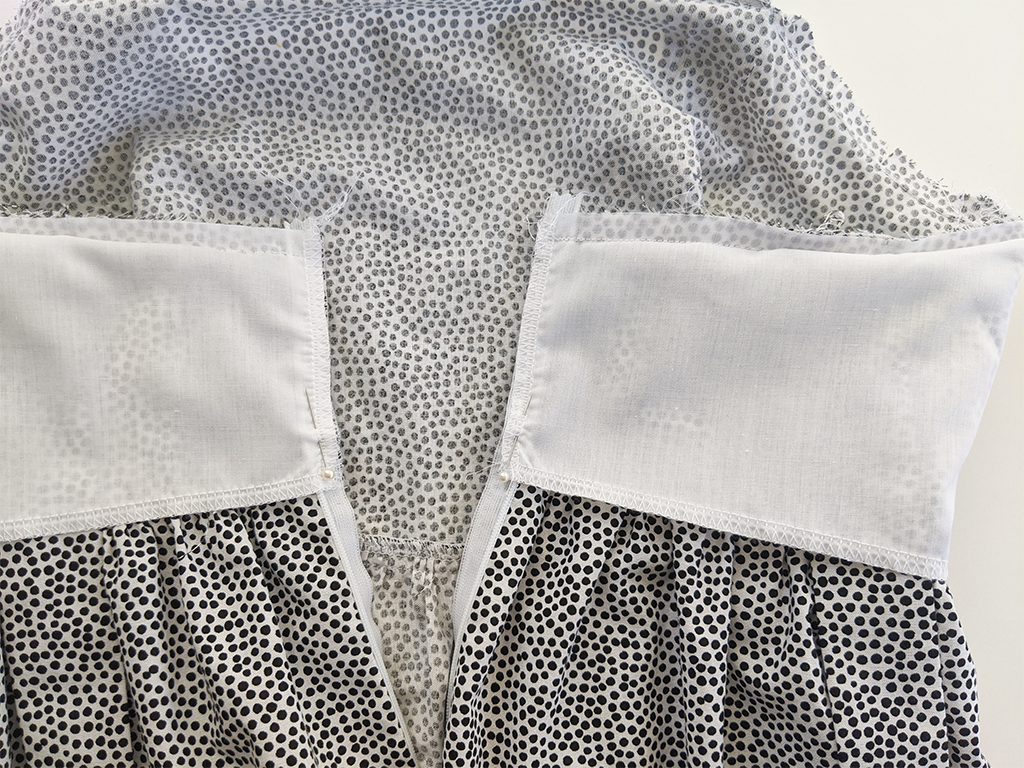
Step 11
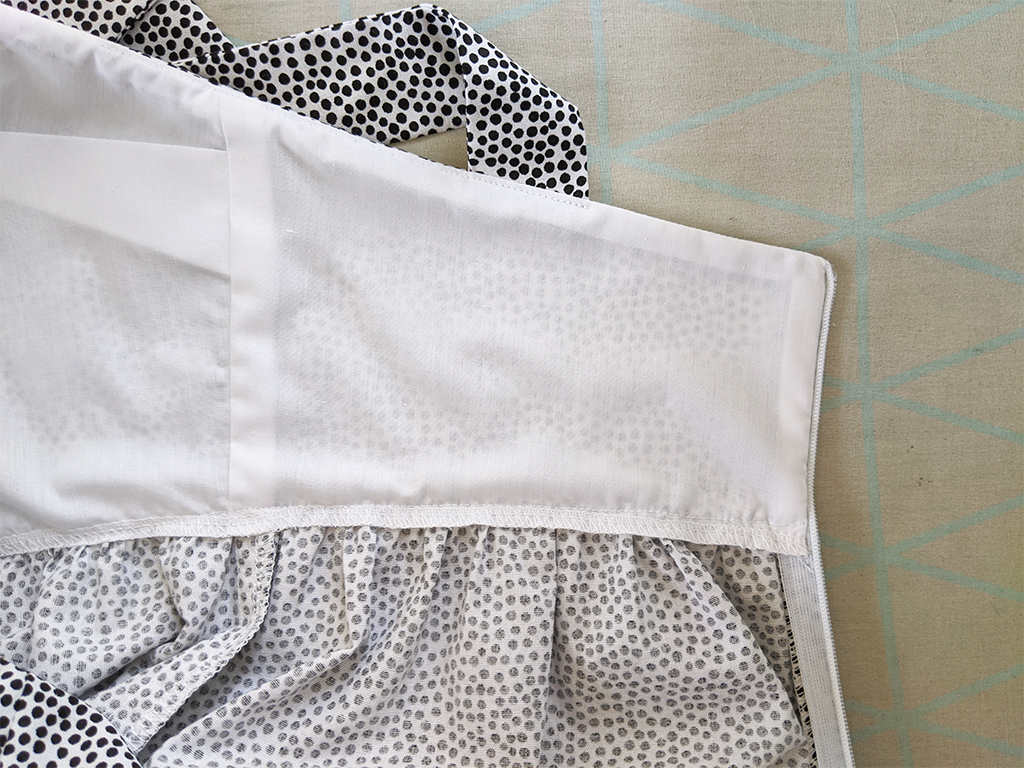
The bottom of the lining can be attached to the waist in one of the following ways.
- Tacked down at side seams (not shown)
- Machine stitch in the ditch of the seam (shown below)
- Fold under overlocked edge and hand sew to main (not shown)
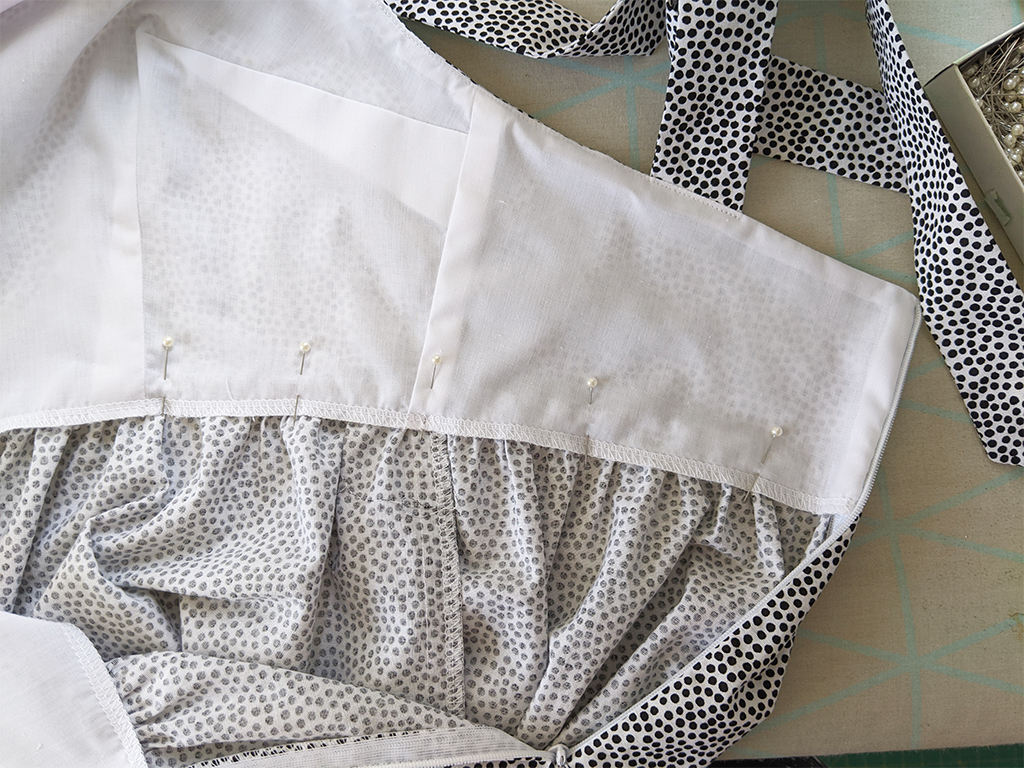
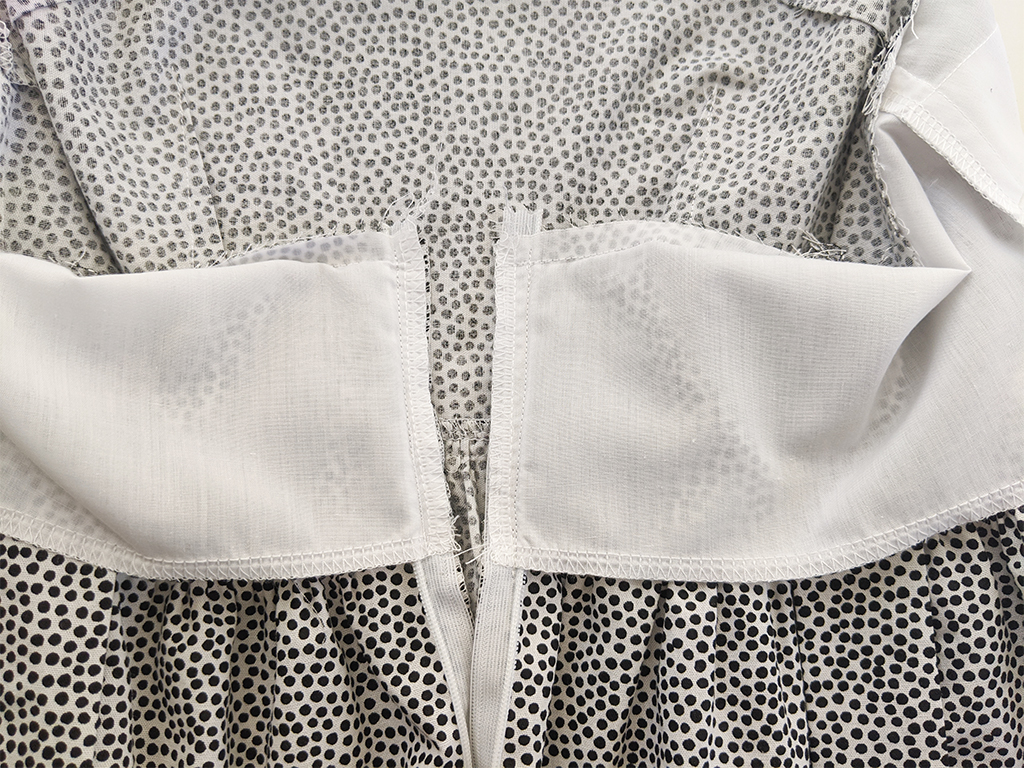
Step 12
Next, take the skirt lower tier with the gather stitch that was set aside earlier and gather and pin to the bottom of the dress ensuring gathers are distributed evenly. Then sew and overlock closed. Press seam allowance up.
Beginner tip* Take care not to over-press the gathers, you want to press the seam allowance and no more than 1-2cm of the lower tier.

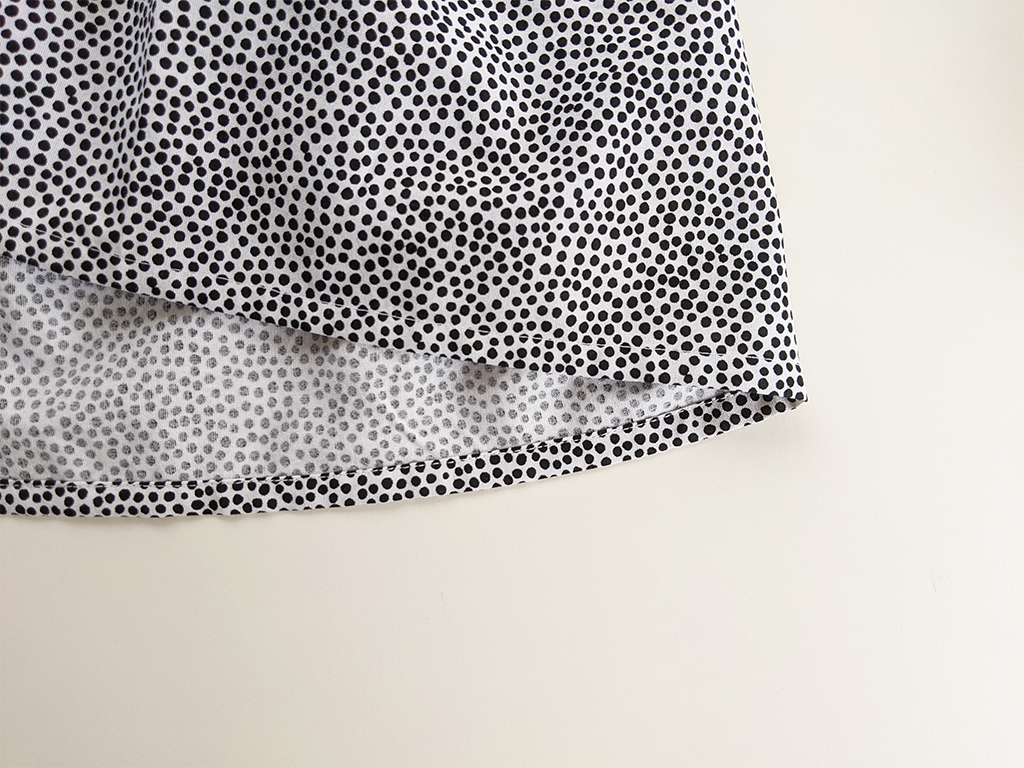
Step 13
Fold and stitch the hem of the dress and press to finish.
Your tie-shoulder summer dress is now complete. How did you go? Let me know in the comments below if you needed extra help.
We also have a number of other patterns where you can practice your sewing skills available for purchase here.
I’d love to see your creations, feel free to tag me on Instagram at @at_the_seams_patterns
x
Want to stay up to date with new information and pattern releases? Join the community below: