Sewing Tutorials, Tops
Sewing Tutorial: Naomi Crop Top
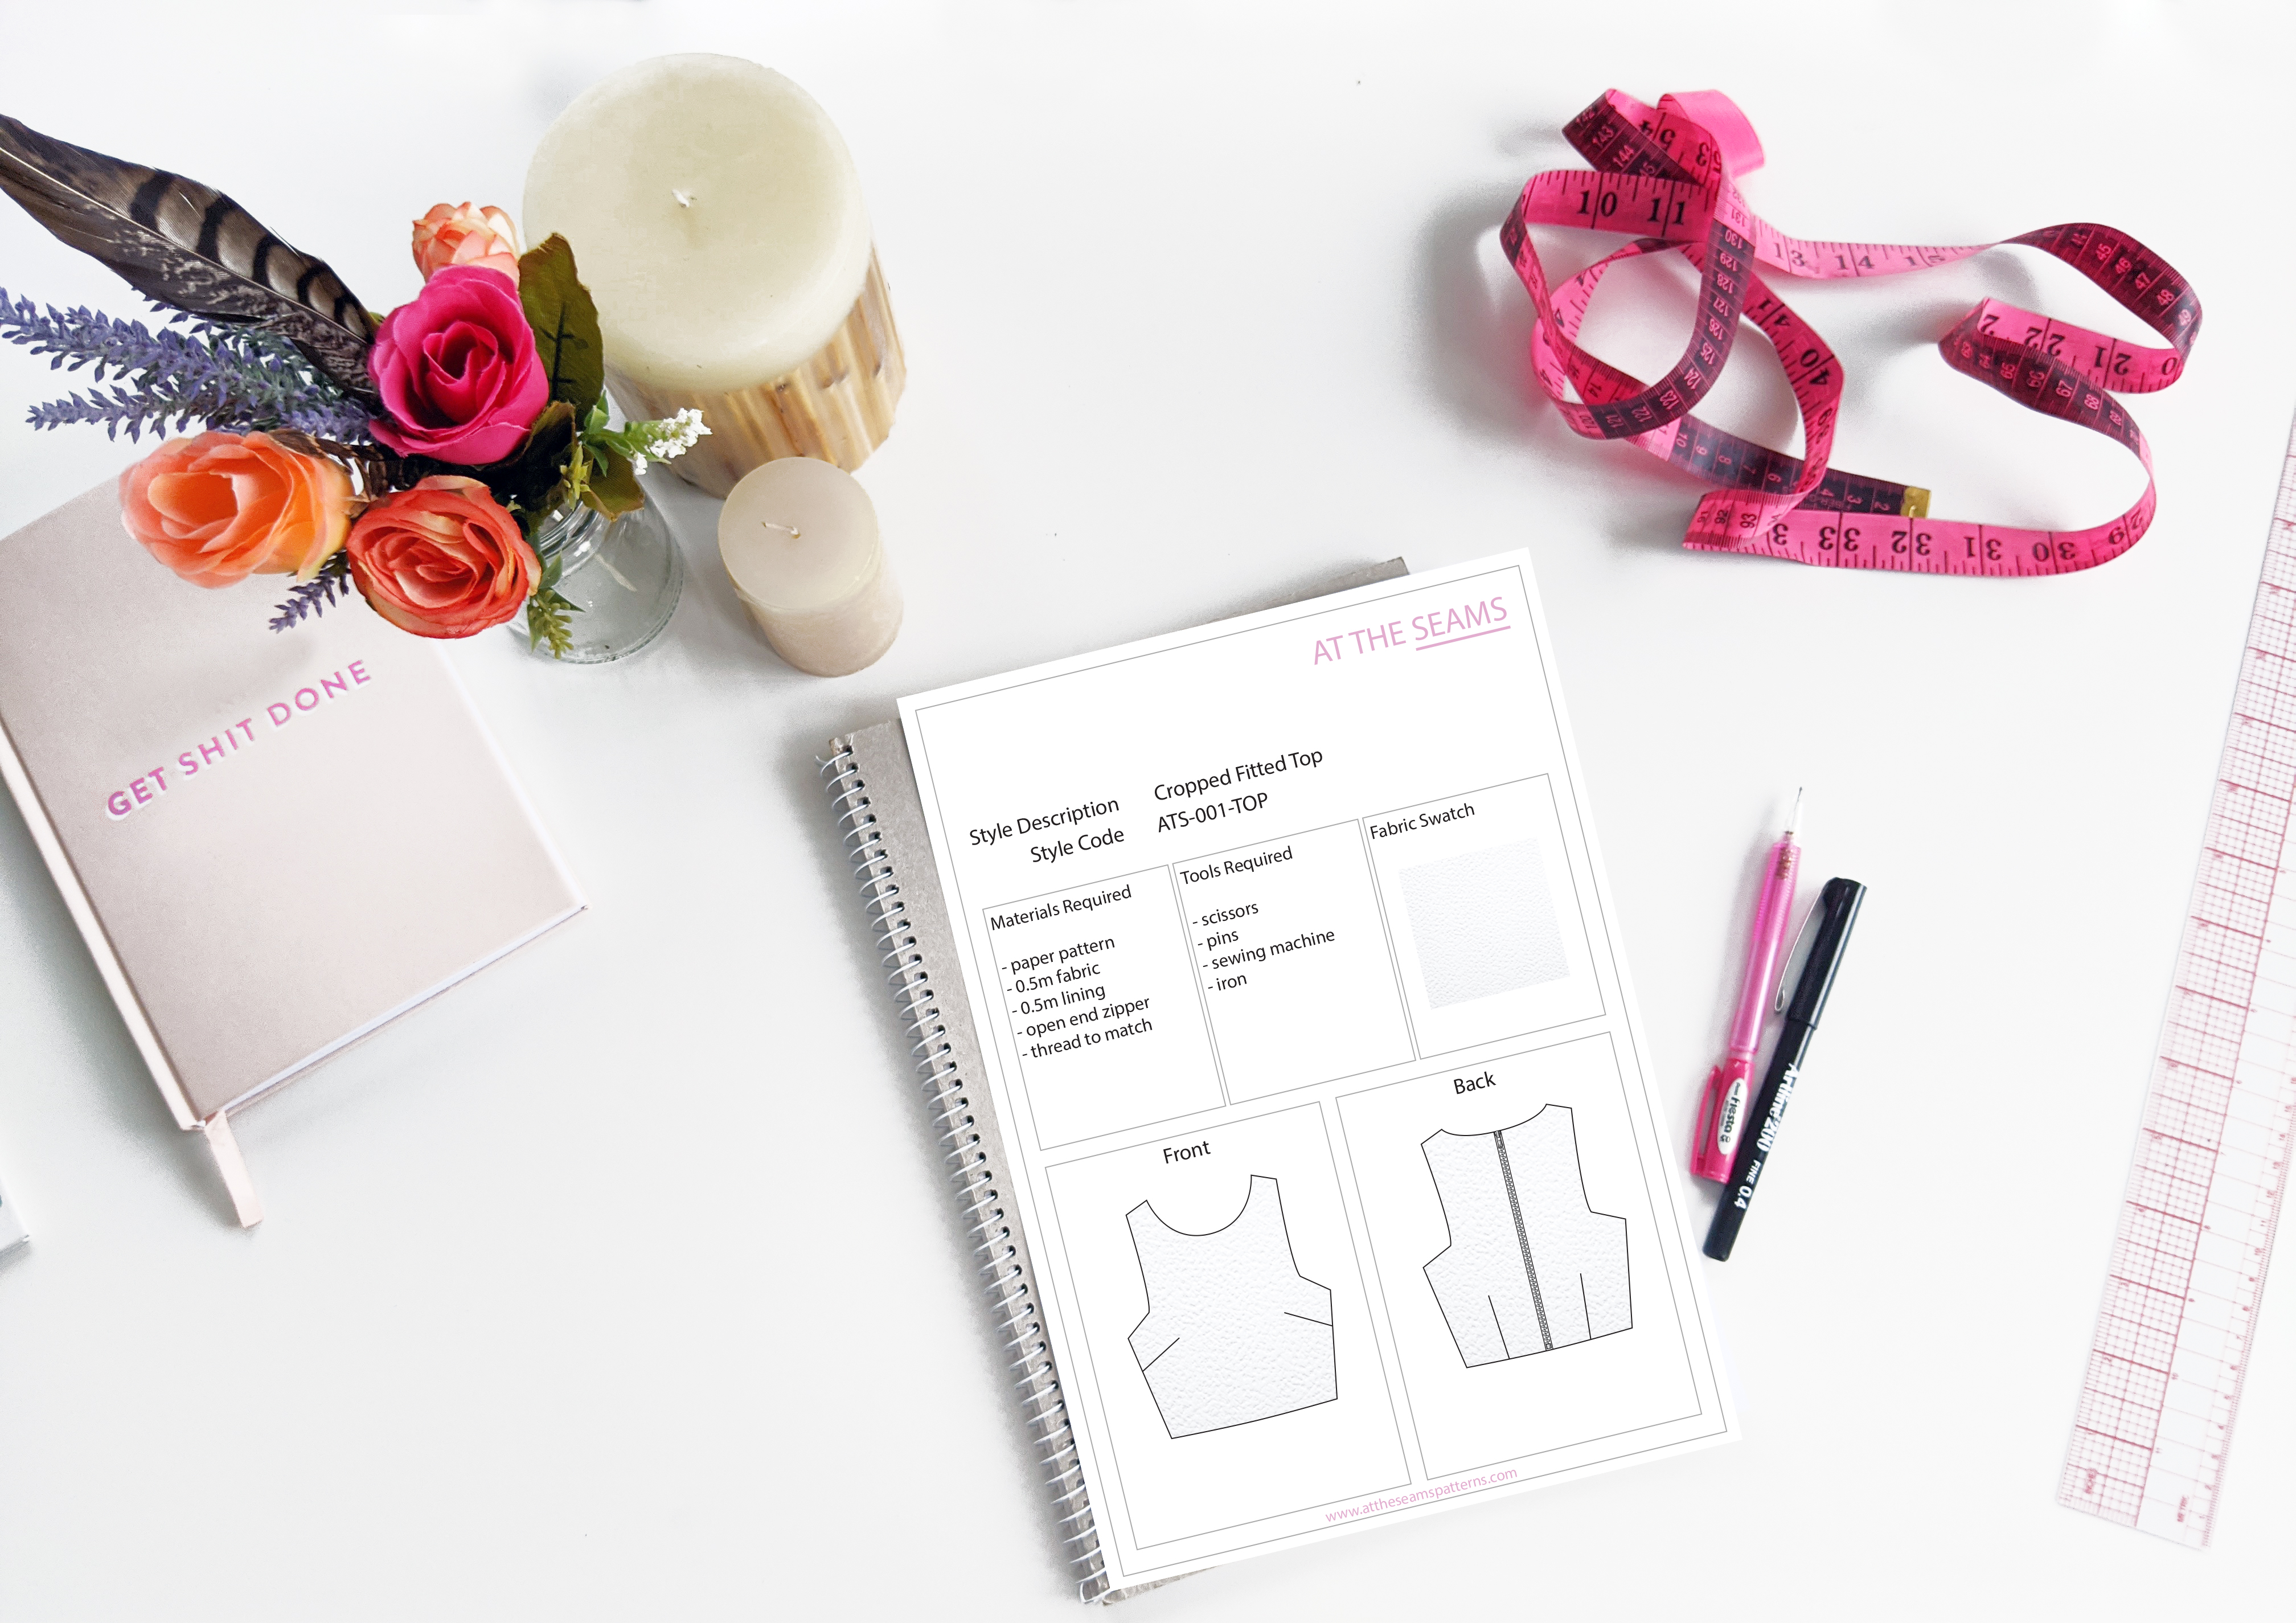
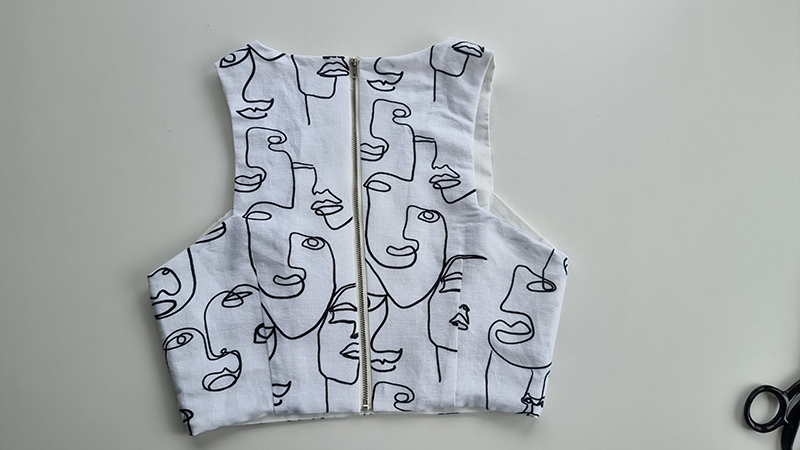
The Naomi Crop Top is another great basic top with an edge, this style features angular armholes and an exposed open end center back zipper. This style is cropped and is tight-fitting. The sewing of this garment does not require an overlocker and is perfect for a beginner sewer. (no hard invisible zippers here)
The style is fully lined and is bagged out internally through the side seam.
Also don’t be afraid to ask questions in the comments below if you need. I’m here to help. So let’s get started.
To begin you will need the following things
Materials
- Naomi Crop Top Top paper pattern , or if you prefer to shop on Etsy
- 0.5-0.6m fabric
- 0.5-0.6m lining
- 37-40cm open-end zipper
- cotton thread
Tools
- scissors
- pins
- sewing machine
- iron
Tips
- Ensure your fabric is washed, dried, and pressed before you start cutting. For instance, there is nothing worse than washing your beautiful garment and it shrinks, or even more annoying the lining shrinks and the main doesn’t so your garment is all pulled out of shape and is unwearable.
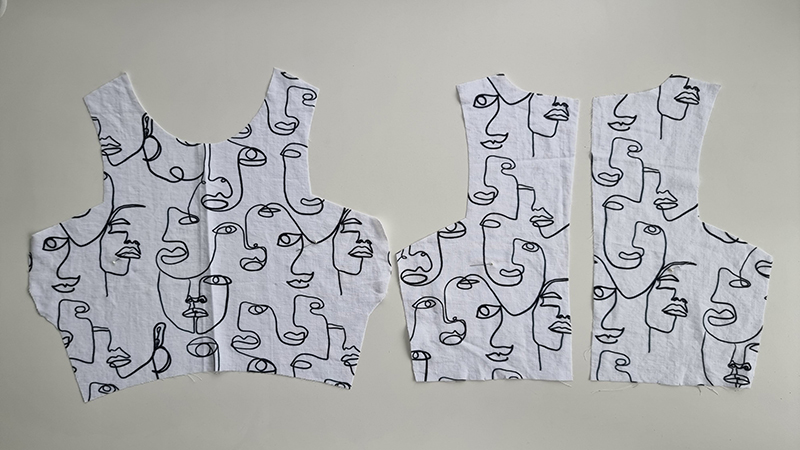
Step 1
Cut all main and lining pieces accurately on the correct grain, ensuring all notches are clipped. Please note seam allowance is marked on the pattern.
Beginner tip* If you can afford to purchase a rotary cutter and cutting mat, I find this more accurate and time-efficient.

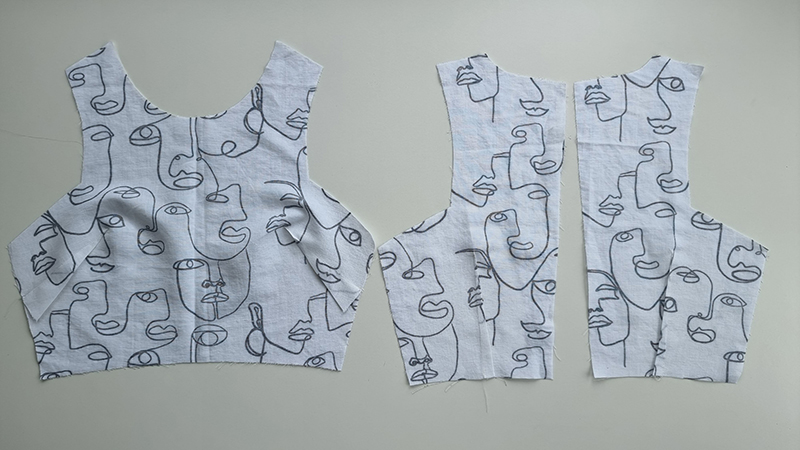
Step 2
Sew the side bust darts on the front bodice and then the waist darts on the back bodice on main. Then repeat on the lining. Press darts downwards on the front and towards the center back on the back of the bodice.
Beginner tip* If needed you can draw the dart lines onto the fabric with dressmaker’s chalk to ensure you sew a neat straight dart.
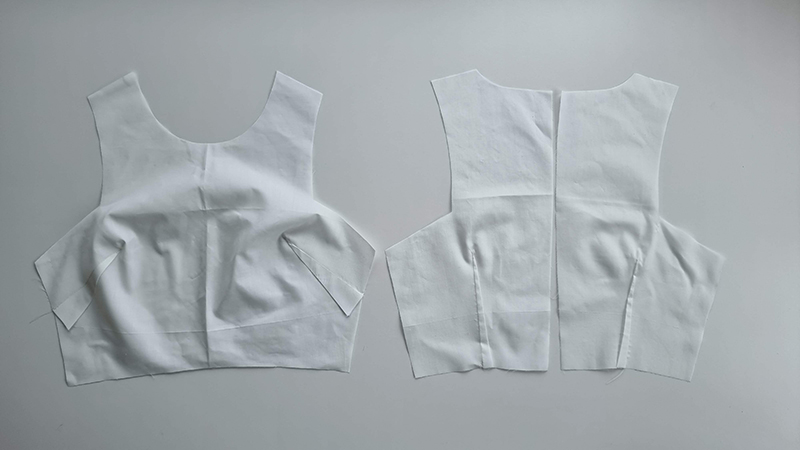
Step 3
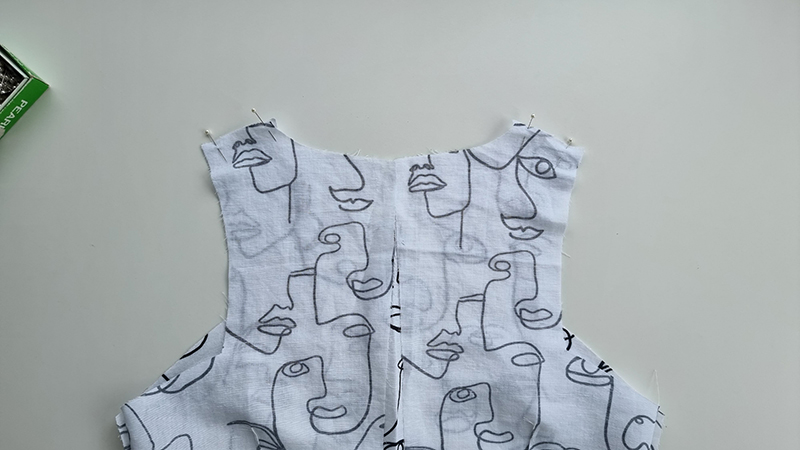
Pin the front and back shoulder seams of the main, right sides together, stitch closed. Repeat on the lining. (note do not sew main and lining together)
Step 4
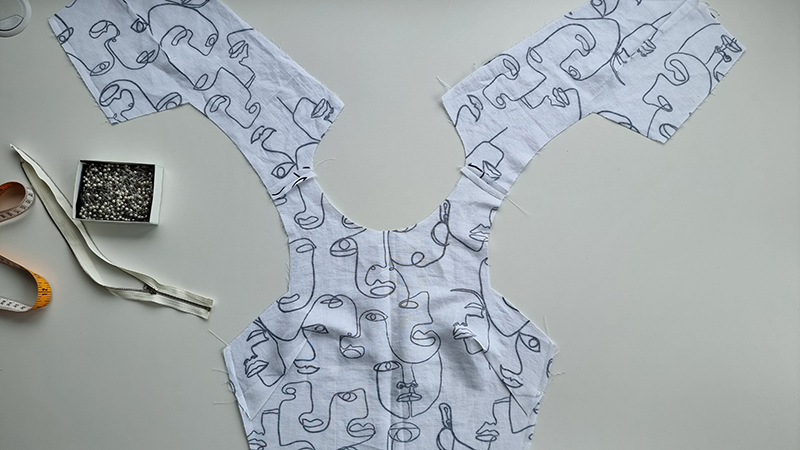
Place the lining right side up on the table and lay the main right side down over the top. Pin together along the front and back armhole and along the front and back neck edge. Stitch closed then clip the curves and corners.

Step 5
Turn the garment through by pulling the back bodice through the shoulder towards the front bodice.
Step 6
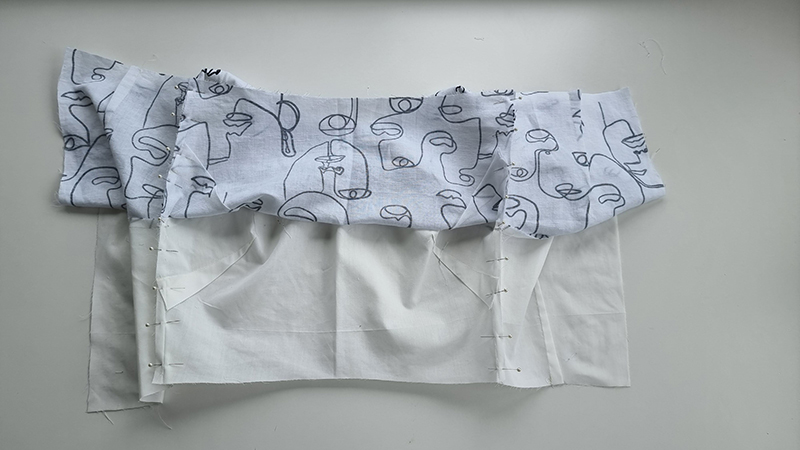
Then, fold the garment open to stitch the side seams together. Pin the main to main and lining to lining (see video)
Step 7
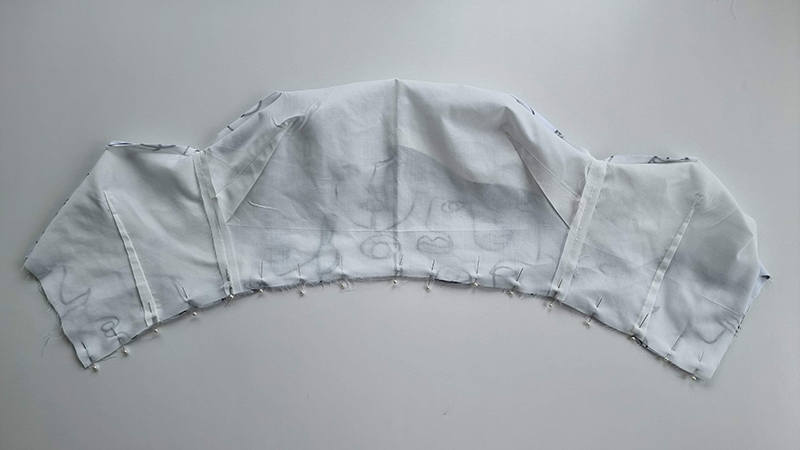
Next, fold the hem of the main up over the shoulders, then fold the lining up the other side and pin together along the hem edge. Stitch closed, then turn the garment through the back opening.
Step 8
Once the garment is turned back through the right way, press the neck, armhole and hem edges.
Step 9
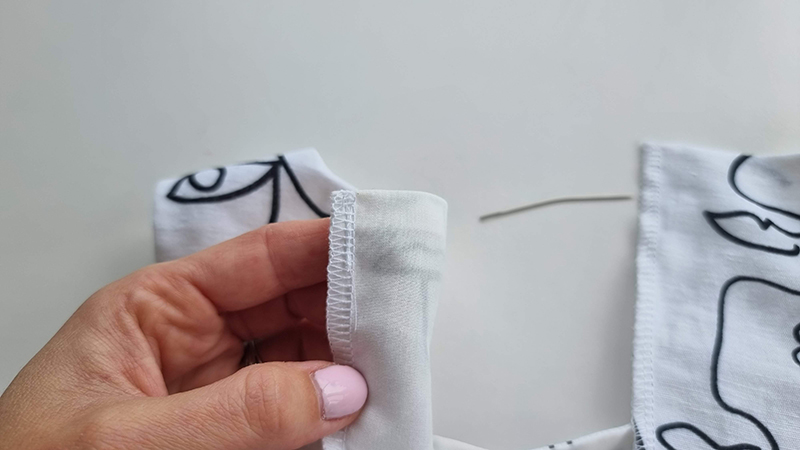
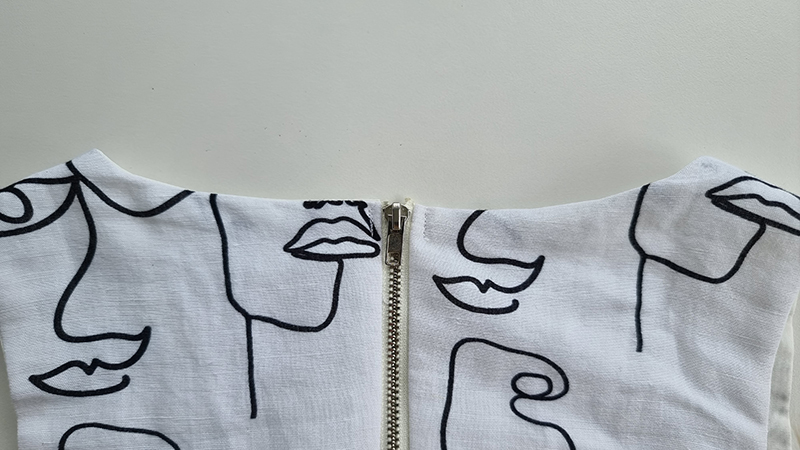
Overlock the back opening closed on each side. Use a large sewing needle to thread the excess overlocking threads back into the overlocking to secure.
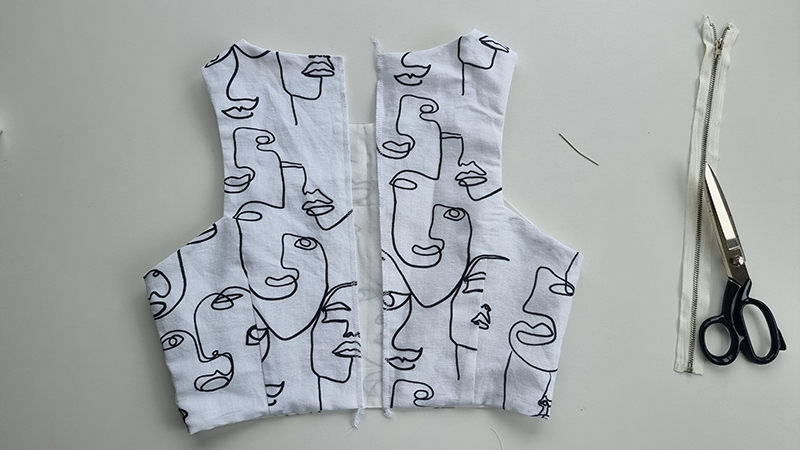
Step 10
Pin the zipper to the back opening and stitch to secure.
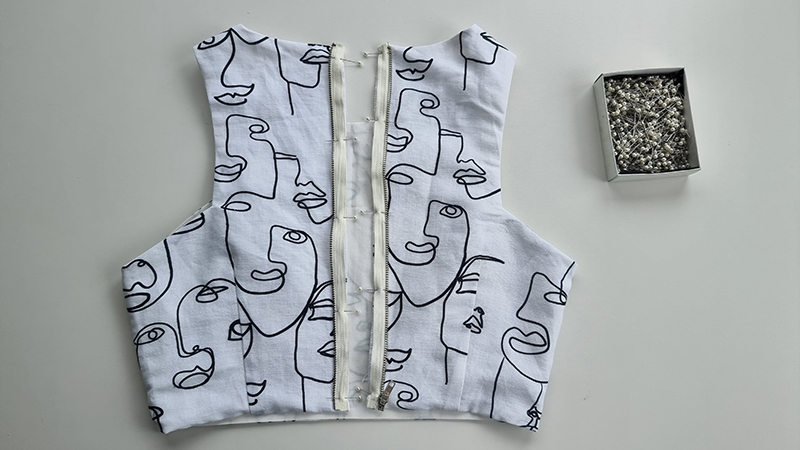

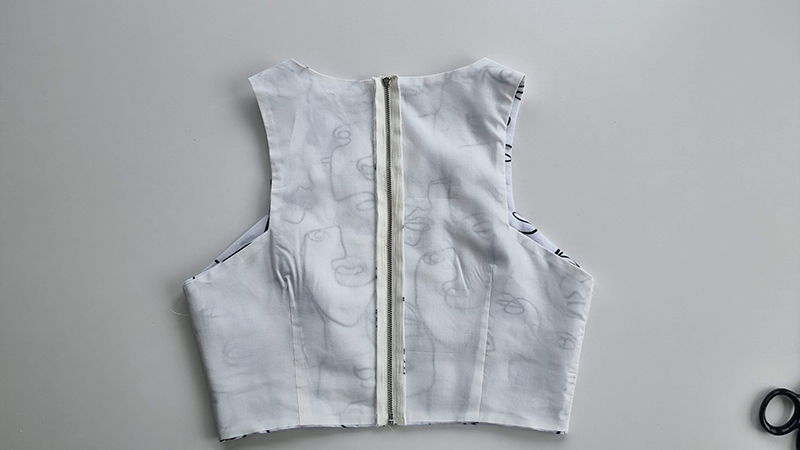
Step 11
Fold the top of the zipper down internally and stitch in place.
The Naomi Cropped Fitted Top is now complete. How did you go? Let me know in the comments below.
I also have two other top patterns that don’t need an overlocker available for purchase here and here along with more sewing tutorials.
x x