Dresses, Sewing Tutorials
Sewing Tutorial: Willow Bustier Dress
SEWING ABILITY
Advanced
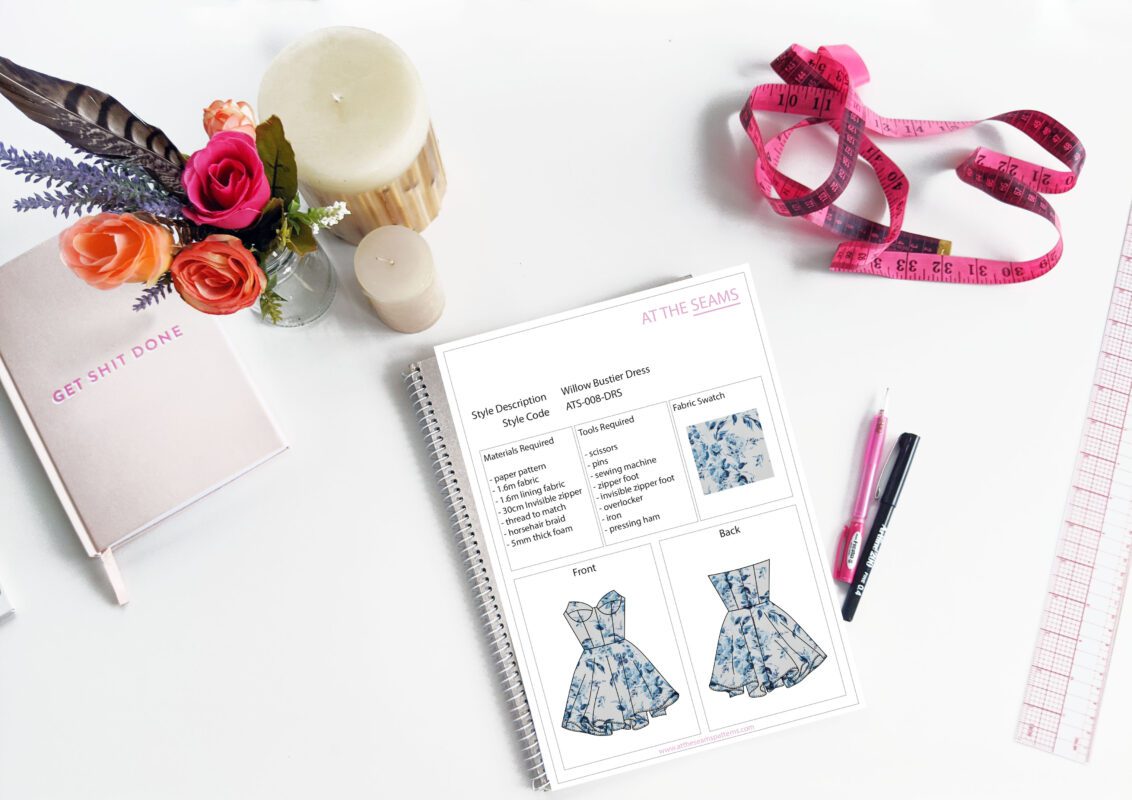
To begin, you will need the following things:
Materials
- Willow Bustier Dress (XS-5XL) paper pattern , or if you prefer to shop on Etsy
- 1.4-1.6m fabric (XS-XL) 1.6m fabric (XL-5XL)
- 1.6m lining fabric
- 0.4m of interfacing (optional)
- 30/35cm Invisible zipper
- horse hair braid (optional)
- 5mm thick foam for bust cups (optional)
- cotton thread (enough to also thread your overlocker)
Tools
- scissors
- pins
- sewing machine with a standard foot
- regular zipper foot and invisible zipper foot
- overlocker
- iron
- pressing ham
Fabric Requirements
The Willow Dress is best made with structured woven fabrics that hold the bodice shape and allow the skirt to drape nicely. Cotton poplin, cotton sateen, linen blends, chambray, or lightweight denim for casual looks, while taffeta or dupioni work well for formal versions. For lining use cotton, voile, or satin.
Tips
- Ensure your fabric is washed, dried, and pressed before you start cutting. There is nothing worse than washing your beautiful garment and it shrinks, or even more annoying, the lining shrinks and the main doesn’t, so it’s all pulled out of shape and is unwearable.
If you prefer video instructions – please head over to youtube.
Willow Bustier Dress – Sewing Instructions
CUTTING AND INTERFACING
Step 1
Cut all main pieces accurately on the correct grain, ensuring all notches are clipped. Please note that all seam allowance is marked on the pattern in a grey dashed line and can also be found on page 3 of the booklet provided with the purchased pattern.
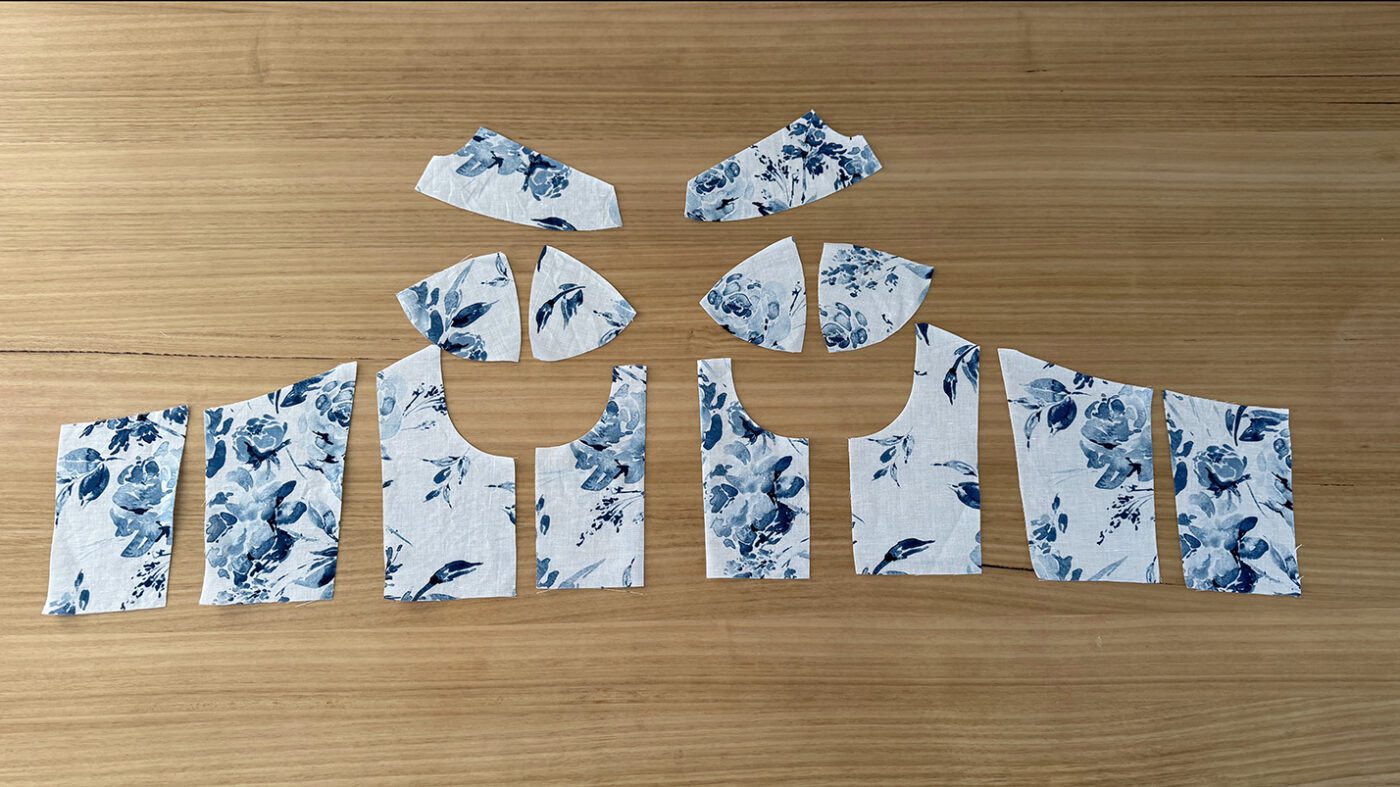
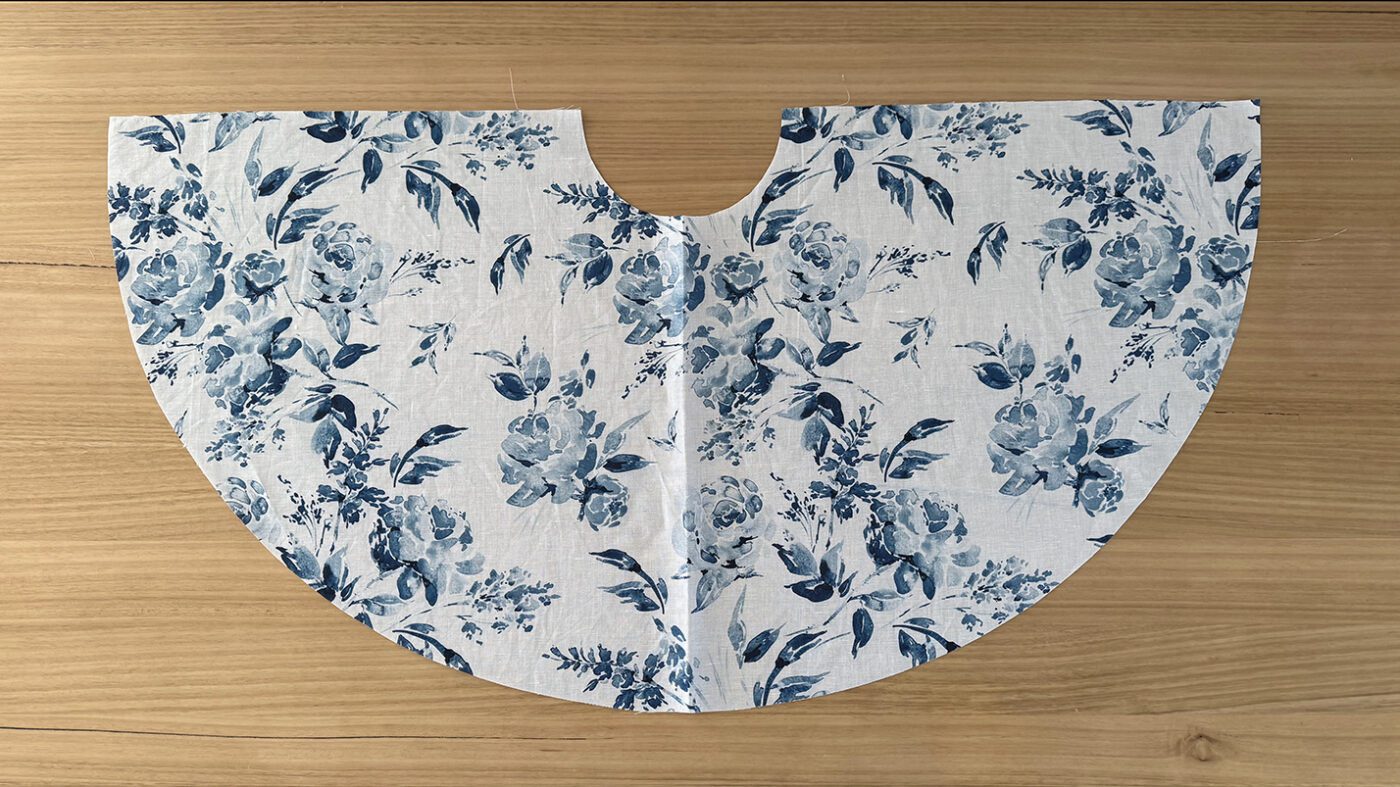
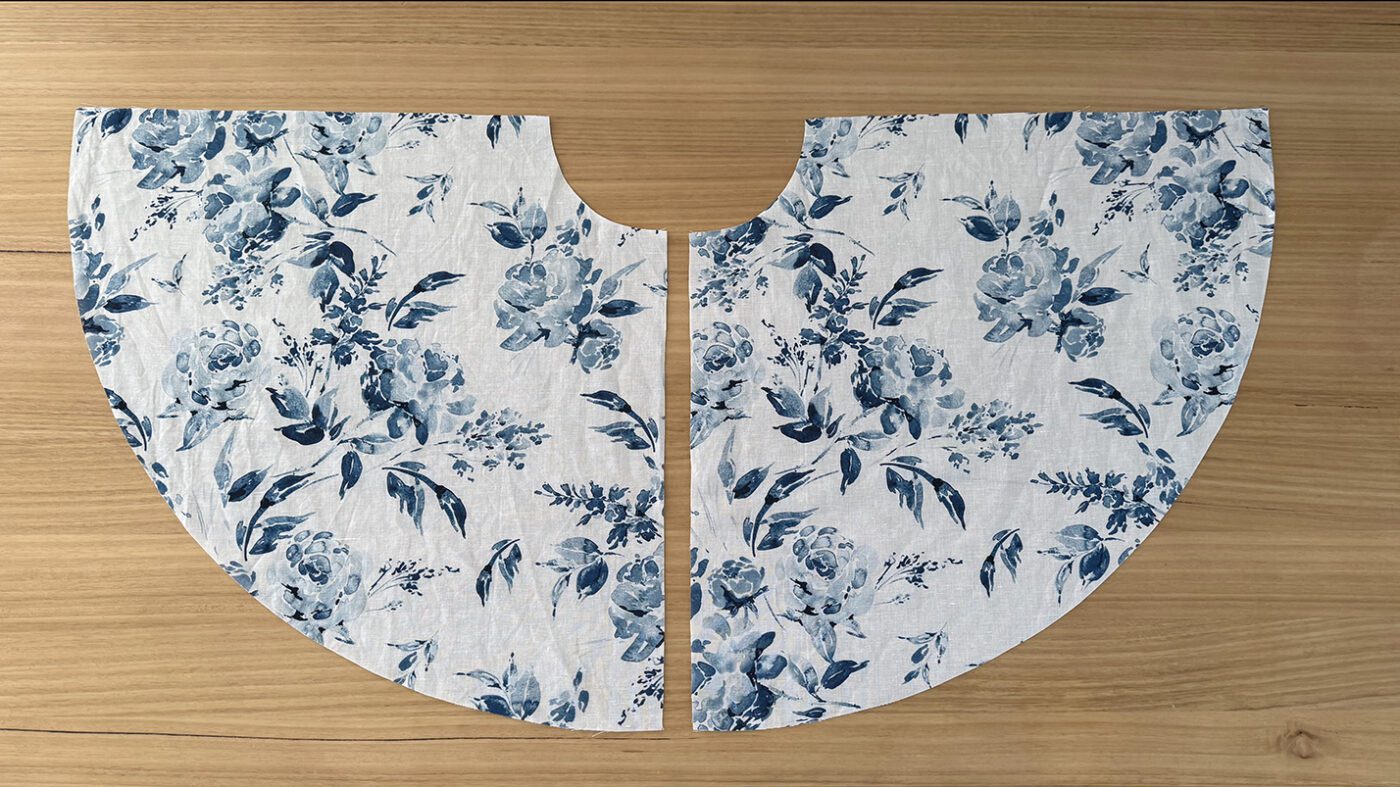
If you need help with pattern cutting instructions, these can be found in the same booklet.
Beginner tip* If you can afford to purchase a rotary cutter and cutting mat, I find this more accurate and time-efficient.
Step 2
Then, cut along the lining cut line of the skirt pattern and cut all lining fabric pieces.
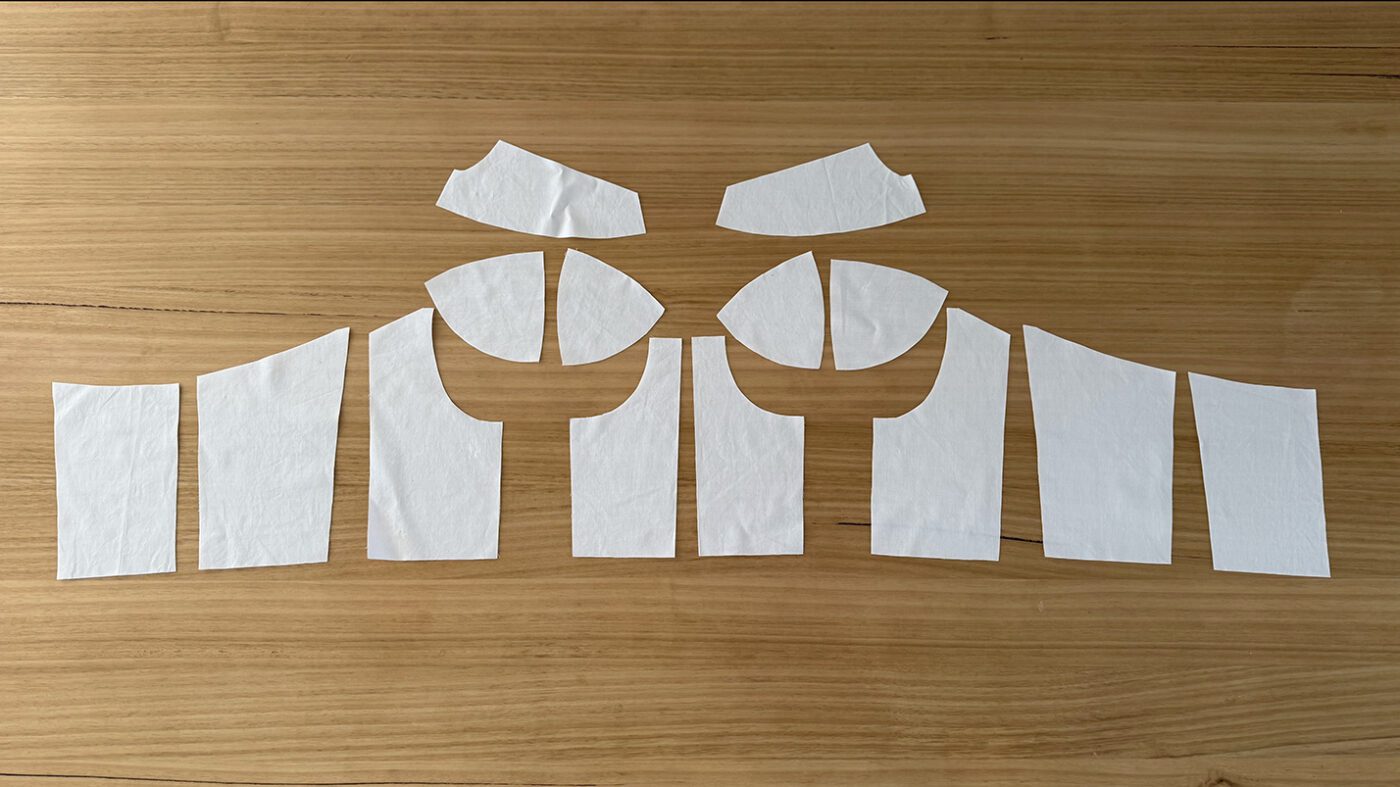
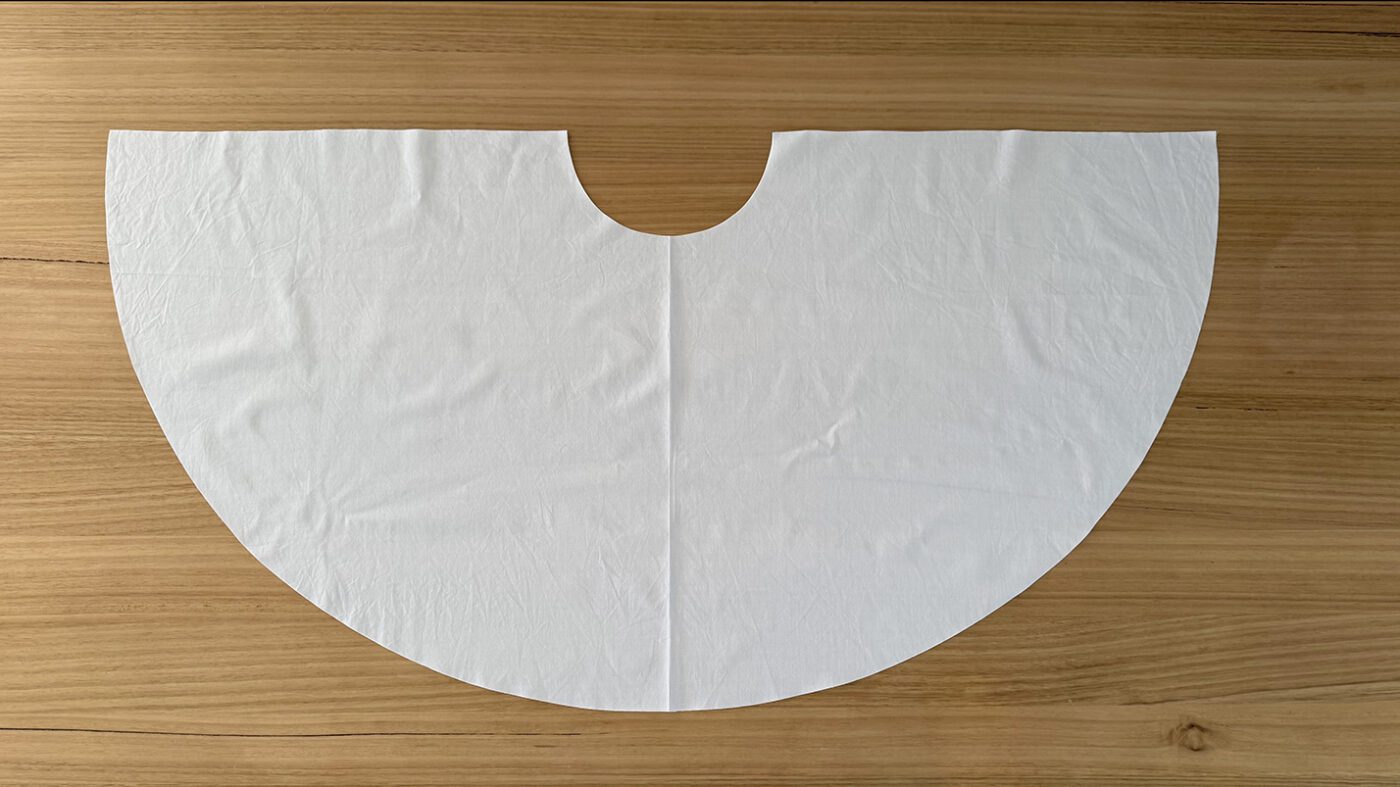
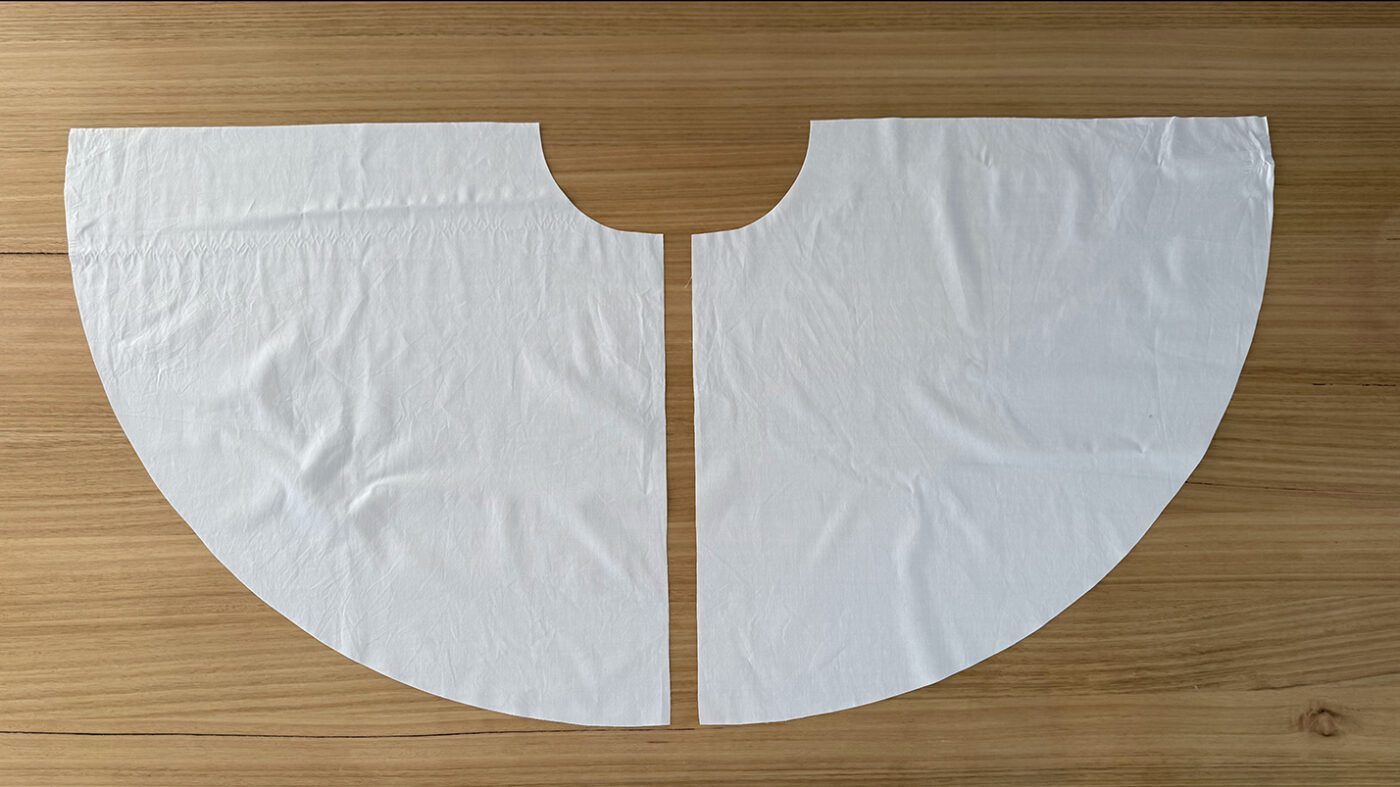
Step 3
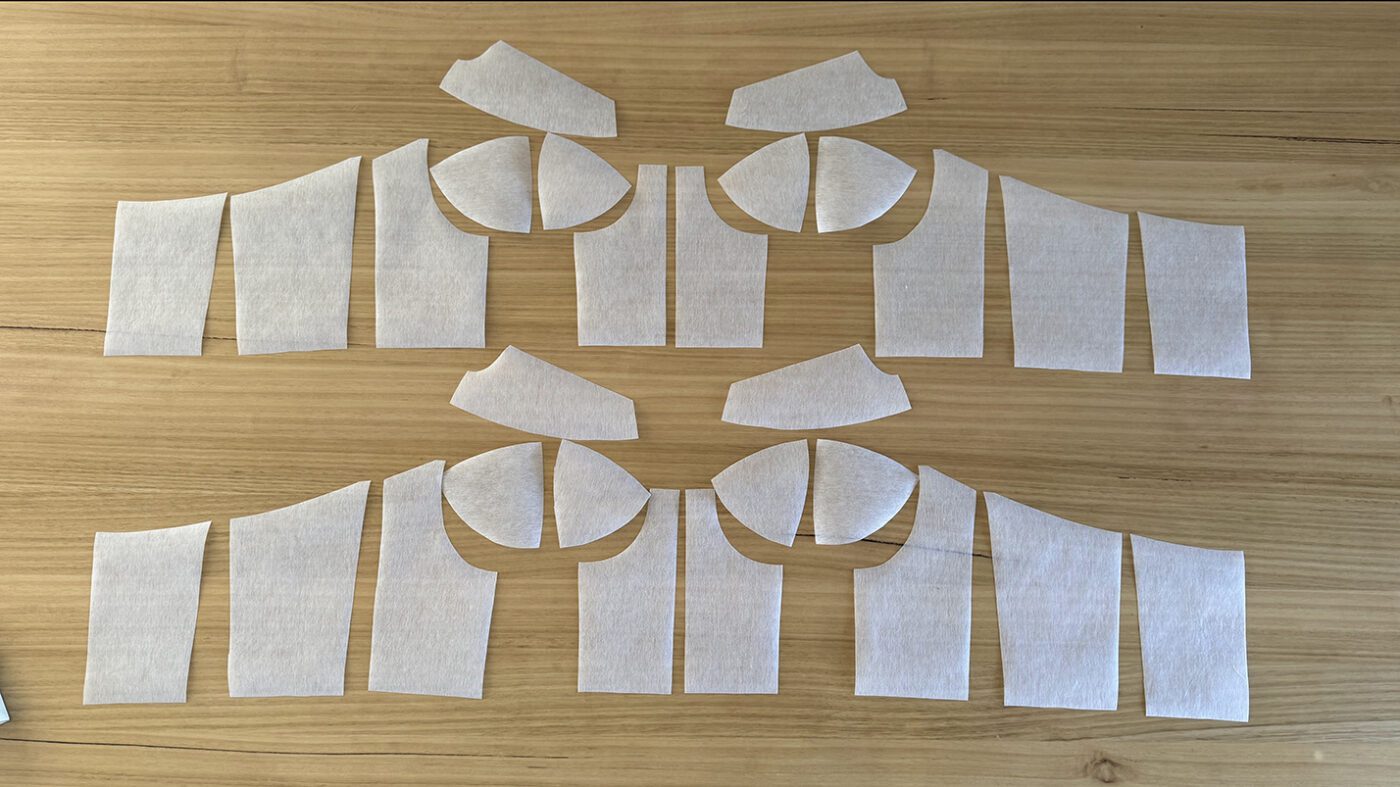
If using interfacing – which is recommended for light weight fabrics – cut your interfacing pieces using the bodice pattern pieces only, the skirt does not require interfacing. You can add interfacing to your main fabric or lining fabric or both, depending on the weights of your fabric. For this sewing tutorial I have added it to both my main and lining fabric.
Step 4
Then fuse your interfacing to the main and lining pieces of the bodice.
If you like you can fuse the interfacing to the main and lining fabric before cutting so they can be cut in one step.
BODICE – MAIN FABRIC
Step 5
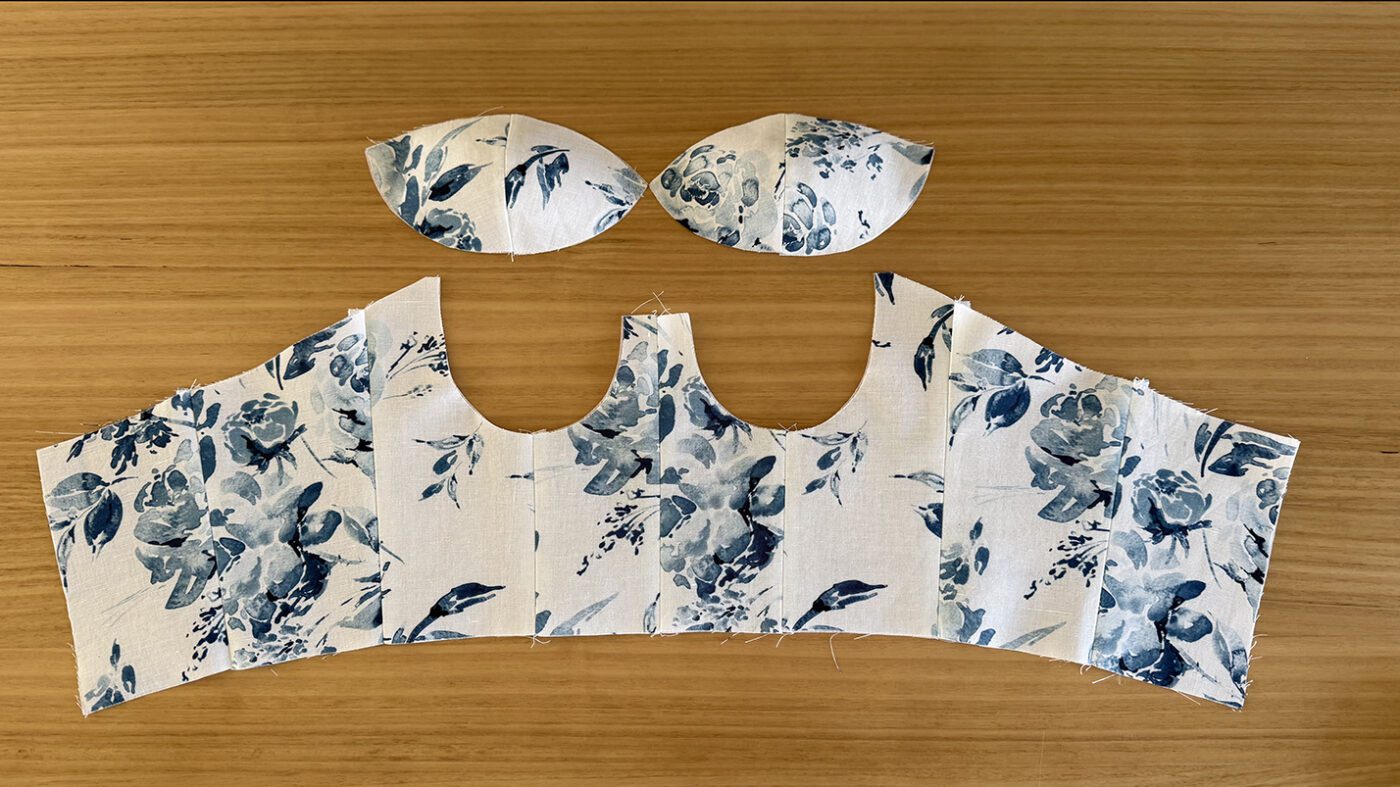
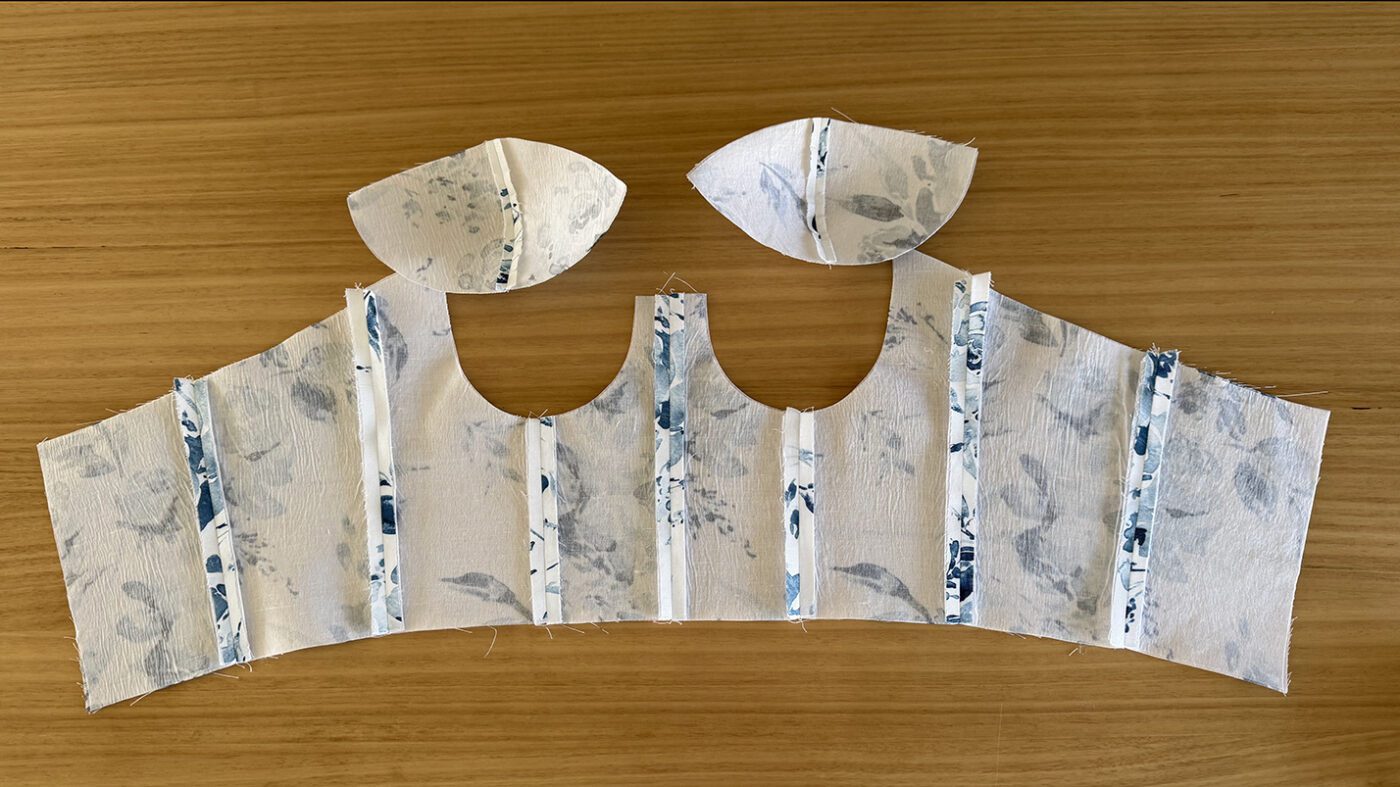
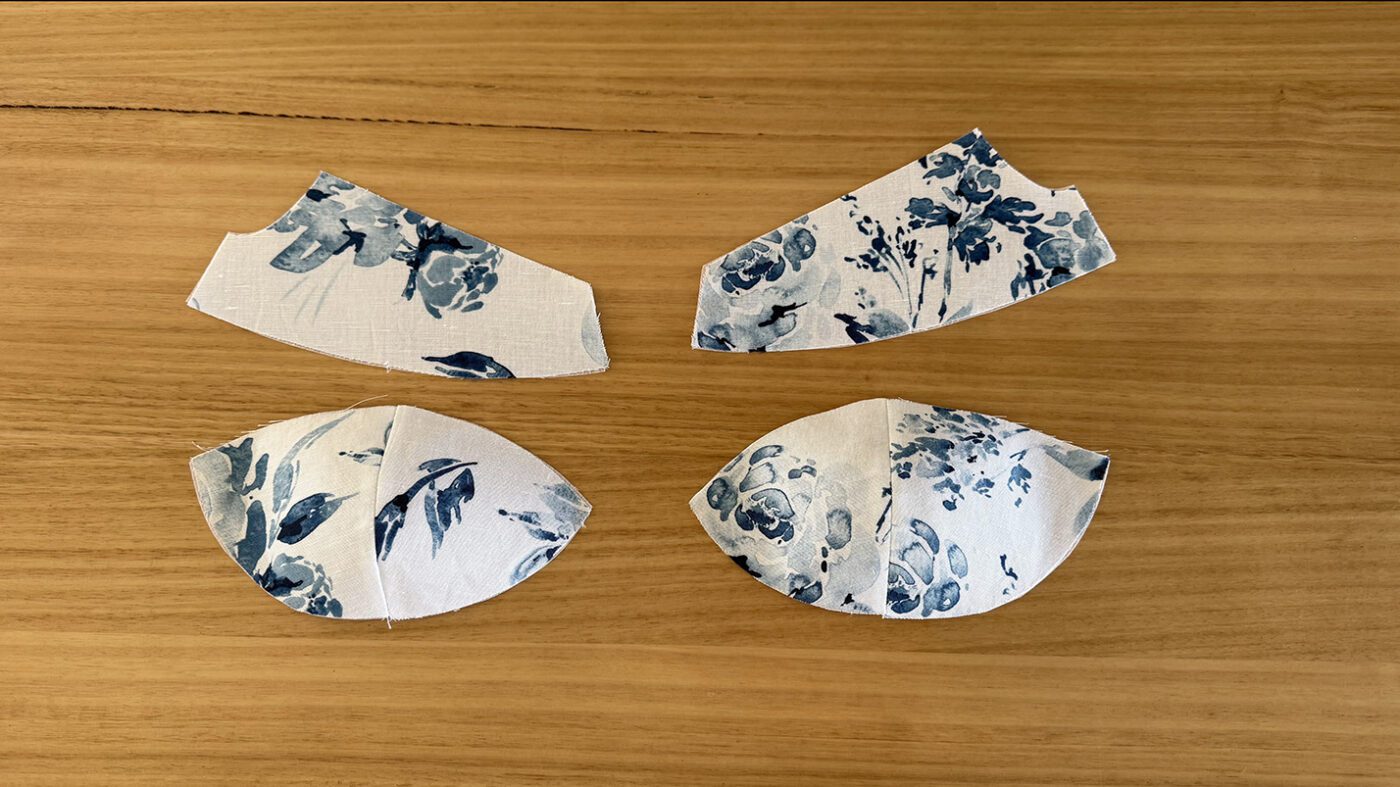
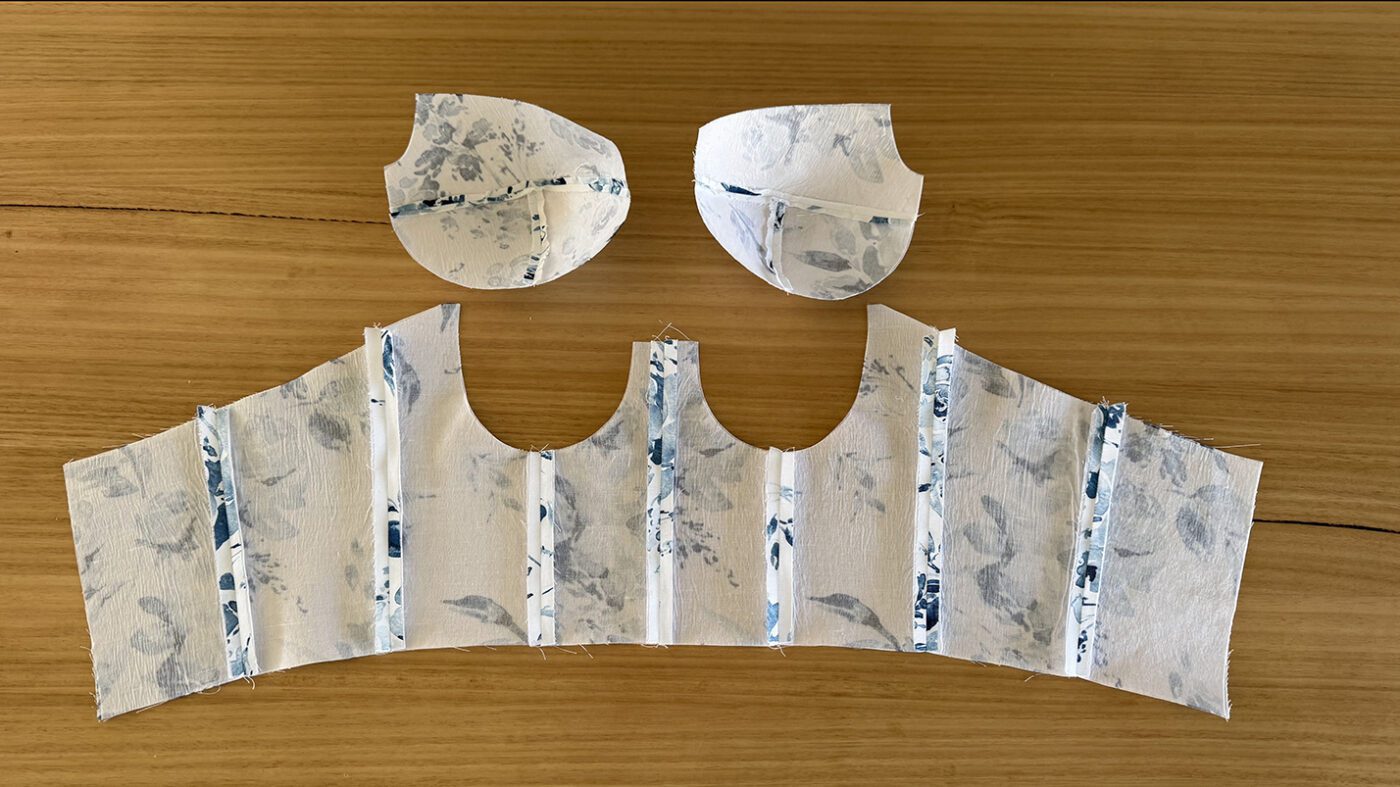
Start by pinning all vertical panel seams of your main fabric pieces right sides together. Next, pin the center and side bust cups, right sides together, so that you end up with a pair.
Step 6
Then stitch closed with a 1cm seam allowance.
Step 7
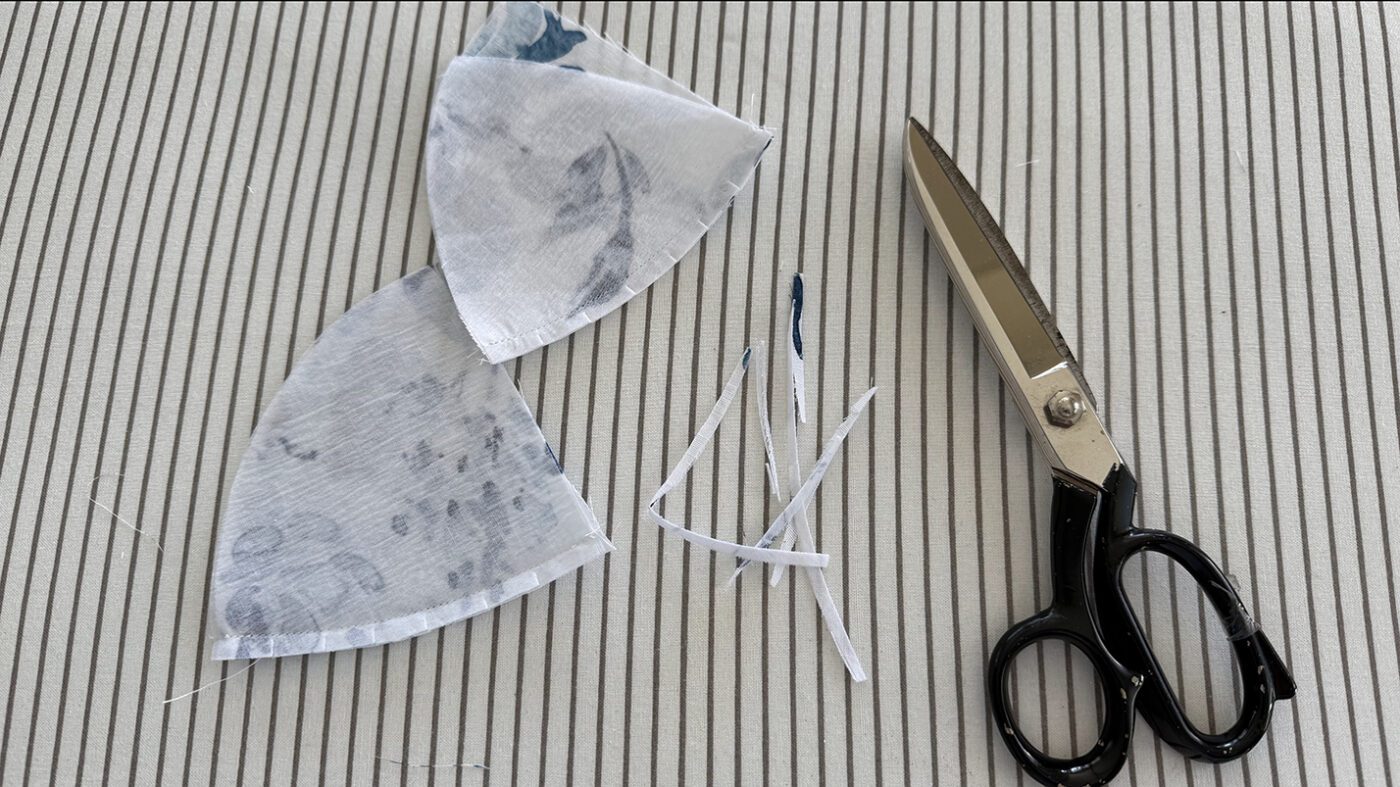
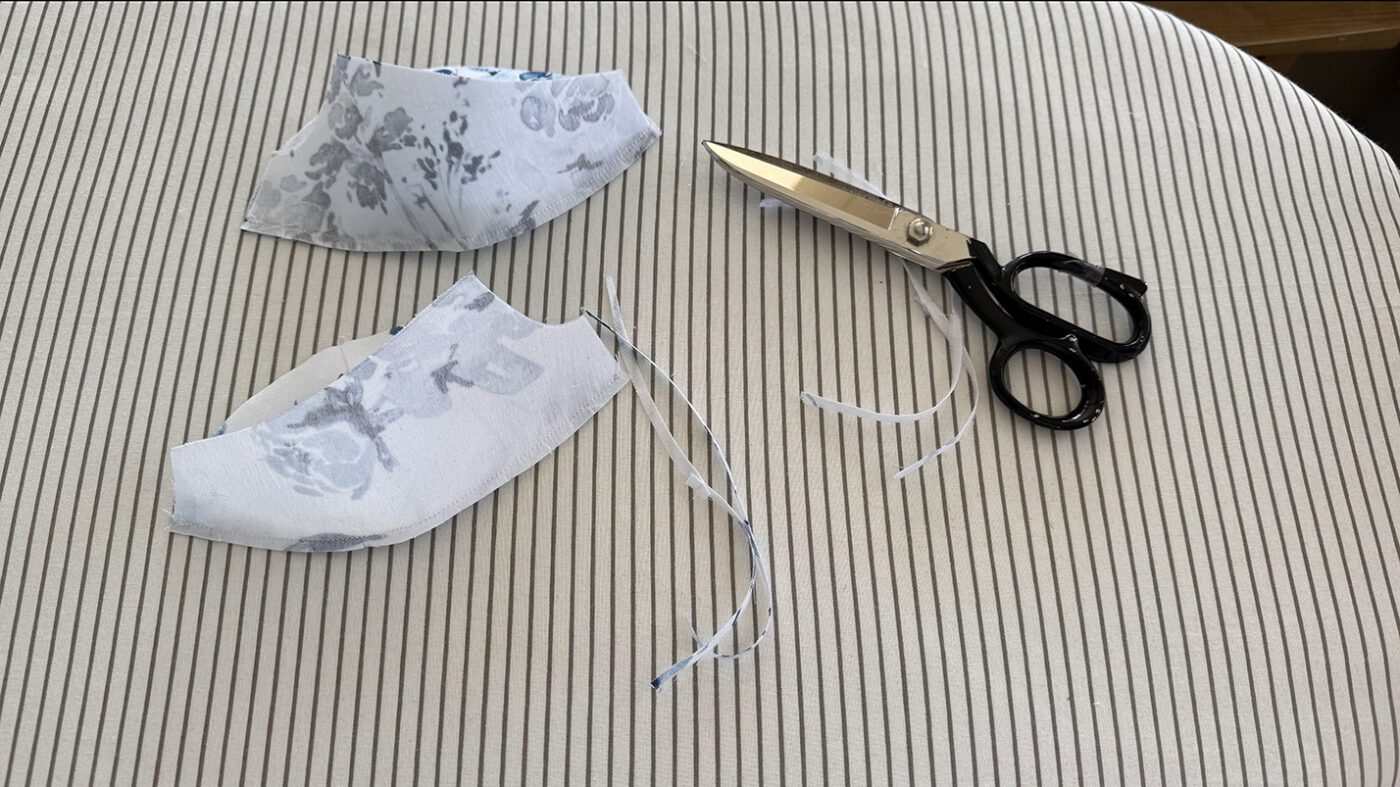
Press the lower vertical seams open and then trim the bust cup seams back to 5mm and press open. Using a pressing ham can make pressing the curves of the cups easier.
Step 8
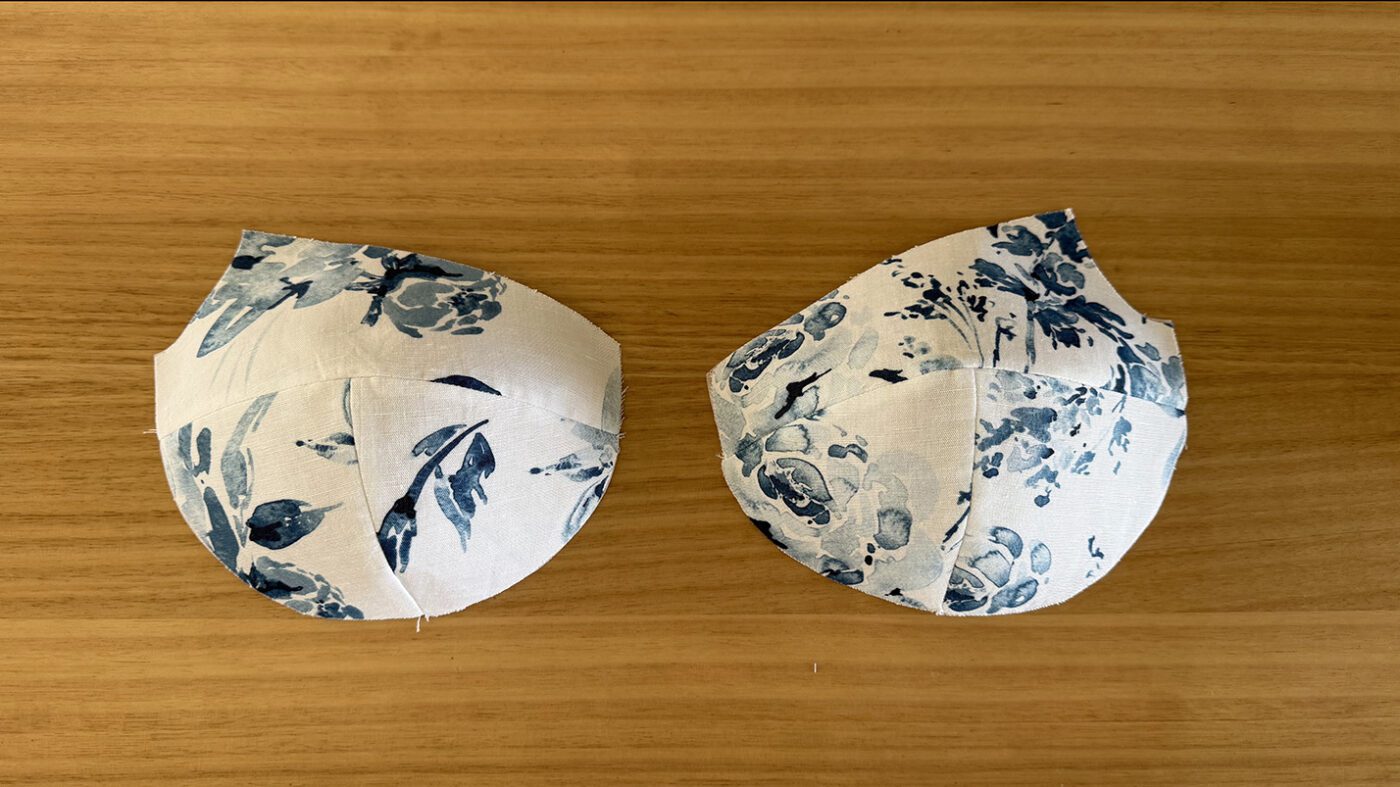
Then pin the top bust panel seam to the lower bust right sides together on both cups.
Step 9
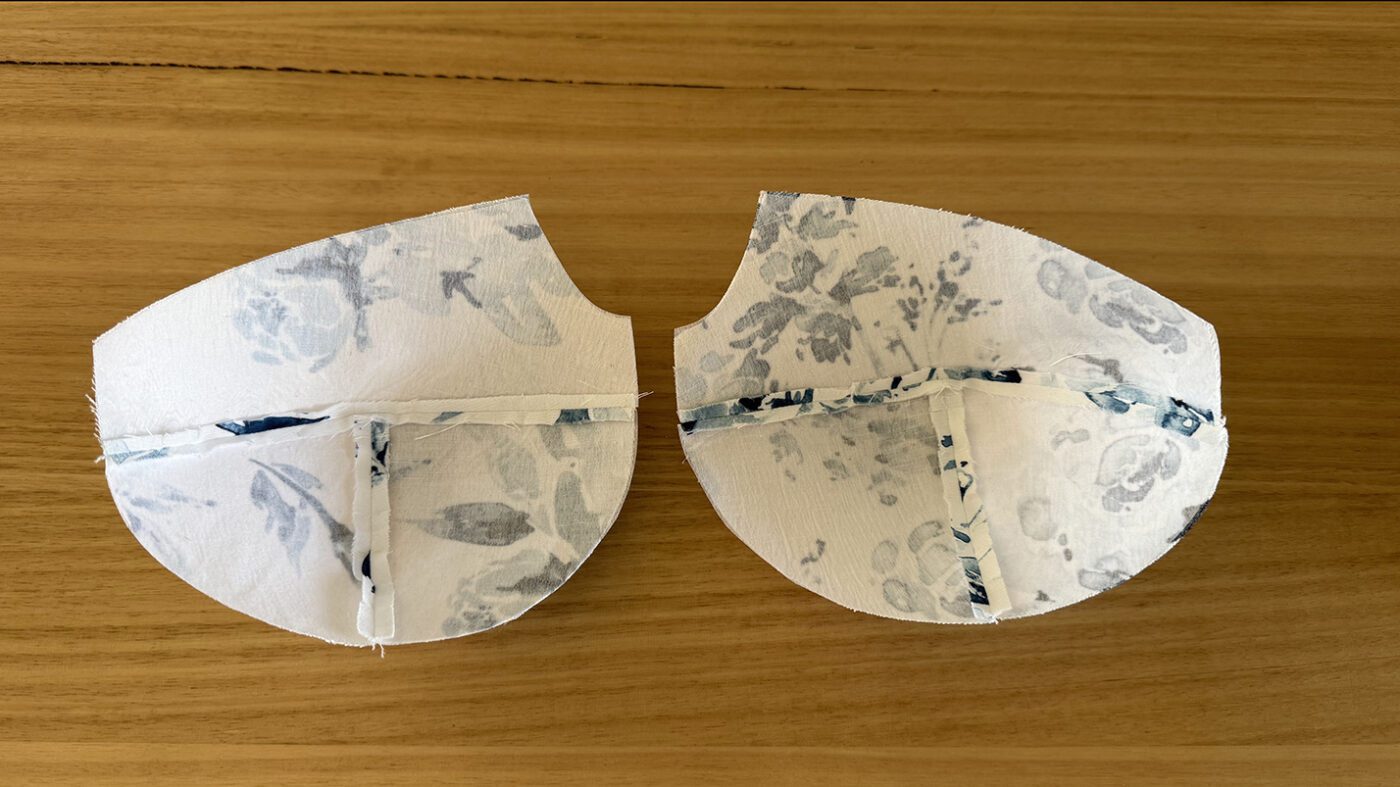
Stitch closed with a 1cm seam allowance.
Step 10
Trim the seam back to 5mm and press open.
Step 11
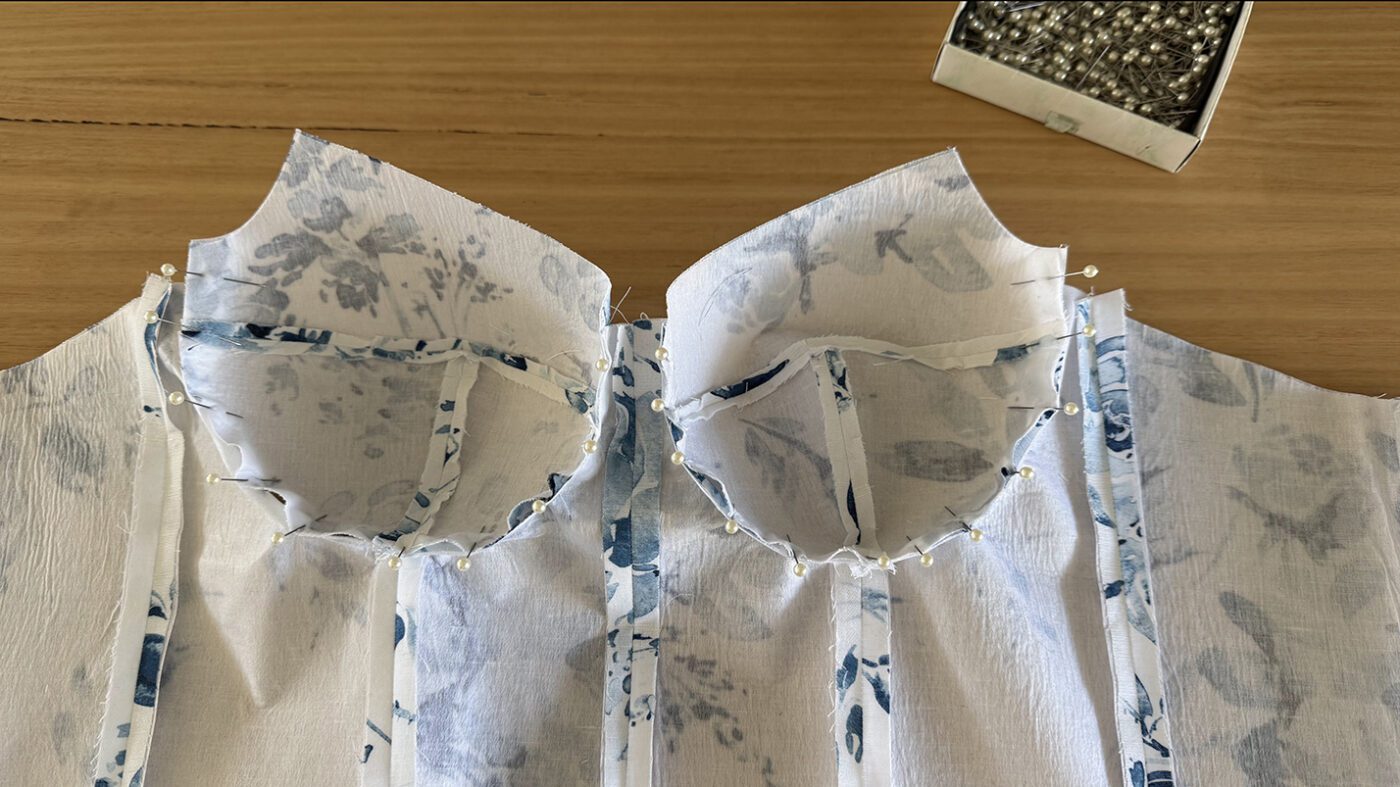
The cups are now ready to be inserted into the lower bodice. Pin the cups to the bodice at the middle panel seam. Then work your way around to each edge.
Step 12
Sew the cups in from the seam to the side, then the seam to the centre front. This can be completed in one step if you like, but I found it was easier and neater getting the cups in by centring the panel seams first.
Beginner tip* This step can be tricky because the curves of the fabric are opposite, so take your time and sew it slowly. Reducing your stitch length slightly can help you have more control over the turning of the seams as you sew.
Step 13
Trim the seam back to 5mm and press towards the cup. The seam allowance can be pin stitched down if desired however this will be visible from the outside of the garment so you may decide to only do this on the lining.
SKIRT – MAIN FABRIC
Step 14
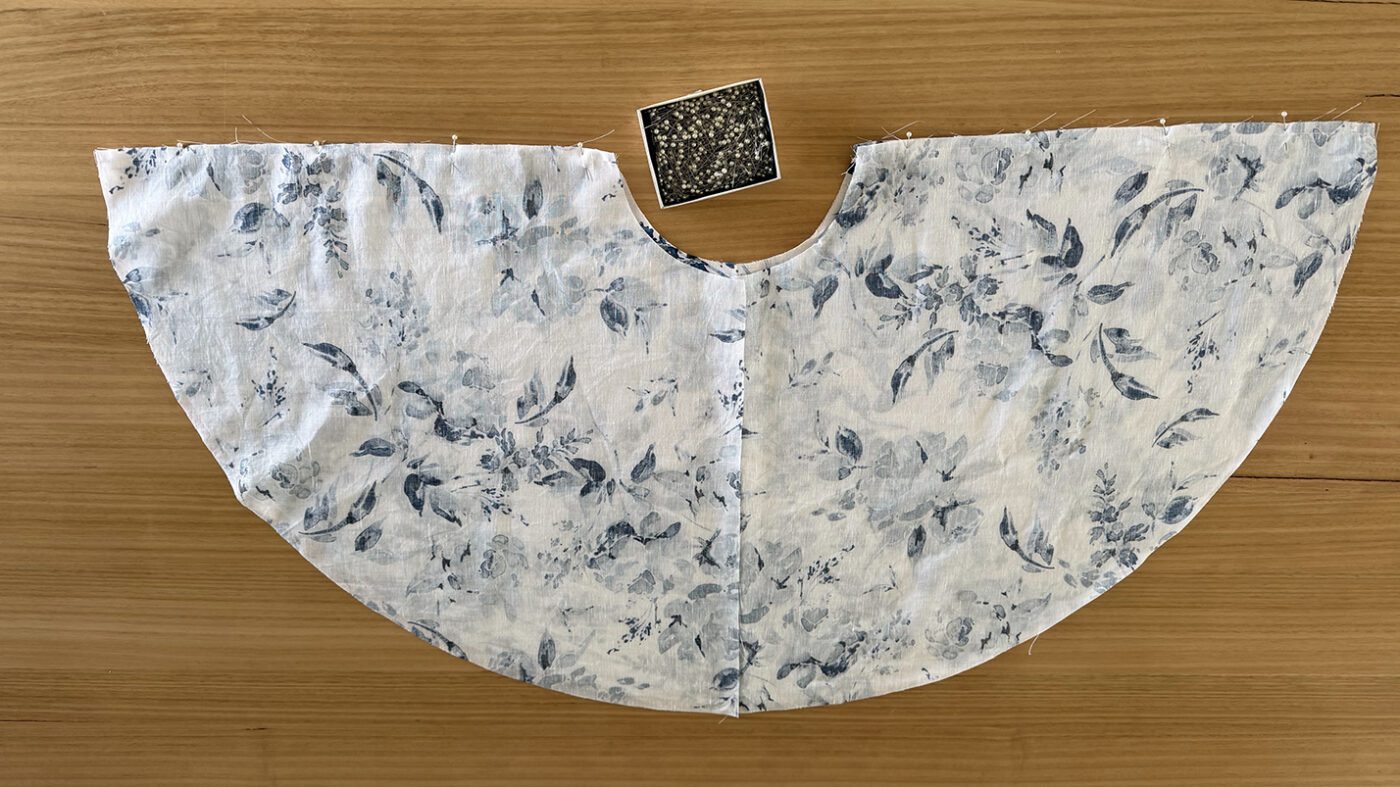
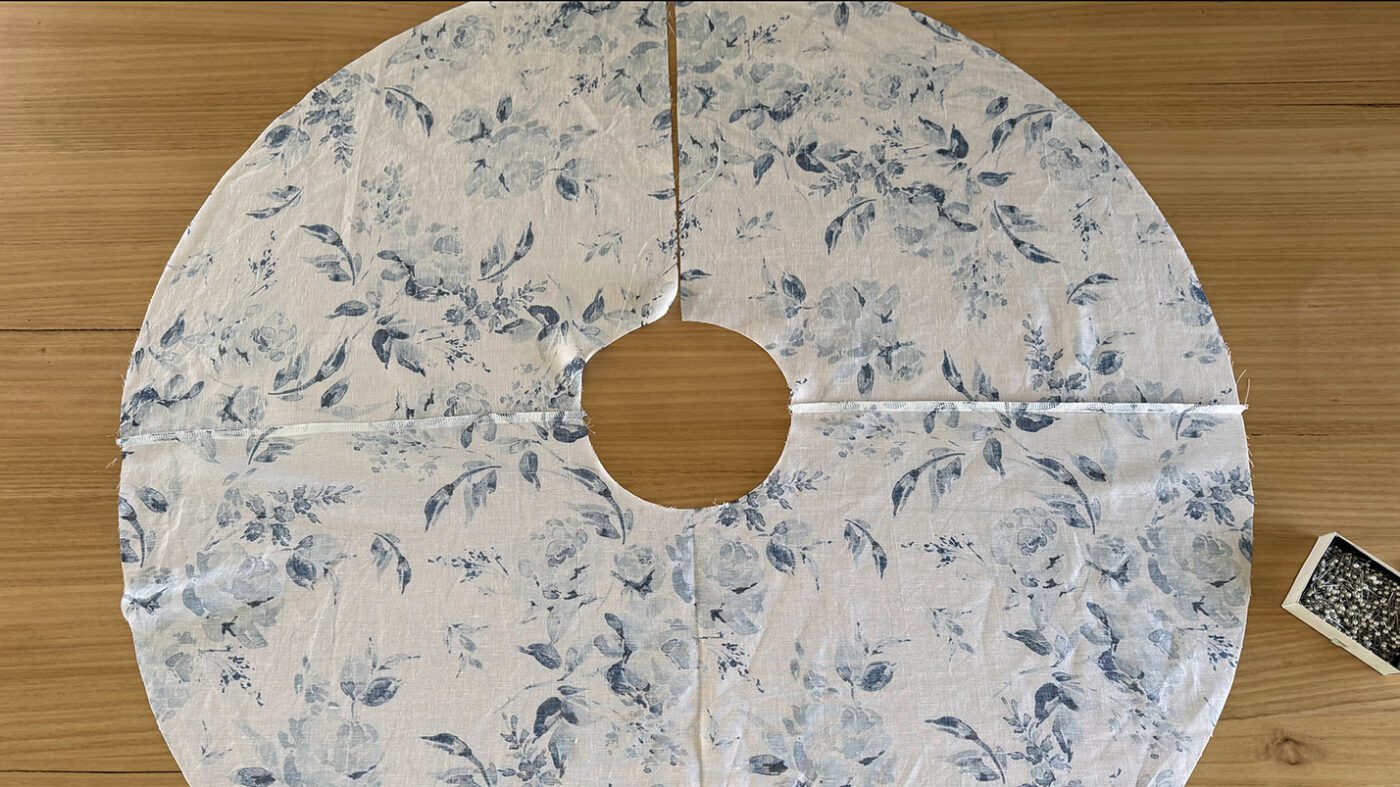
Pin the front and back of the skirt right sides together at each side seam.
Step 15
Stitch closed with a 1cm seam allowance then overlock closed from the front side of the skirt.
Step 16
Press the seam allowance towards the back of the skirt.
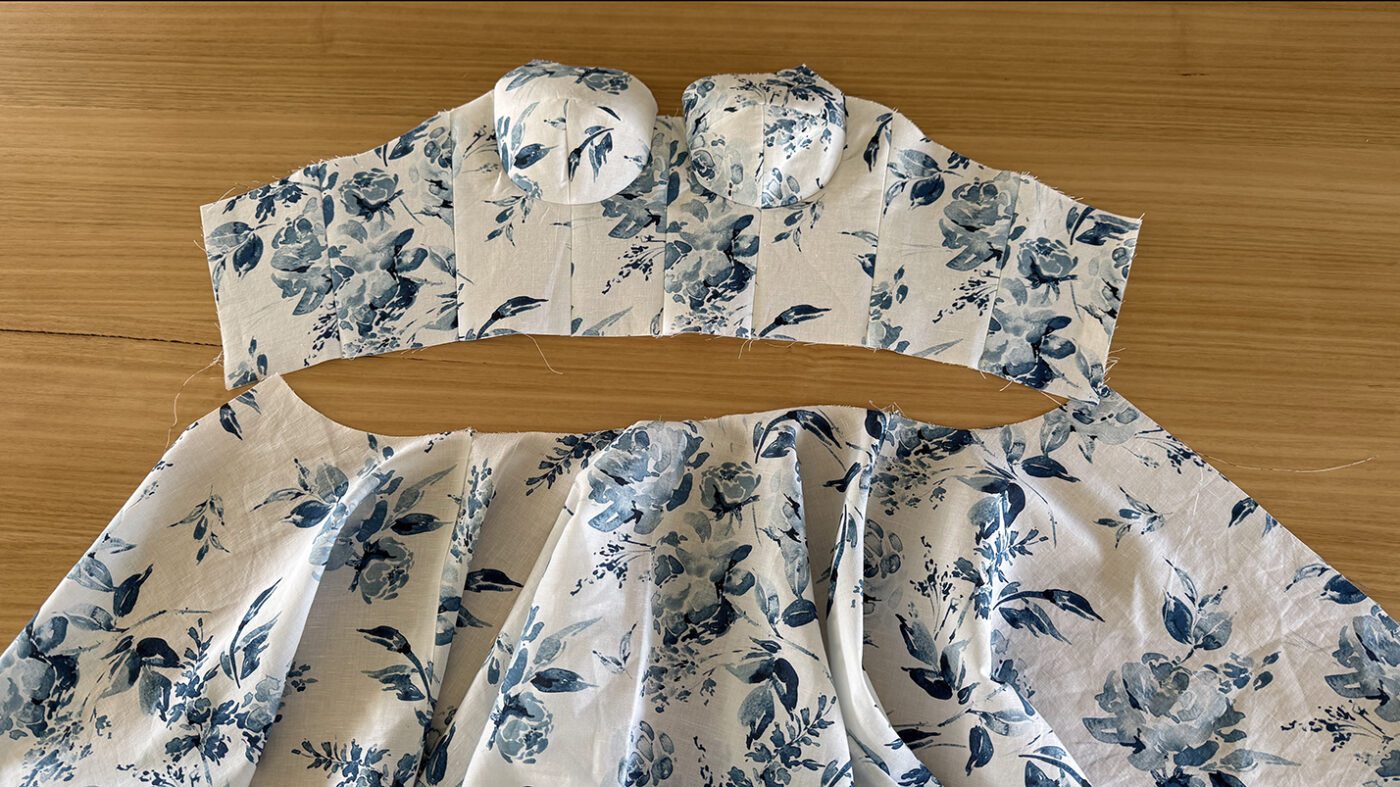
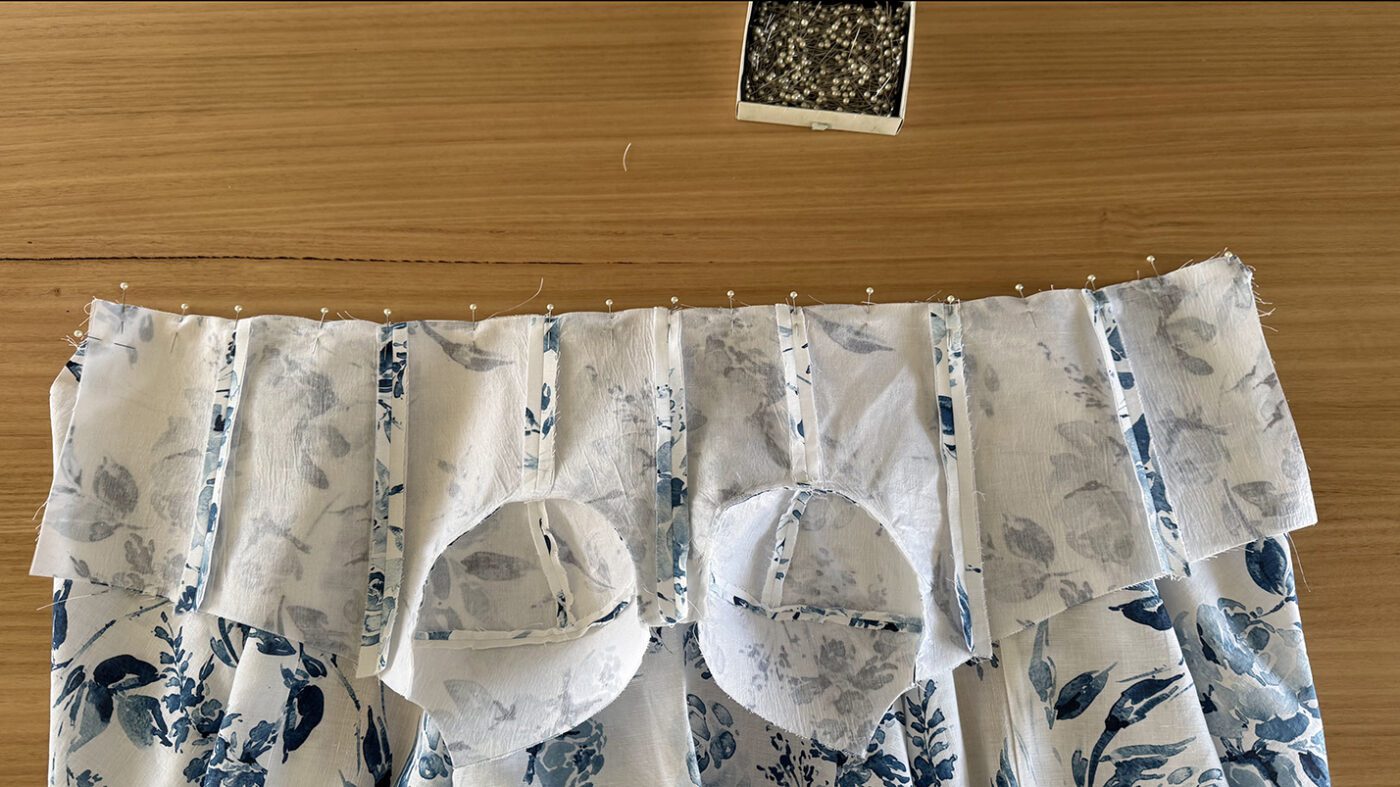
Step 17
Then pin the skirt waist edge to the bodice waist edge so that right sides are together. Take care to ensure the side seams of the skirt and bodice line up.
Step 18
Stitch closed with a 1cm seam allowance.
Step 19
Then press the seam allowance towards the skirt.
BODICE – LINING FABRIC
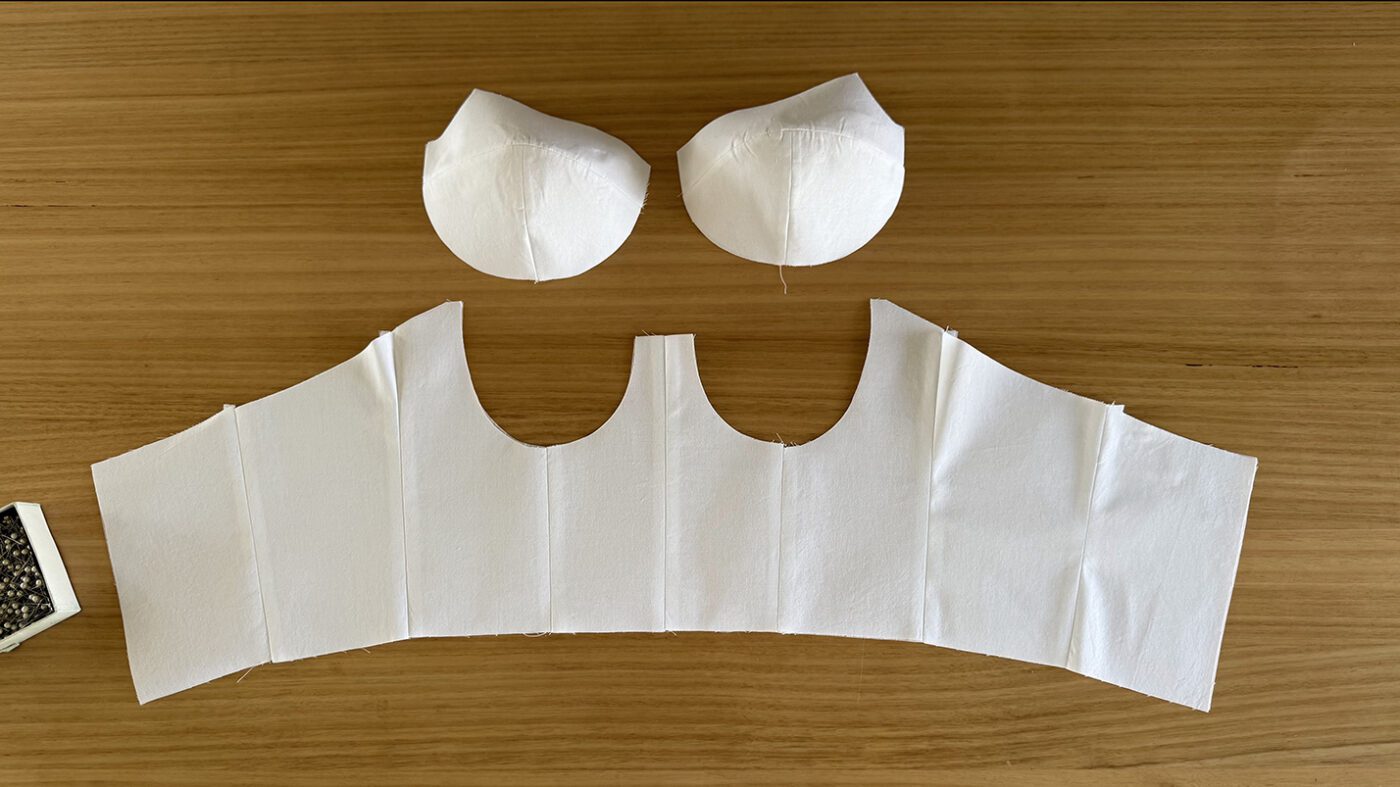
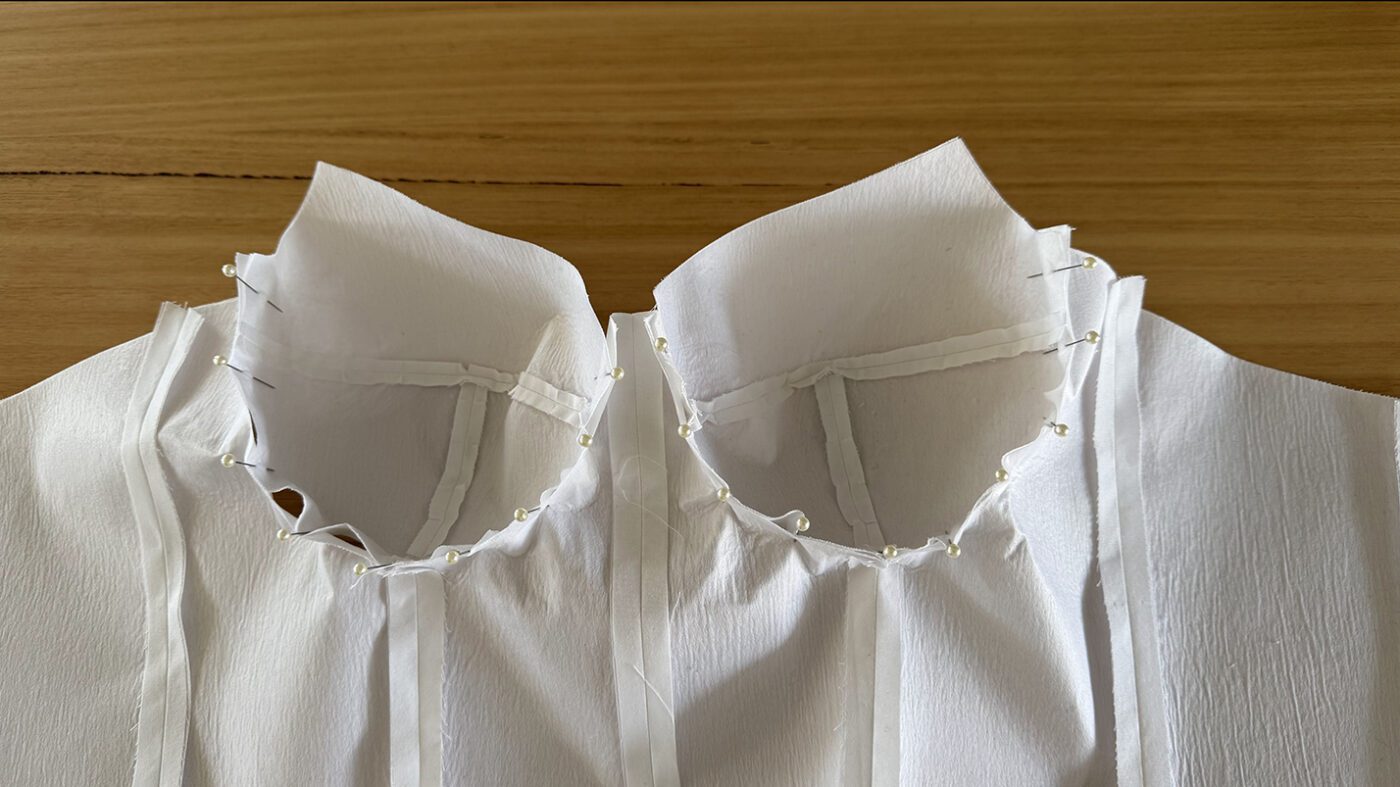
Step 20
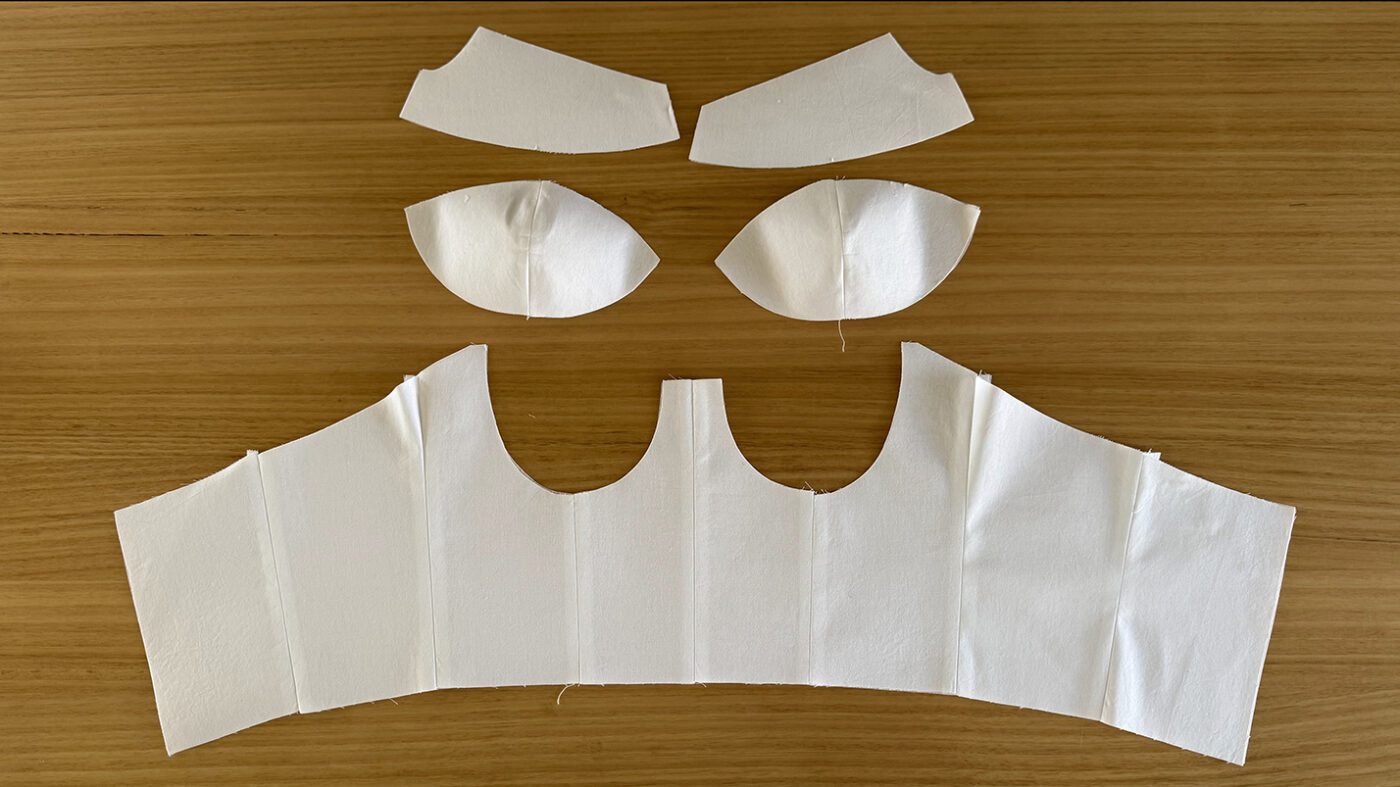
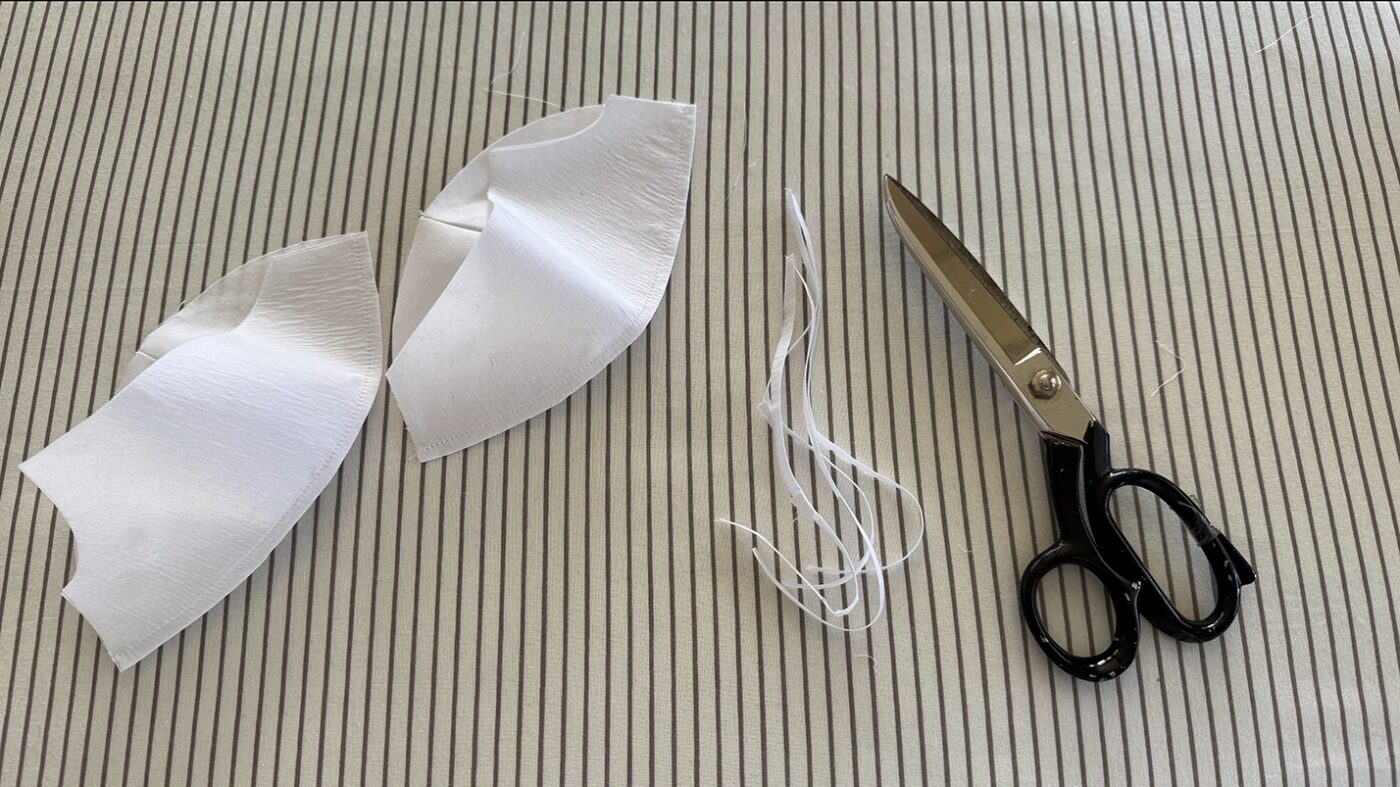
Repeat steps 5 to 13 using the lining pieces.
SKIRT – LINING FABRIC
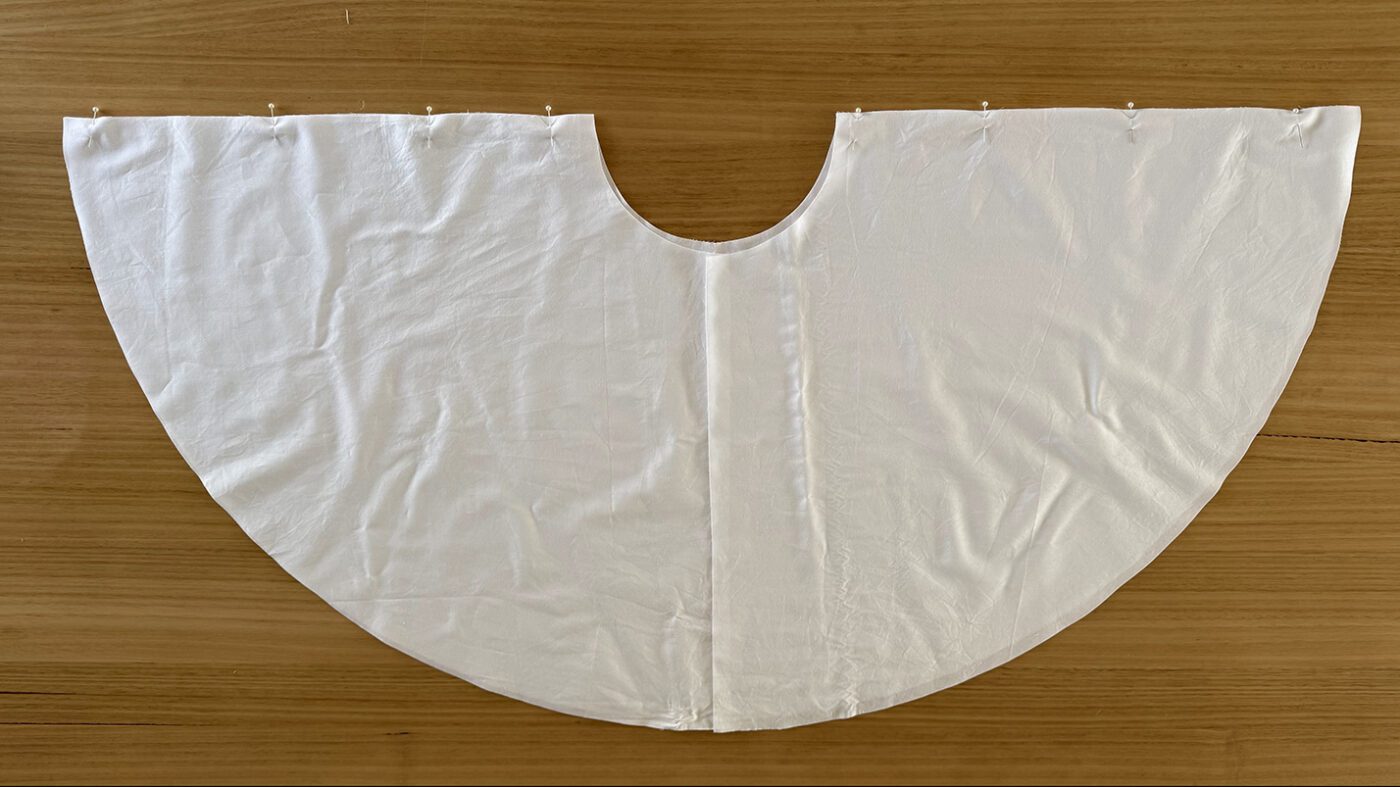
Step 21
Repeat steps 14 to 19 using the lining pieces.
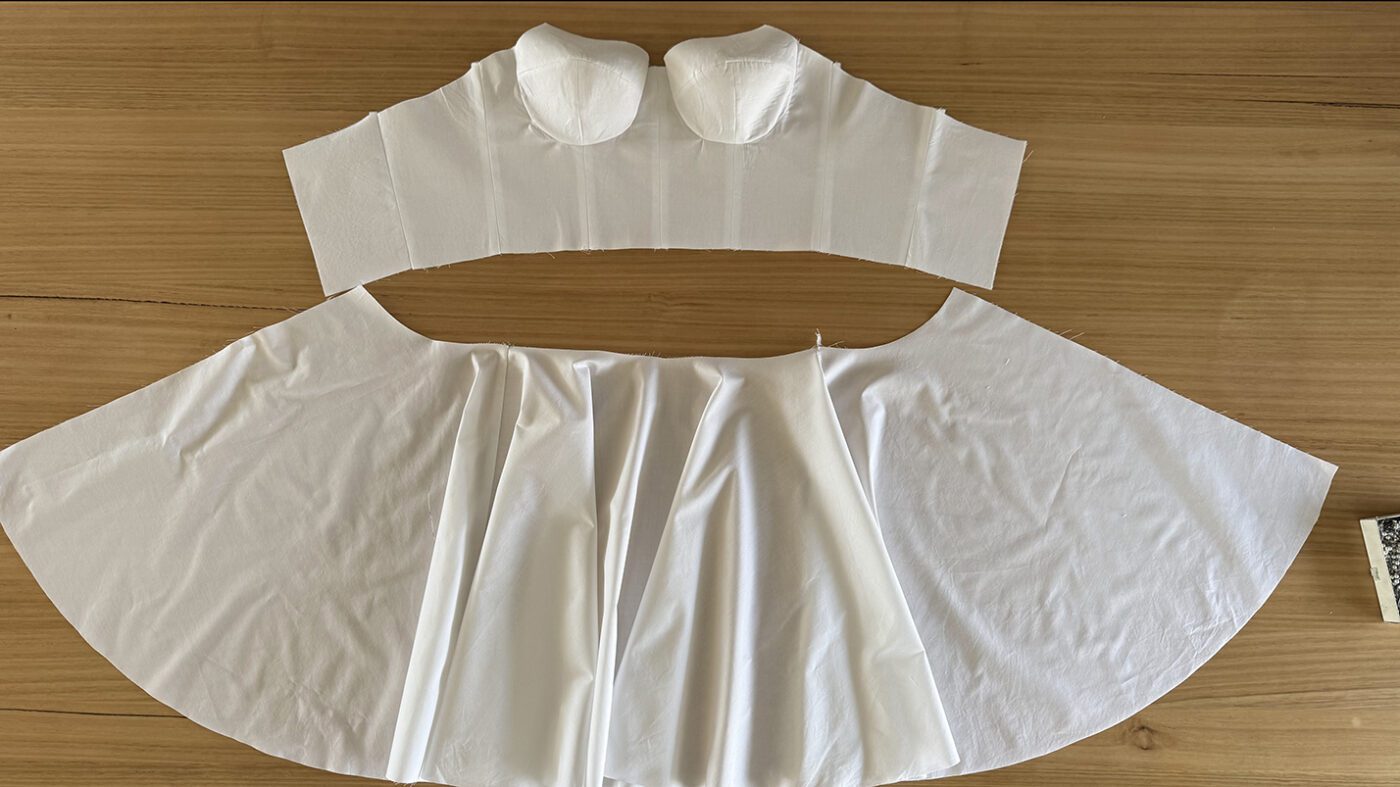
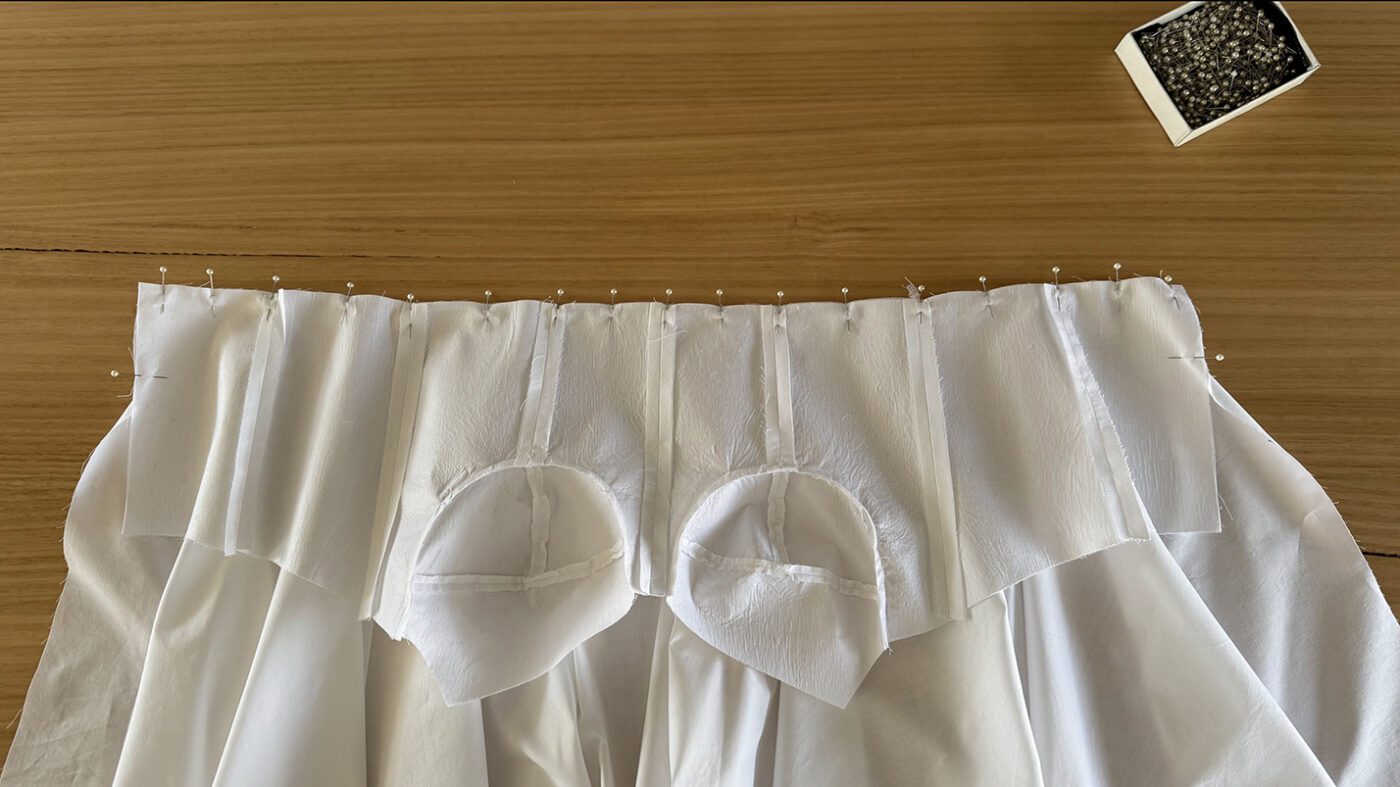
Beginner tip* This is also a good time to check the fit of your garment and make any changes if required. If changes are made, remember to also adjust the lining.
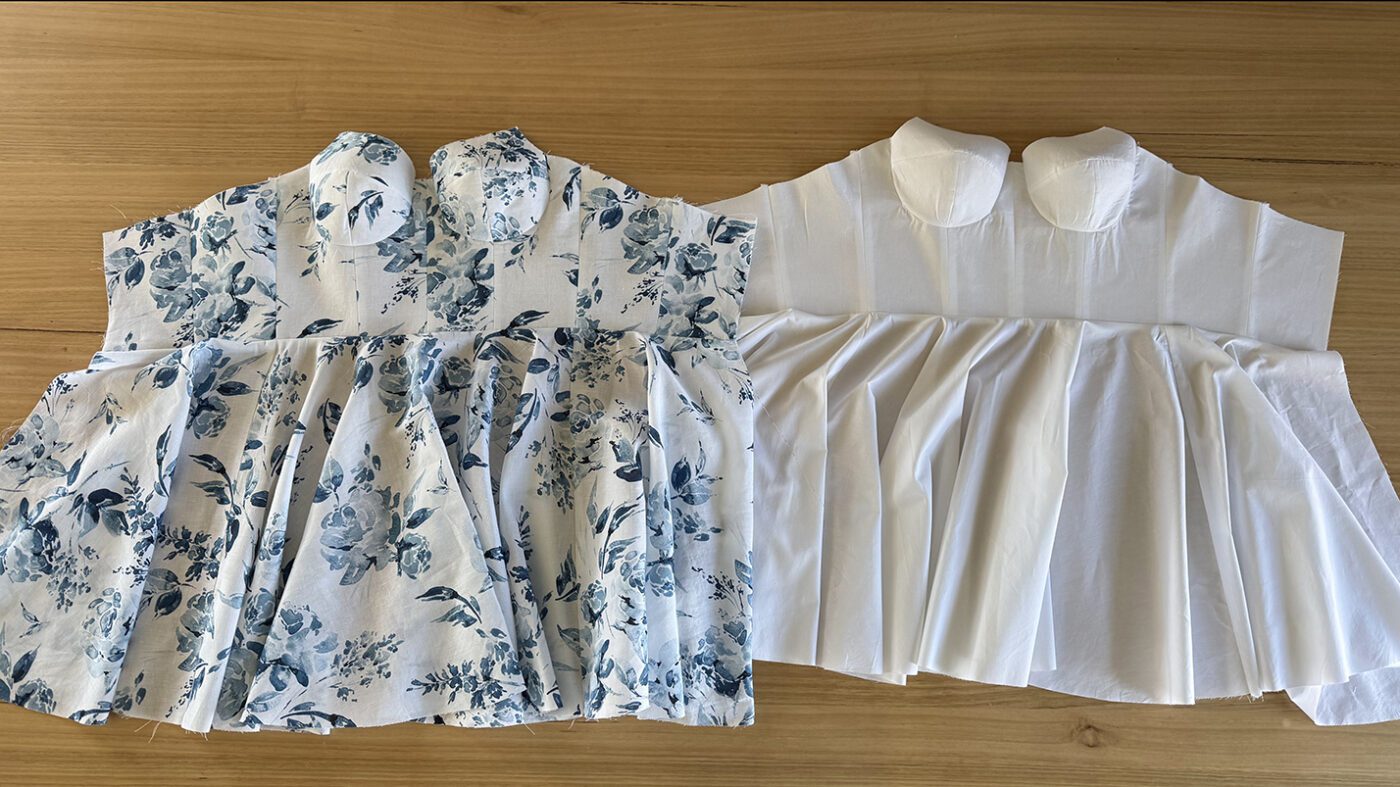
CENTRE BACK INVISIBLE ZIPPER
If you need extra help with invisible zippers, there is a more in-depth tutorial here.
Step 22
Overlock the centre back edge of the main and lining separately from the right side of the fabric.
Step 23
Prepare your invisible zipper for sewing by pressing it open.
Step 24
Lay the main fabric part of the dress down on the table right side up and pin the zipper onto the edges. Take care to pin the zipper inwards of the edge of the fabric to ensure a 1.5cm seam allowance. Also, ensure that your zipper is facing the correct way. It can help to mark the wrong side of the zipper with chalk.
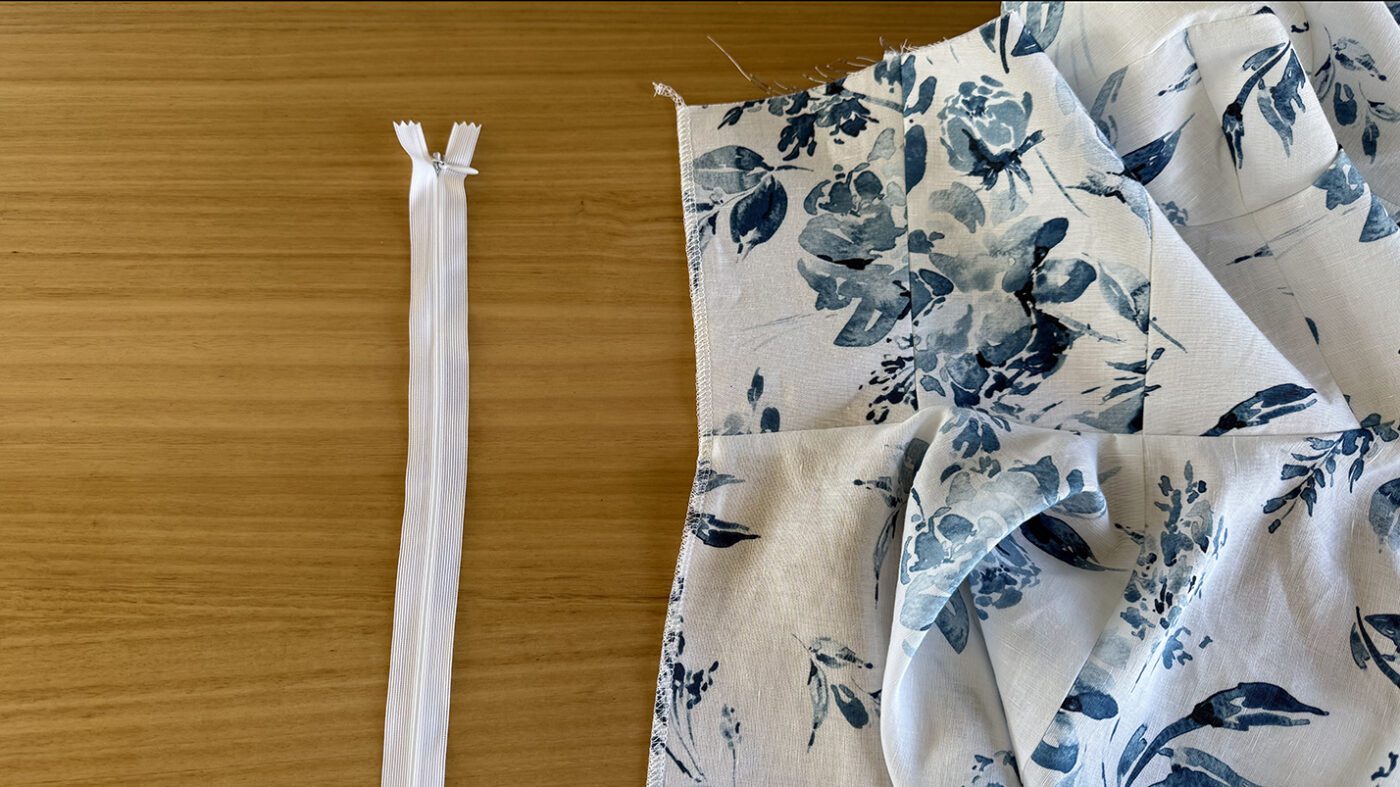
Step 25
Stitch to secure with an invisible zipper foot. Double check the zipper has been attached the correct way.
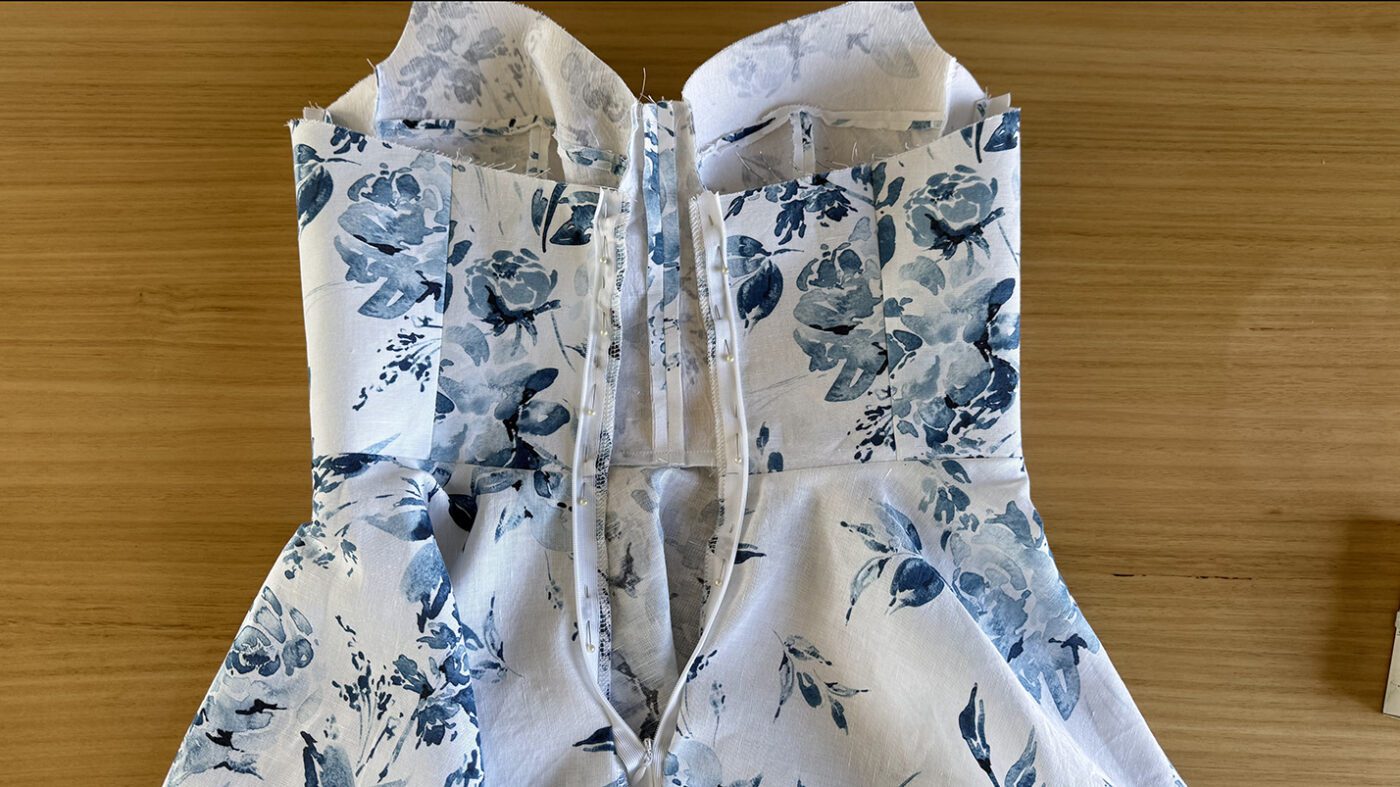
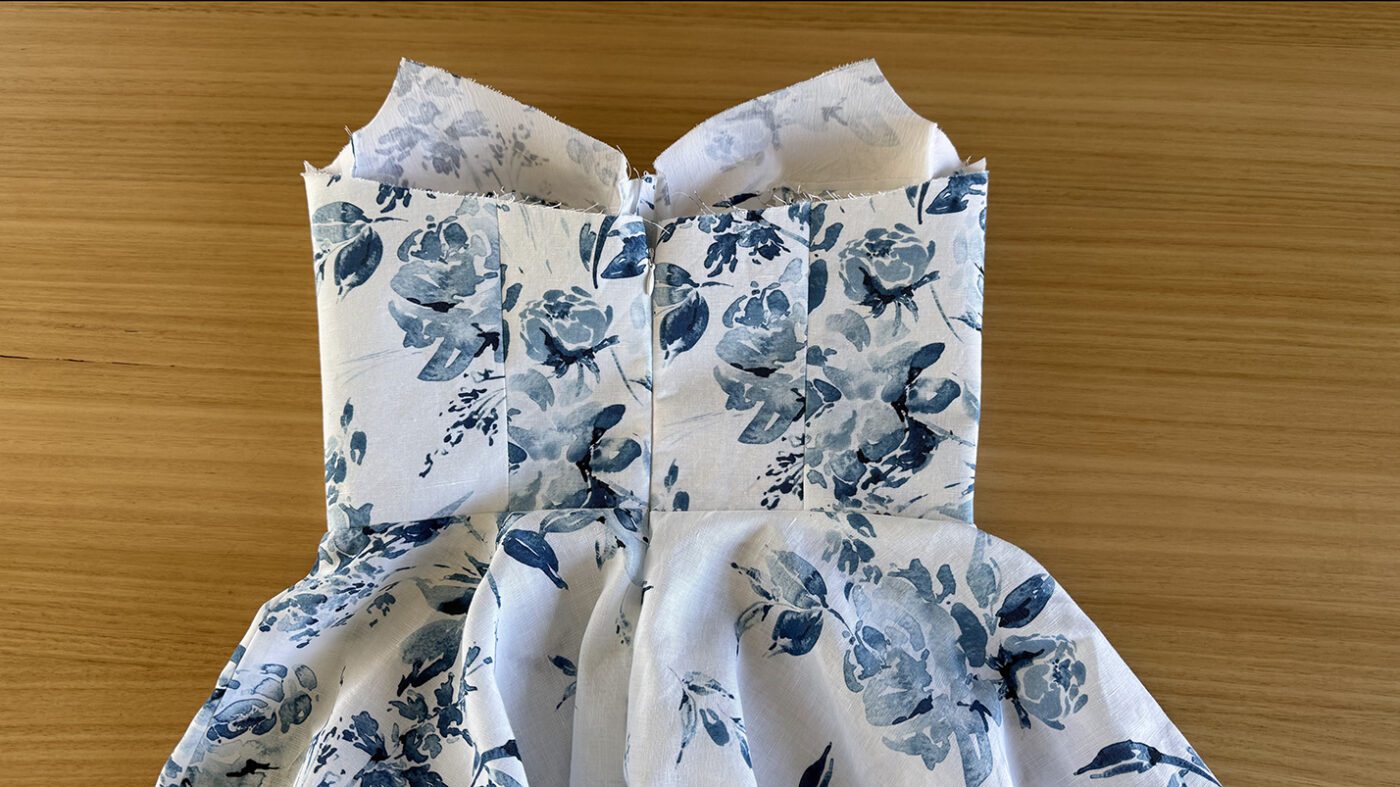
Step 26
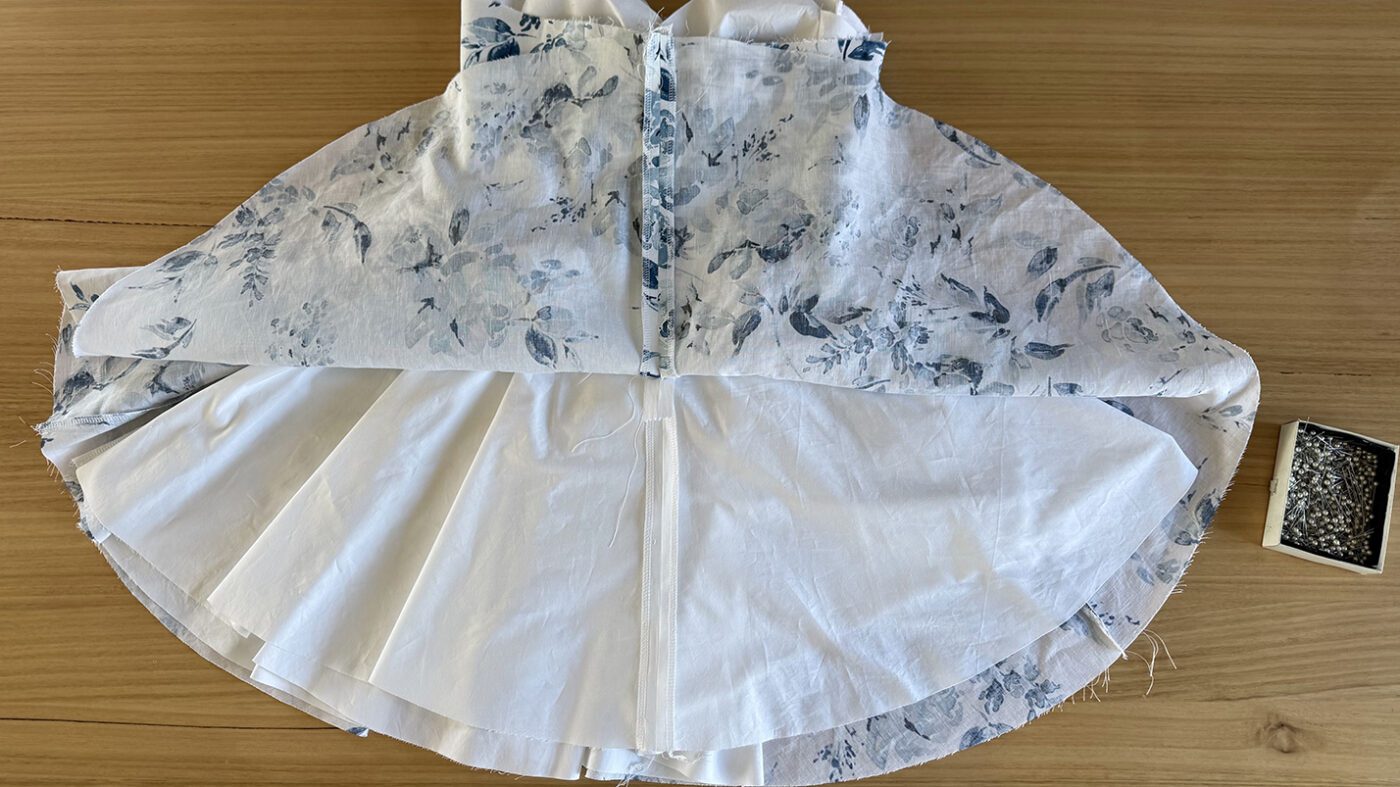
Turn the garment back inside out and place the lining inside so that the right sides of the fabric are facing. Pin the lining to the zipper so that the zipper is sandwiched between the main and lining.
Step 27
Then, using a standard zipper foot, stitch over the original zipper stitch line to secure the lining.
Step 28
Next, pin the seam allowance of the centre back seam closed below the zipper on the main and lining.
Step 29
Stitch closed with a 1.5cm seam allowance.
Step 30
Then press the seams open, at the same time, press the zipper seams flat.
BODICE TOP EDGE
Step 31
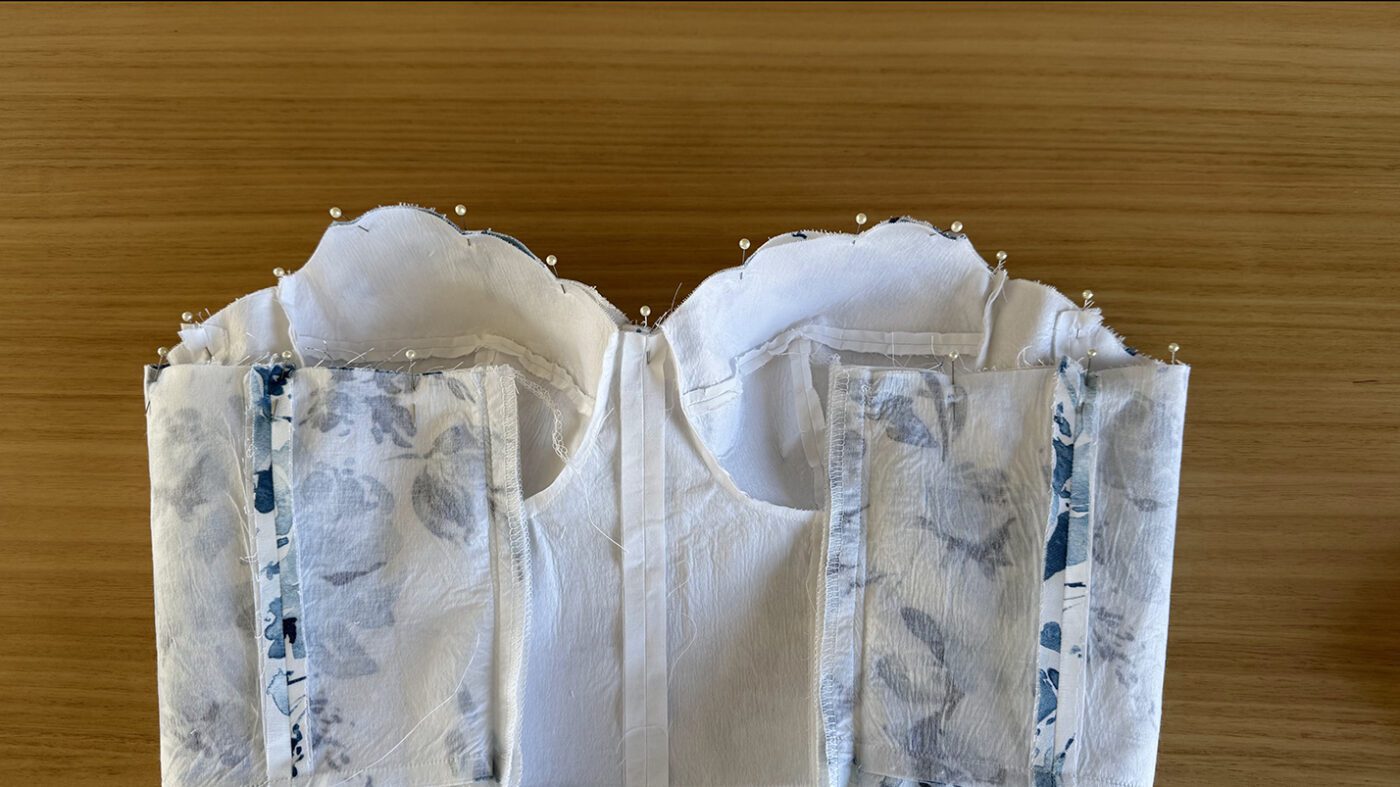
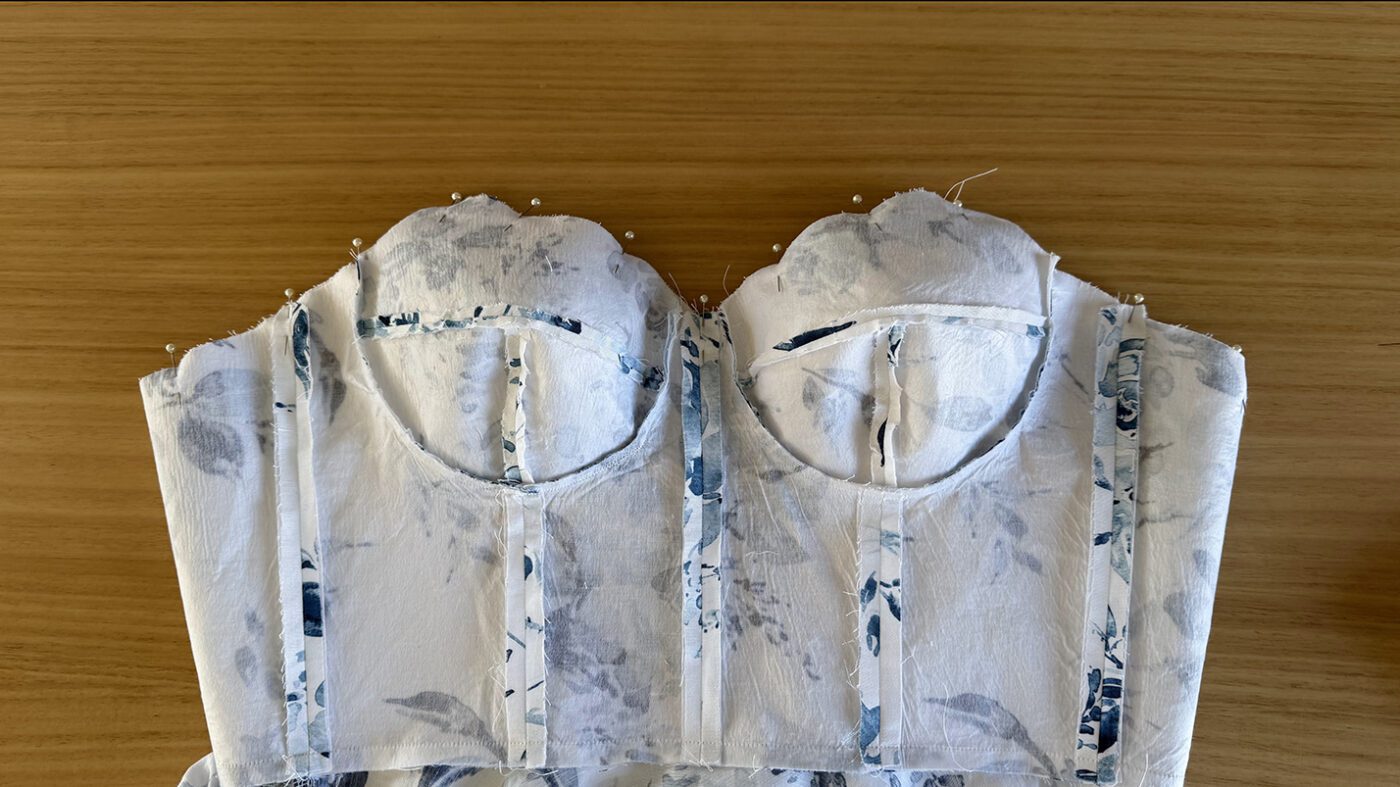
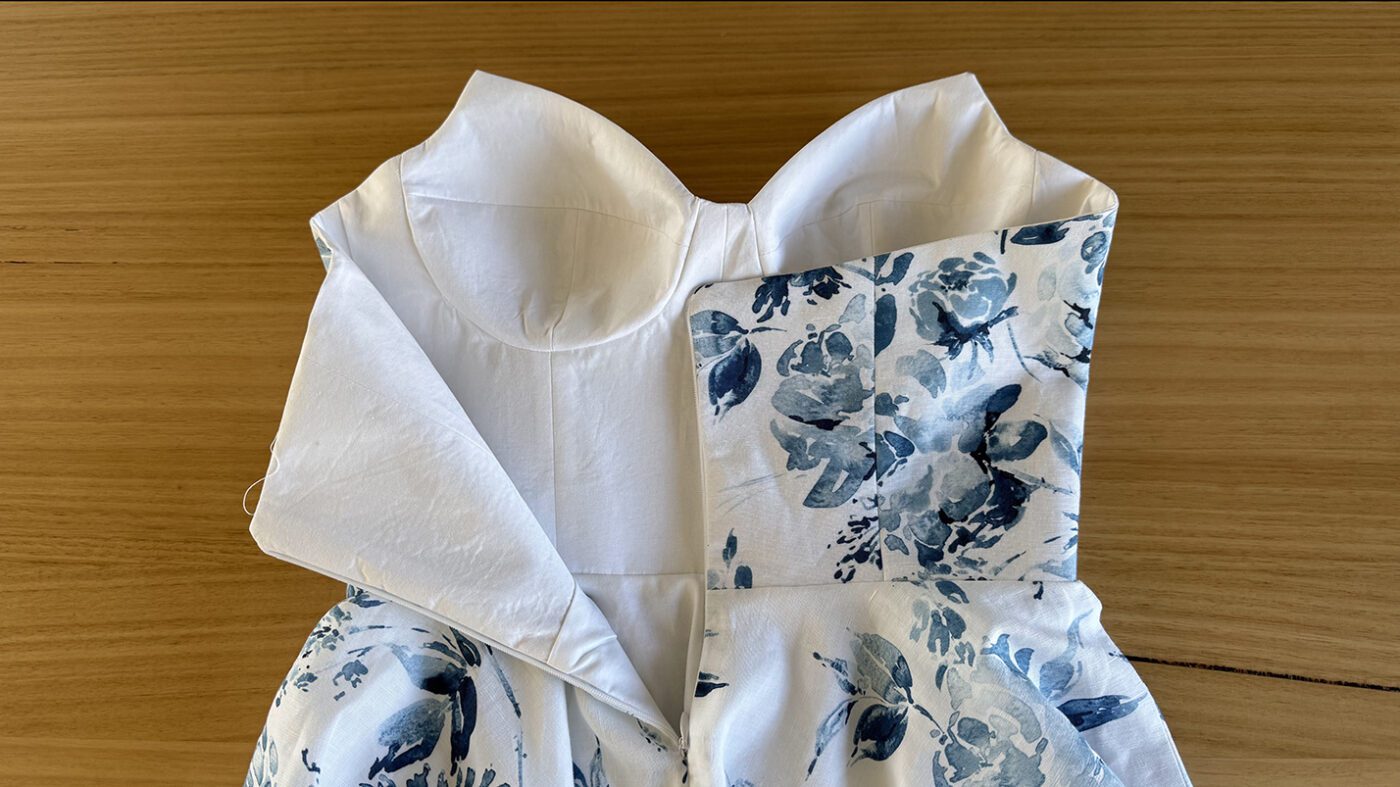
Next pin the main and lining together along the top edge of the garment ensuring all seam junctions line up.
Step 32
Stitch closed using a 1cm seam allowance.
Step 33
Then clip the seam allowance. Ensure the CF, bust points and the top of the zipper are clipped correctly so that the garment turns through neatly.
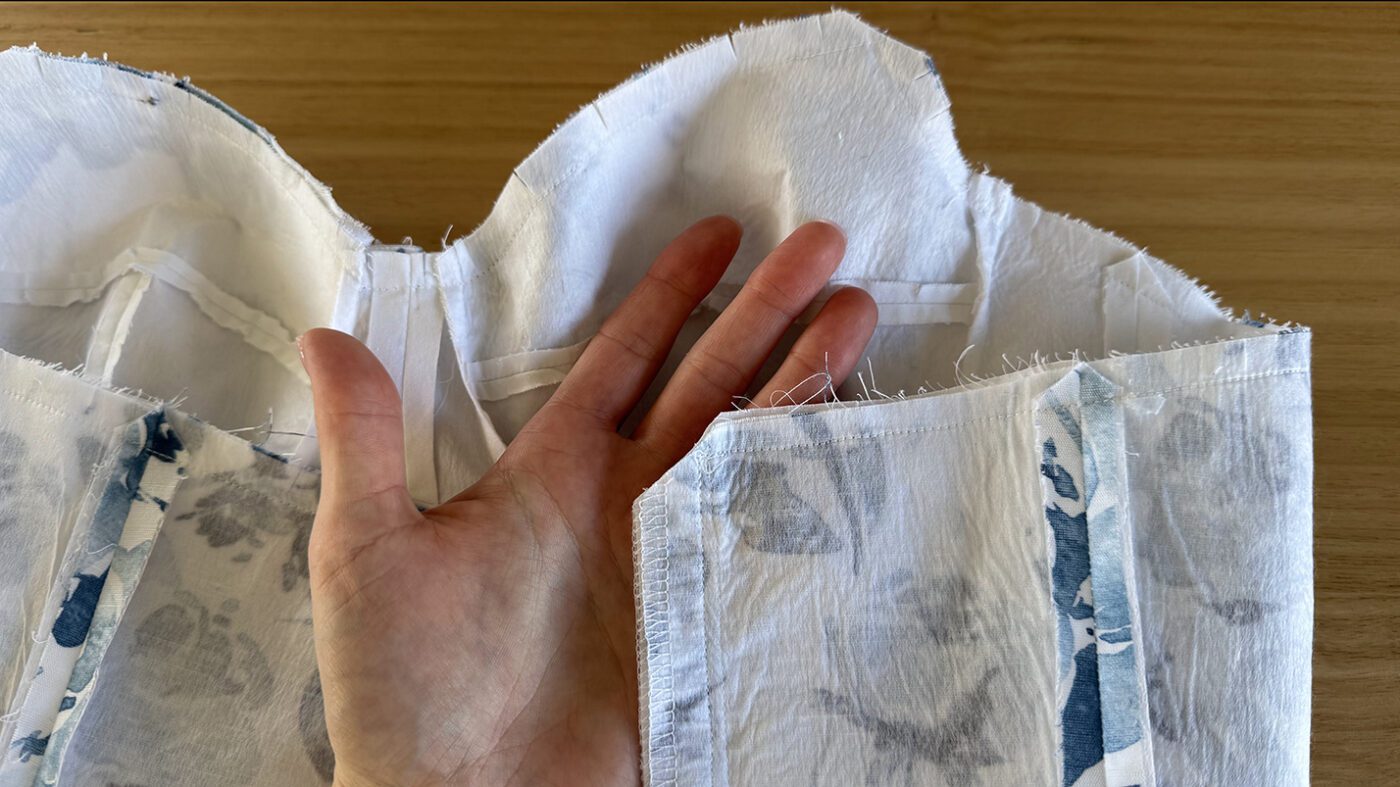
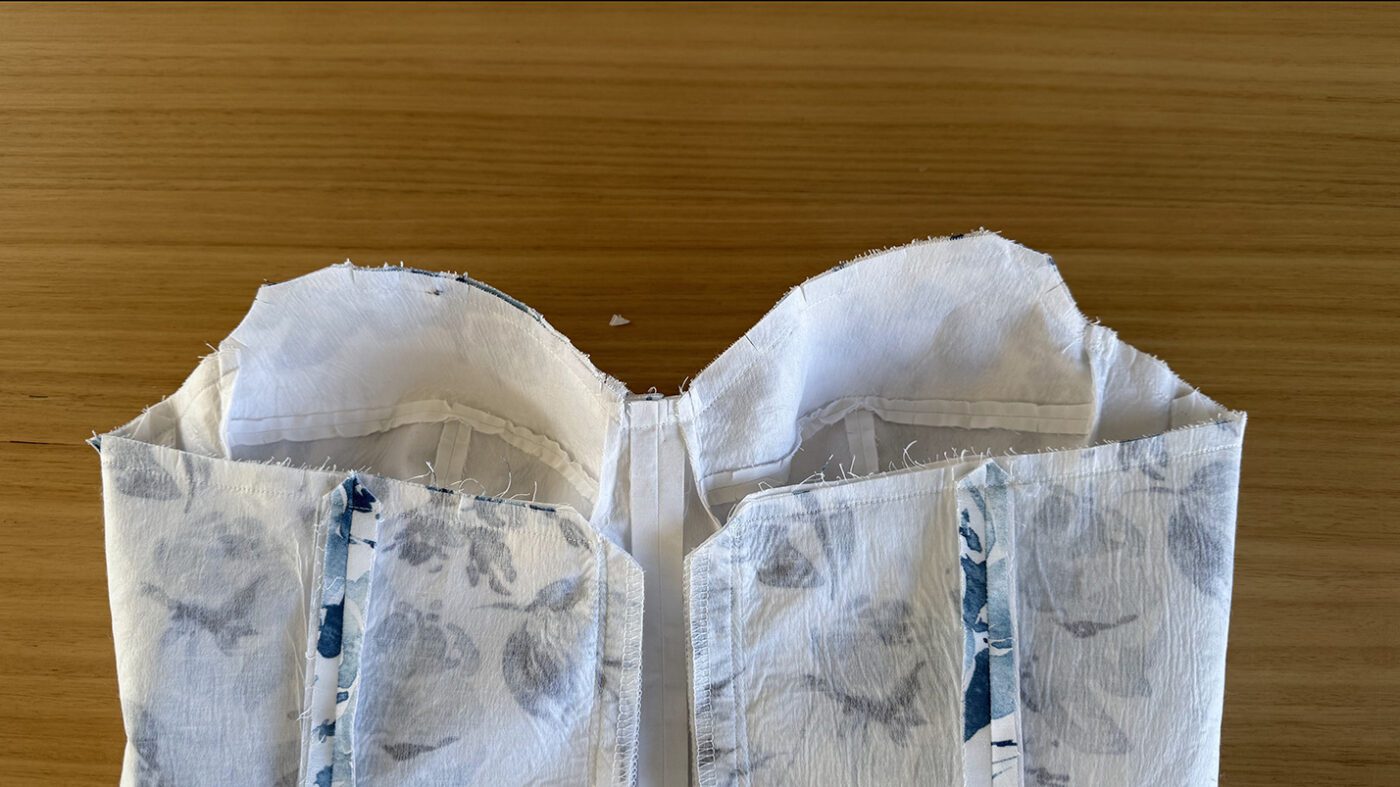
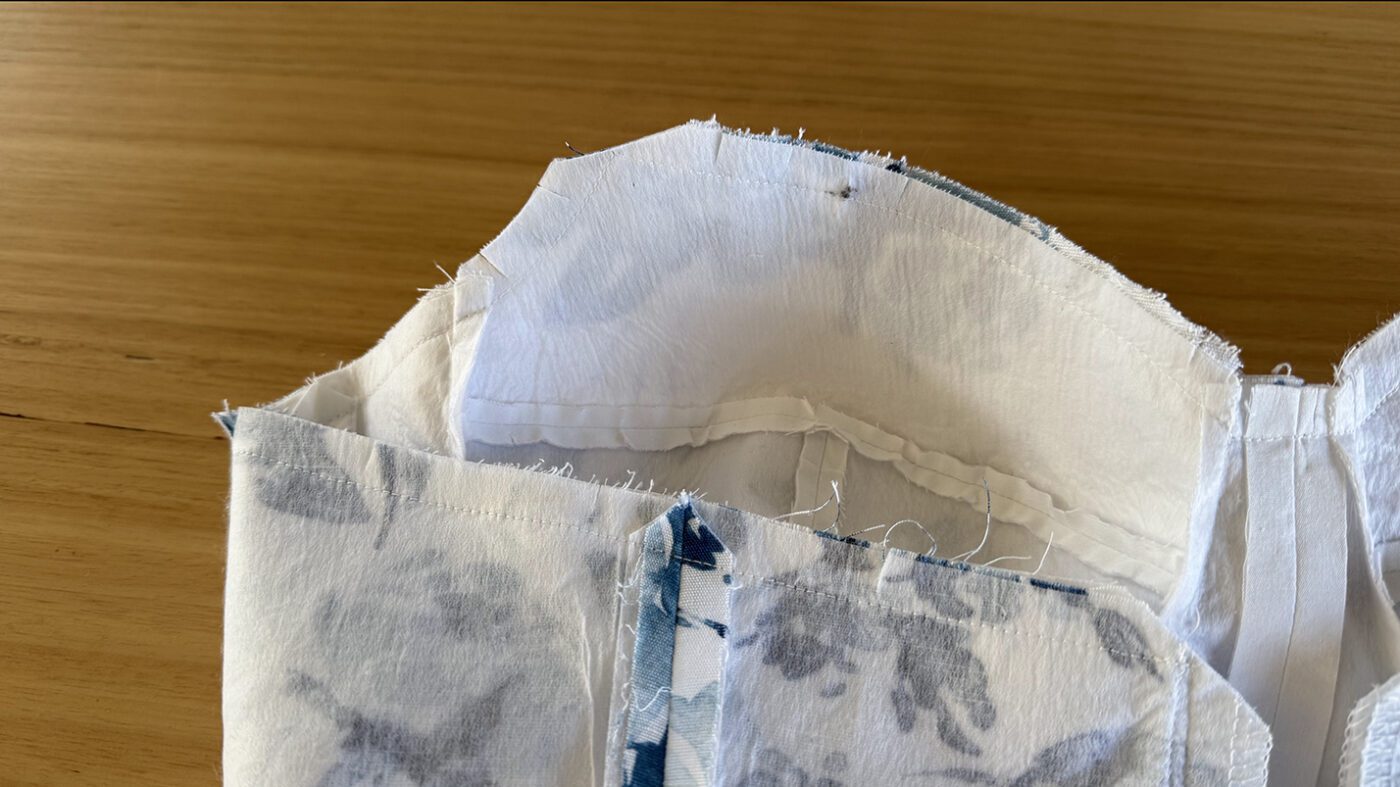
Step 34
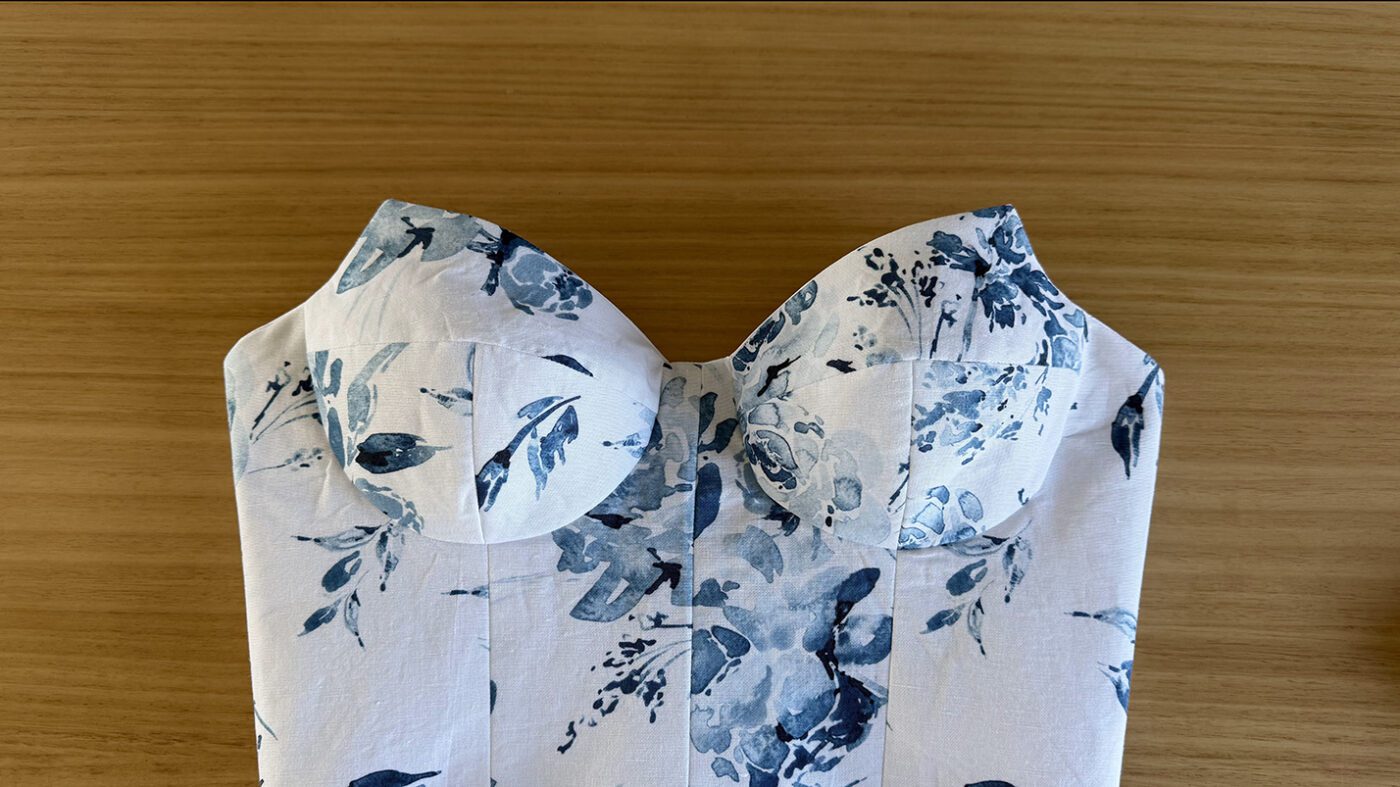
Turn the garment through and press the top edge well.
HEM
Step 35
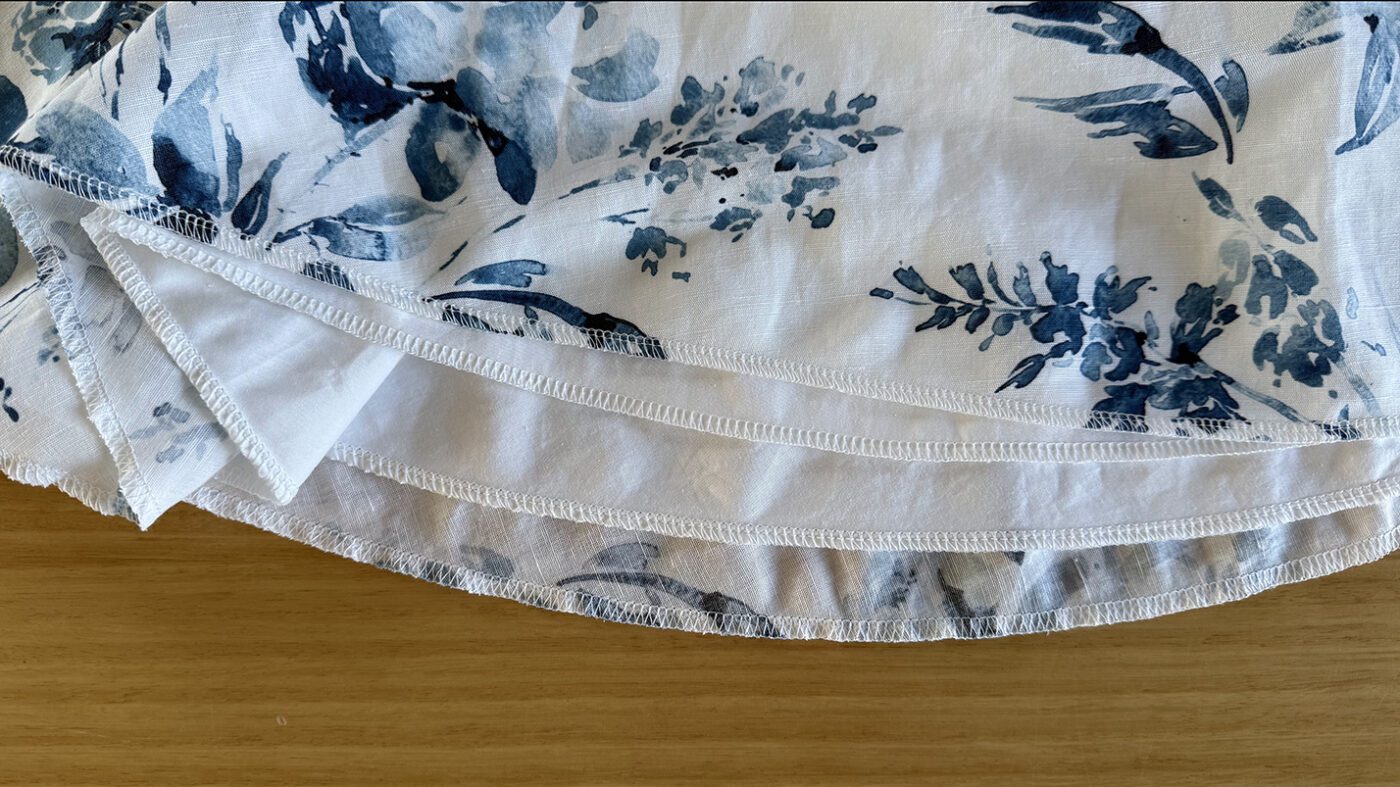
Overlock the hem of the main and lining fabric from the right side of the fabric.
Step 36
Fold the hem of the main and lining over 1cm and press.
Step 37
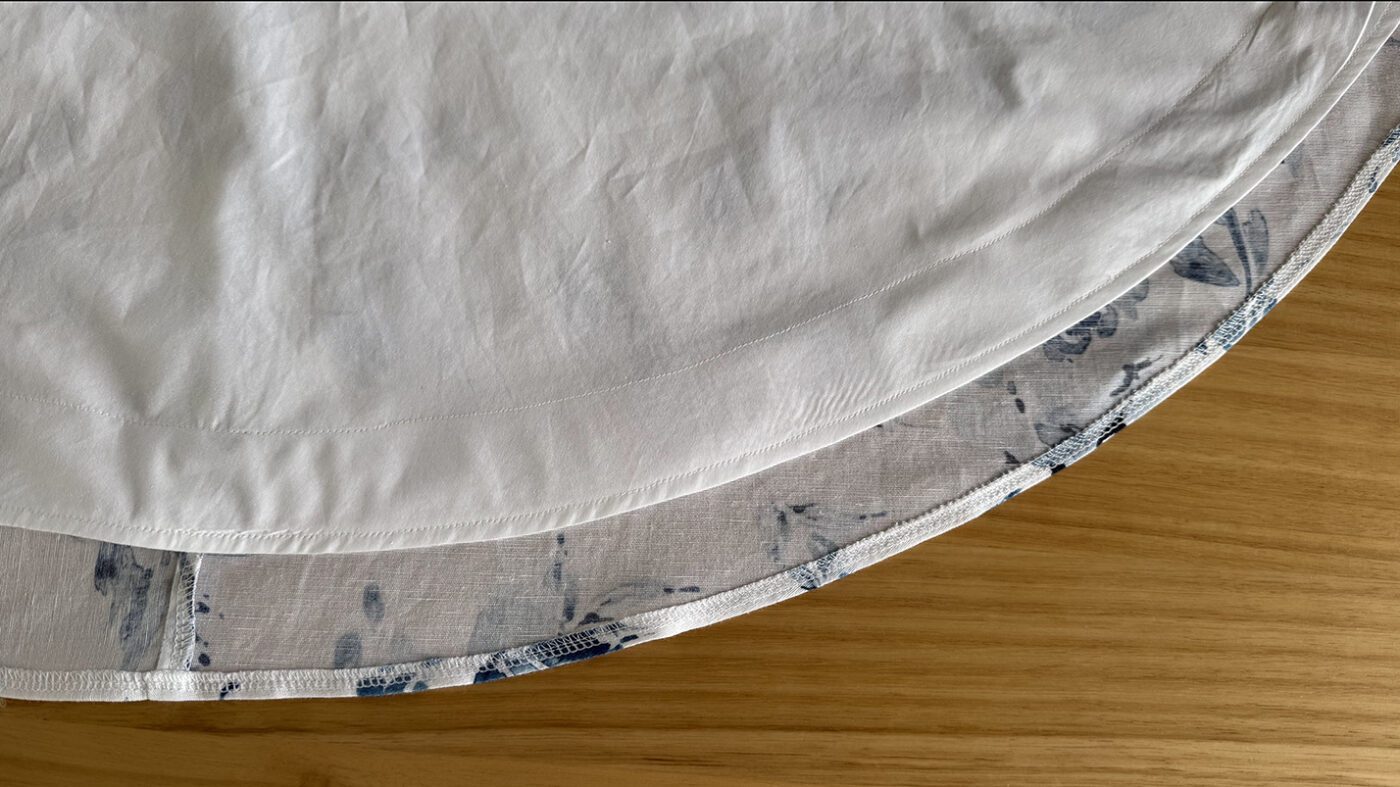
Stitch the main of the hem to secure.
Step 38
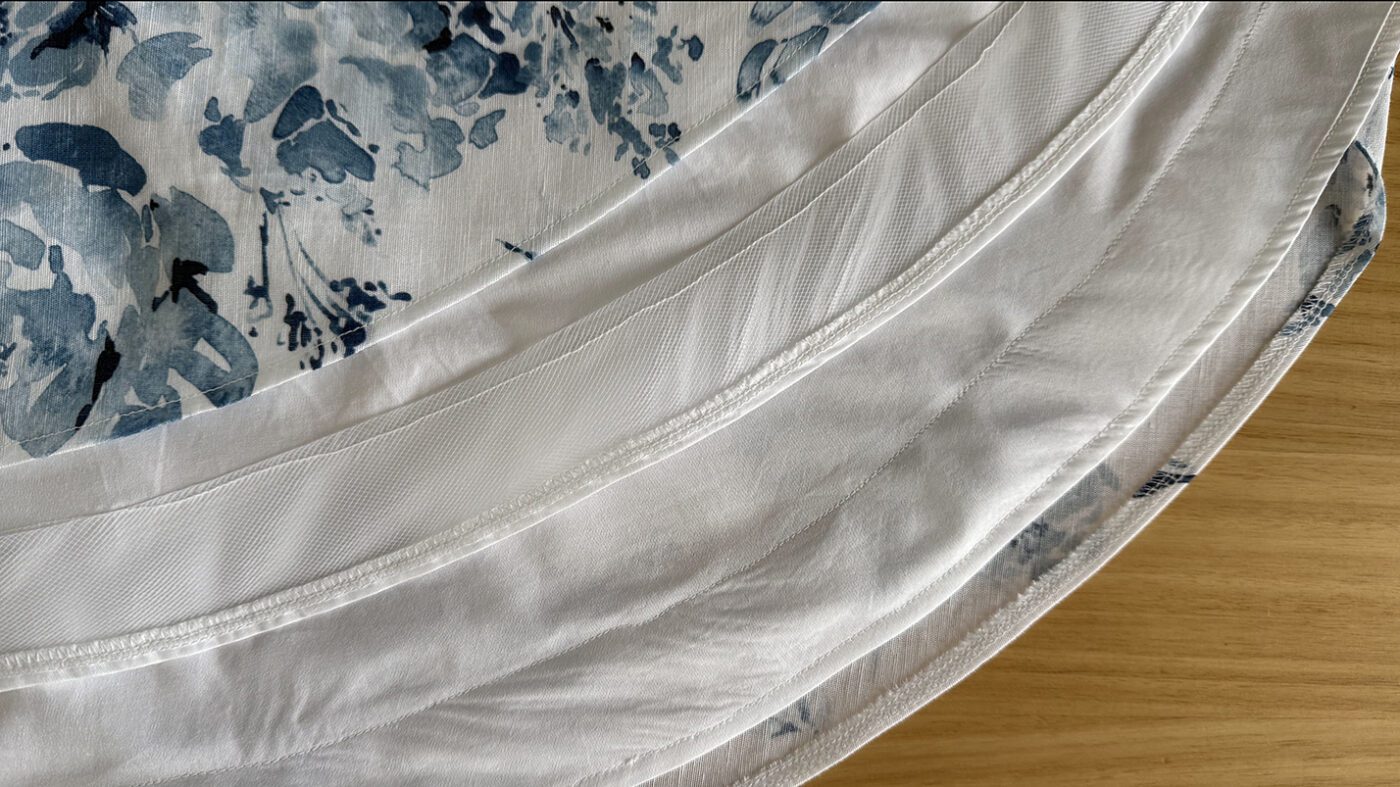
Stitch the lining hem, inserting the horsehair braid as you sew. If you are using a wider horsehair braid, I recommend stretching it slightly as you sew to make step 39 easier.
Step 39
Then stitch the top edge of the horsehair braid down. Using a ballpoint needle is recommended here however, if you sew slowly, a standard needle can be used.
Step 40
If choosing not to use horsehair braid, the lining hem can be hemmed the same way as the main fabric.
OPTIONAL BUST CUPS
The next steps are to show how to add padded bust cups if you wish to add them.
Step 41
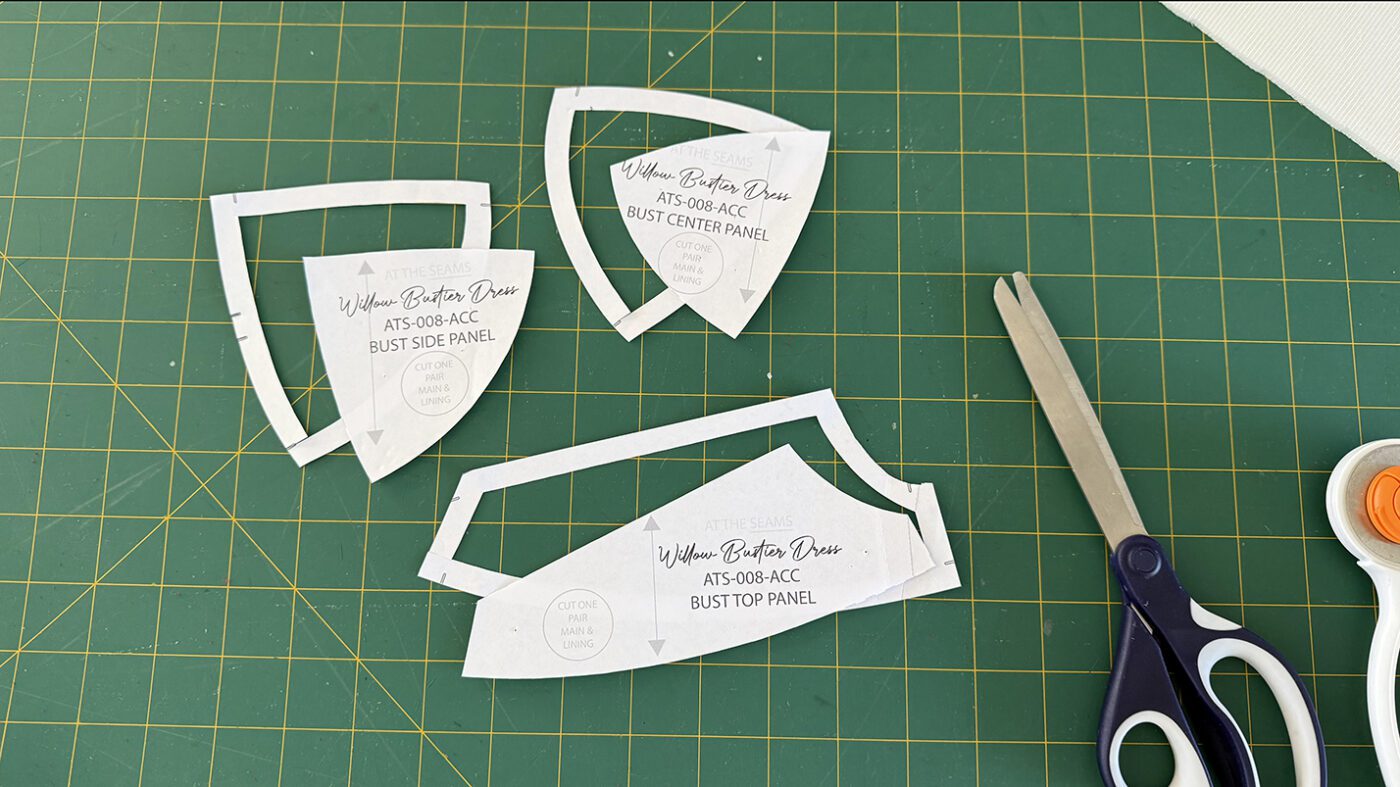
Using the same bodice pattern pieces, take the 3 bust cup pieces and cut off the seam allowance.
Step 42
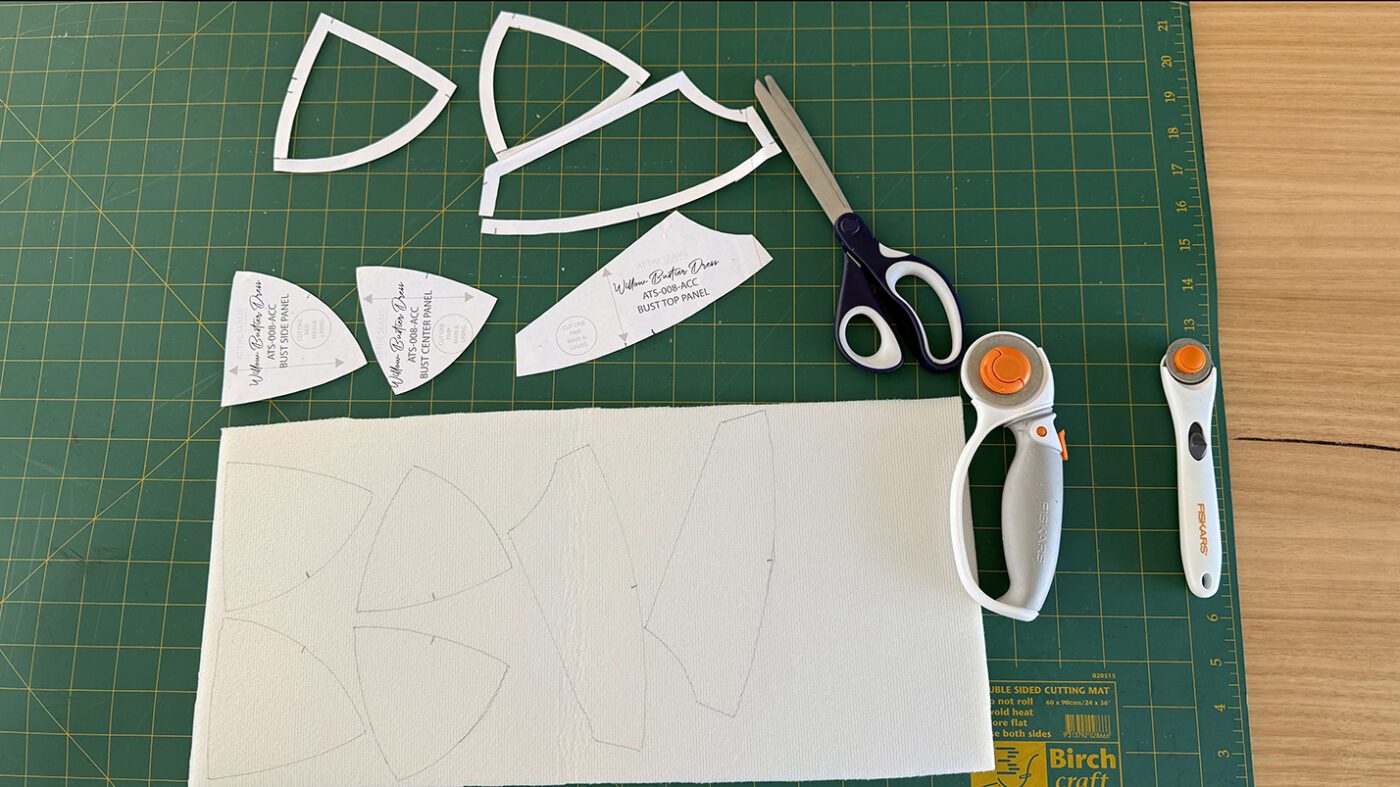
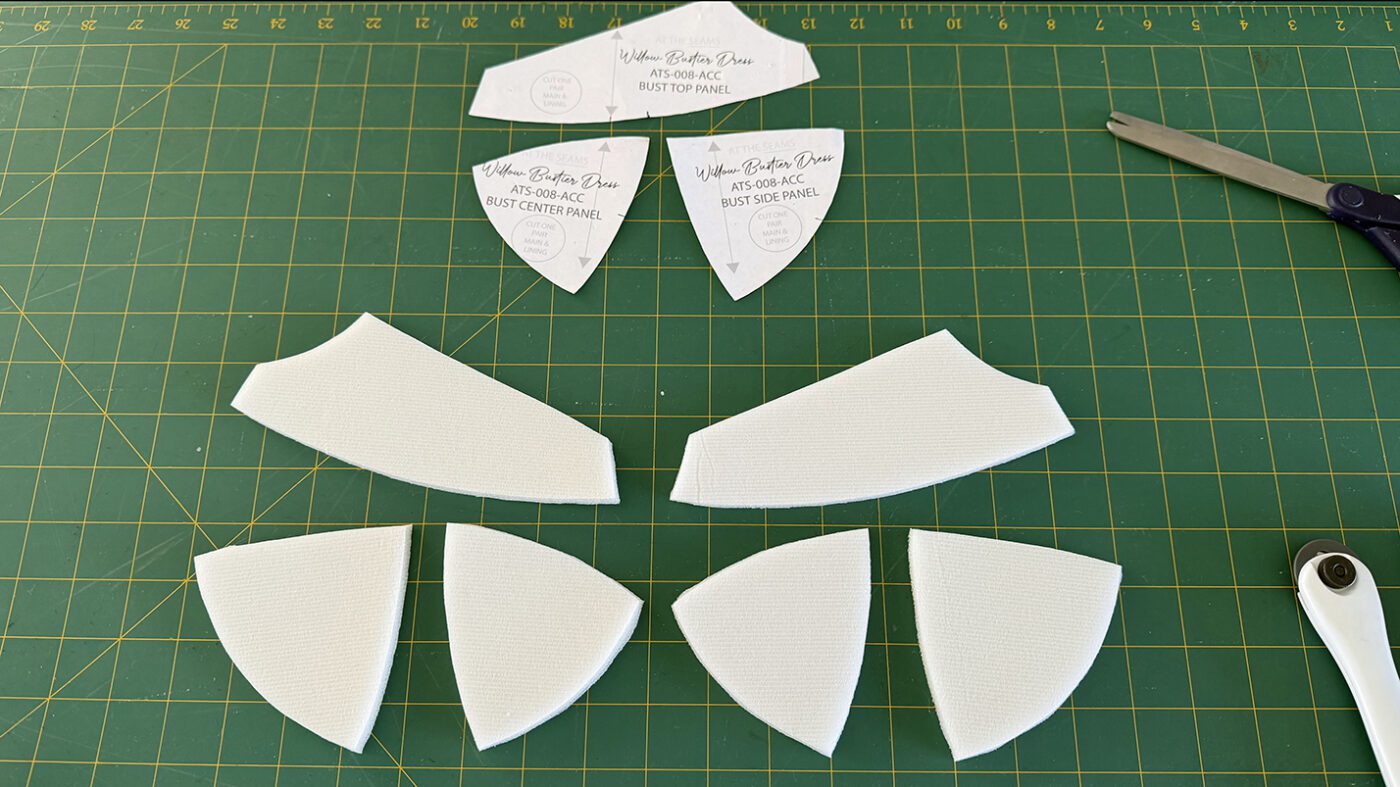
Then, using these pieces, trace them onto your foam using the same cutting instructions as the main. Once you have cut the pieces, you should end up with a pair.
Step 43
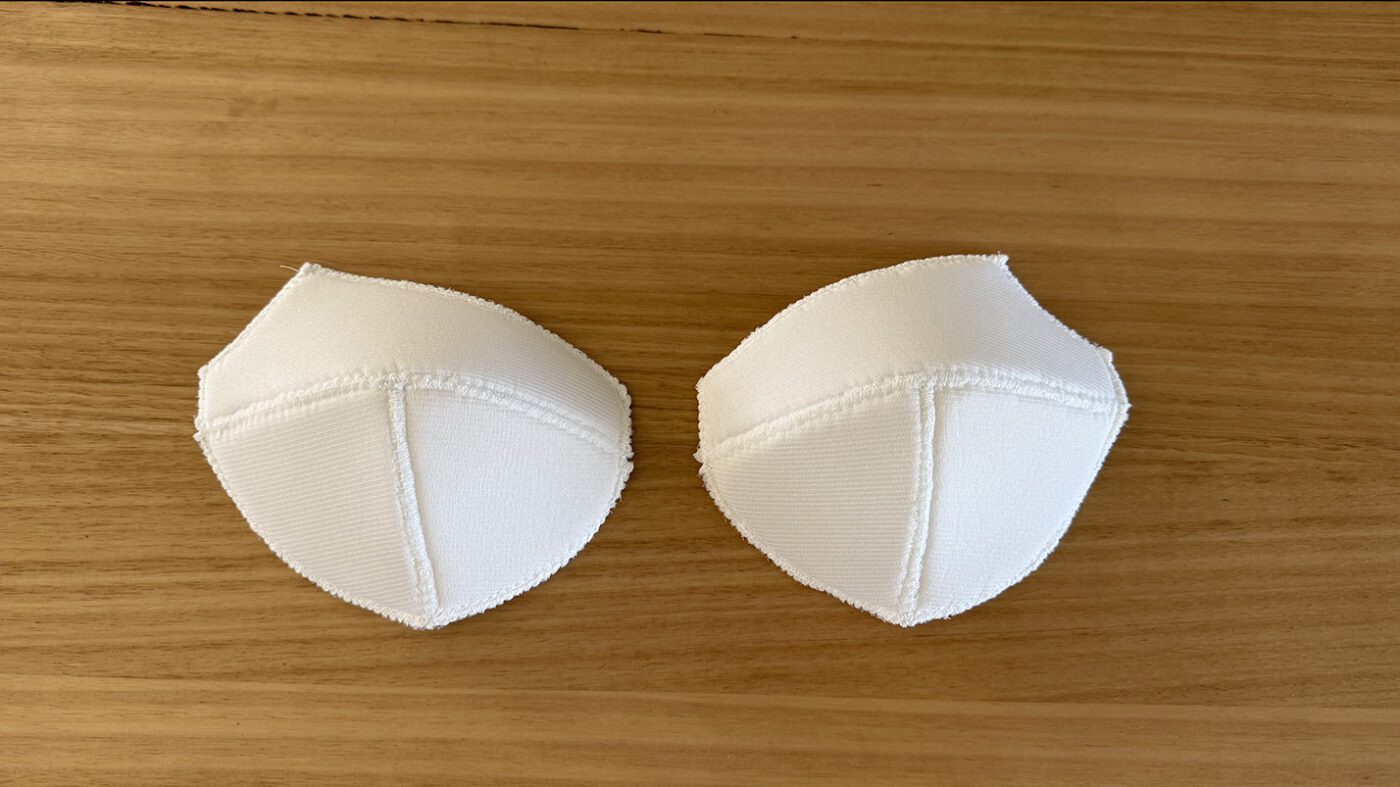
Using a wide zig-zag stitch and a stitch length of 1.5, stitch the seams of the cups together by butting the edges together. (The pieces will not overlap) You will need to push the edges together as you sew since they are curved.
Step 44
Then zig-zag along the outside edges of the cups to flatten the edges.
Step 45
Insert the cups into the dress between the main and lining.
Step 46
Then hand sew the underbust seam of the main and lining together to prevent the cups from moving.
Your Willow Bustier Dress is now complete.
I also have a number of other patterns where you can practice your sewing skills, which are available for purchase here.
I’d love to see your creations, feel free to tag me on Instagram at @at_the_seams_patterns
x
Want to stay up to date with new information and pattern releases? Join the community below: