Dresses, Sewing Tutorials
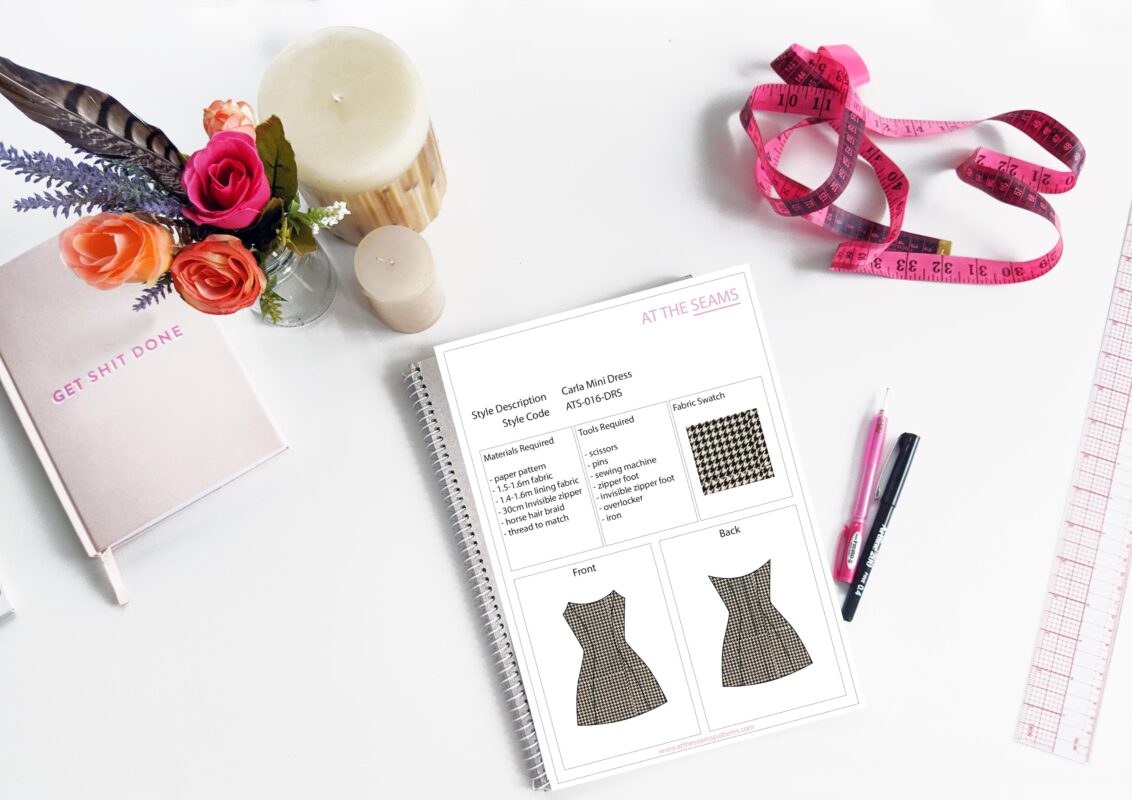
Sewing Tutorial: Carla Mini Dress
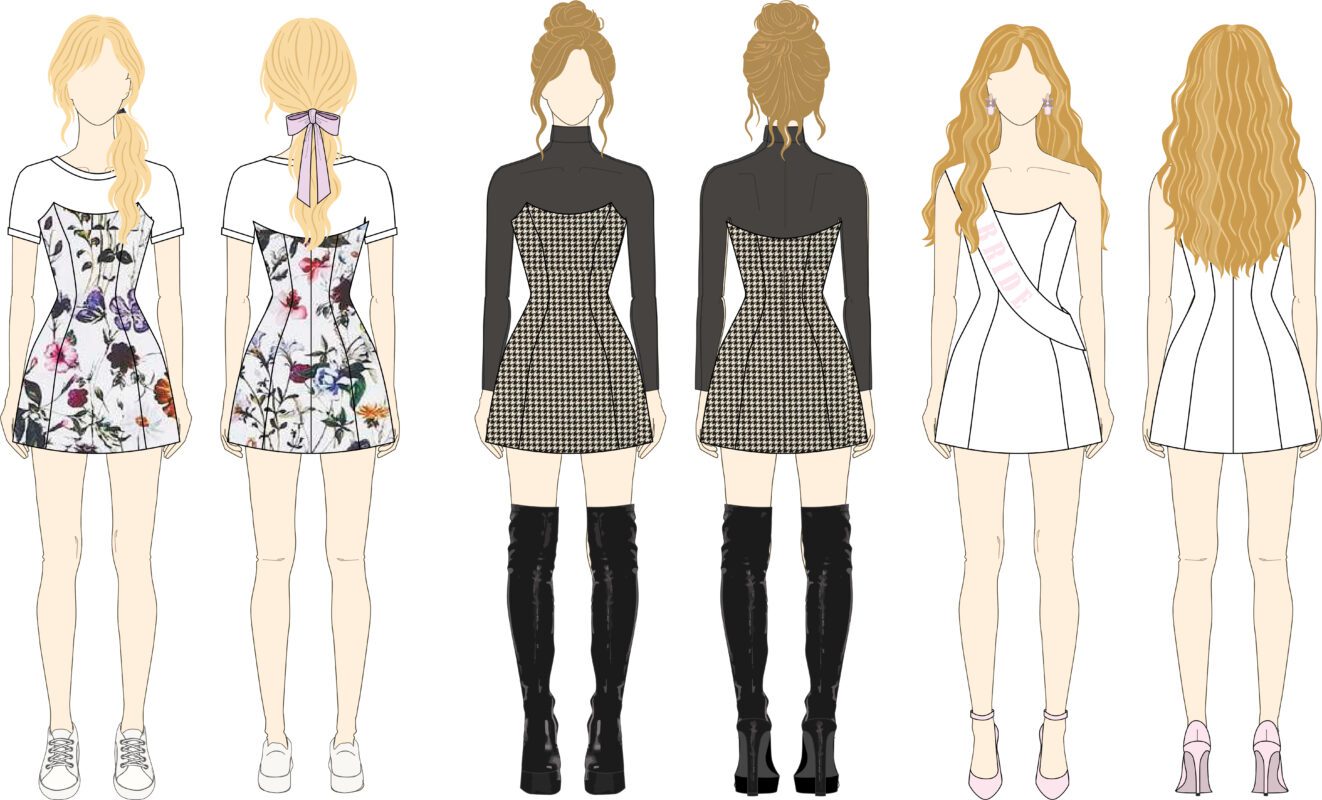
Elevate your handmade wardrobe with the Carla Mini Dress, a modern, flirty silhouette designed for sewists who love timeless style with clean finishes. The dress is fully lined and bagged out on the top edge with a center back invisible zipper.
This PDF pattern features a fitted bodice, flattering princess seams, and a gently flared skirt that hits mid-thigh for the perfect mini length. Alteration lines have been added if you wish to shorten or lengthen the dress. Also, as an added optional extra – Horsehair braid can be sewn into the hem to hold its shape.
Whether you’re dressing up for a special event or creating a chic everyday piece, the Carla Mini Dress adds the perfect touch of polish. Make in floral for a cute summer dress, darker heavier fabrics for winter worn with tights and boots and a nice coat, or even white for a hens or reception dress. This dress covers all occasions.
SEWING ABILITY
Intermediate (must be able to sew an invisible zipper)
To begin, you will need the following things:
Materials
- Carla Mini Dress (XS-XL) paper pattern
- Carla Mini Dress (XL-5XL) paper pattern
- 1.5m fabric (XS-XL) 1.8m fabric (XL-5XL)
- 1.4-1.8m lining fabric
- 30cm Invisible zipper
- horse hair braid
- cotton thread (enough to also thread your overlocker)
Tools
- scissors
- pins
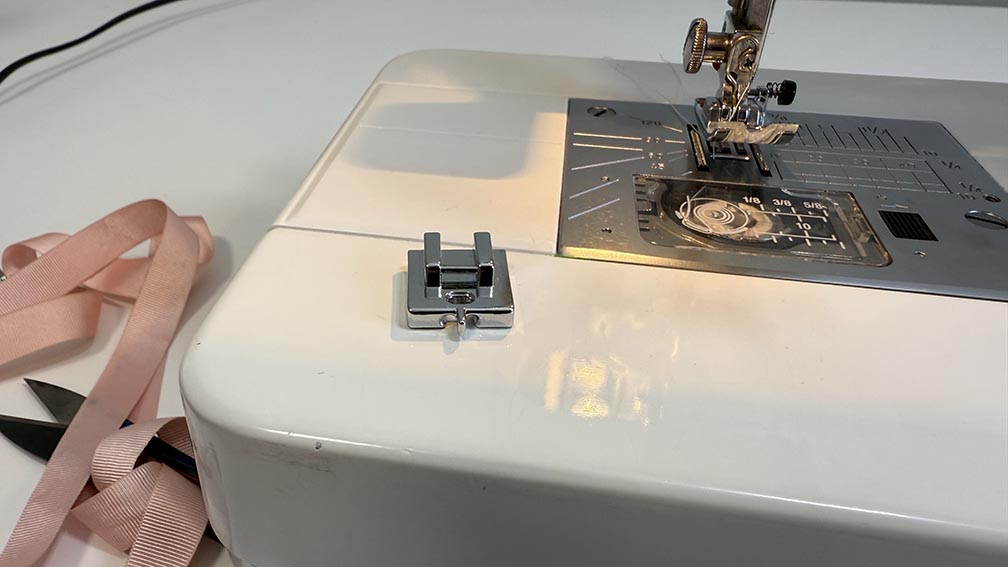
- sewing machine with a standard foot
- regular zipper foot and invisible zipper foot
- overlocker
- iron
Fabric Requirements
The Carla Mini Dress can be made up in almost any mid to heavy-weight woven dress fabric, depending on how you will wear it, linens and cottons for spring, or tweed, wool blends, courduroy or even leather for winter.
Tips
- Ensure your fabric is washed, dried, and pressed before you start cutting. There is nothing worse than washing your beautiful garment and it shrinks, or even more annoying, the lining shrinks and the main doesn’t, so it’s all pulled out of shape and is unwearable.
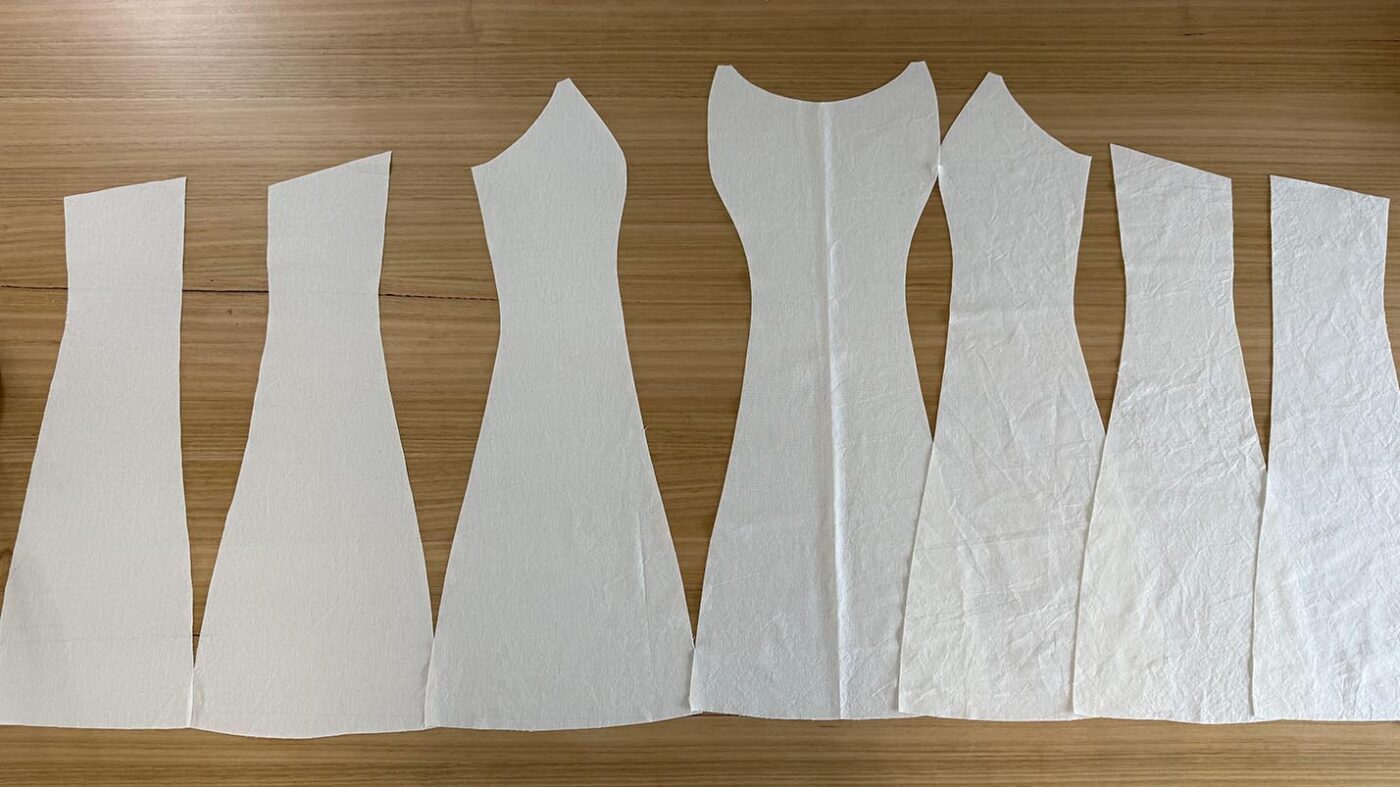
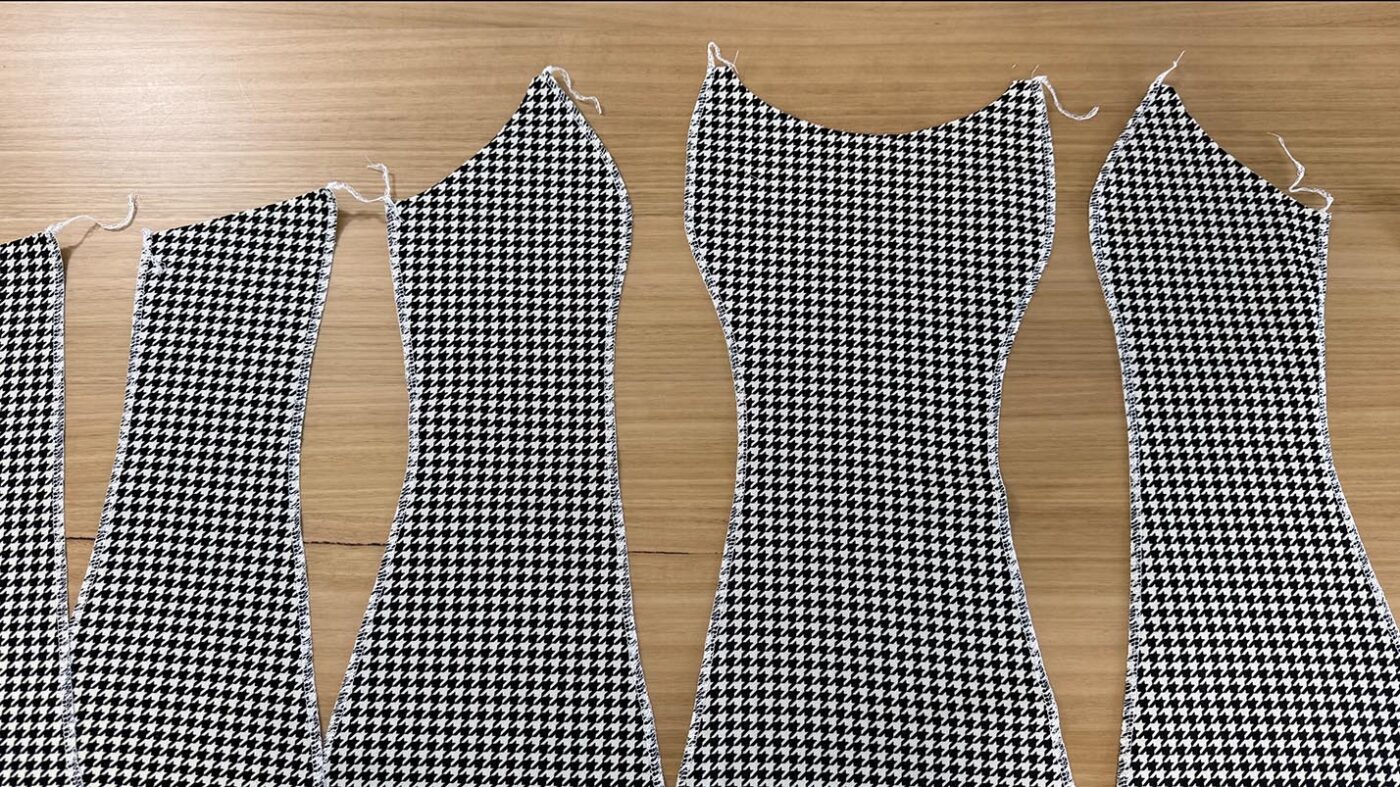
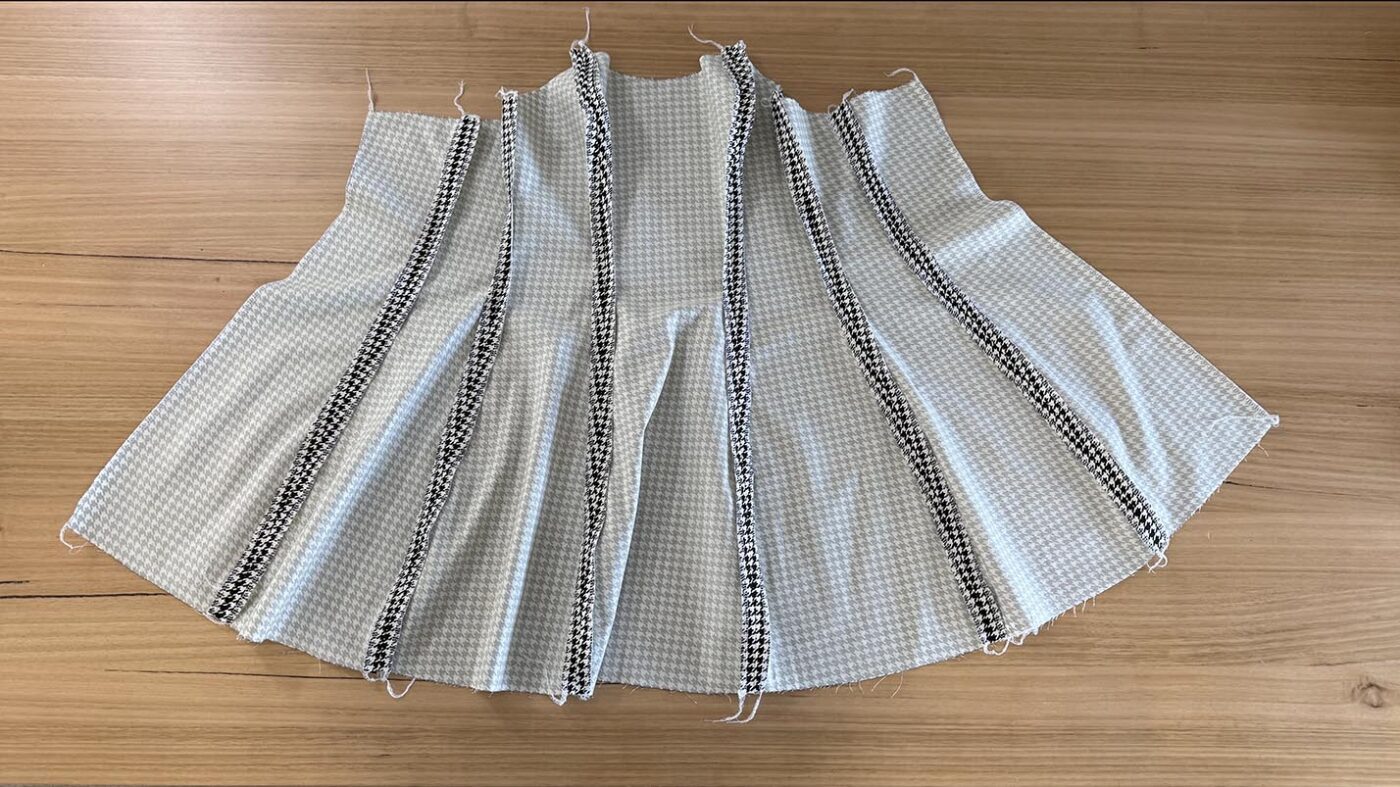
Step 1
Cut all main and lining pieces accurately on the correct grain, ensuring all notches are clipped. Please
note that the seam allowance is marked on the pattern and is listed on page 2 of the booklet provided.
Beginner tip* If you can afford to purchase a rotary cutter and cutting mat, I find this more accurate and time-efficient.
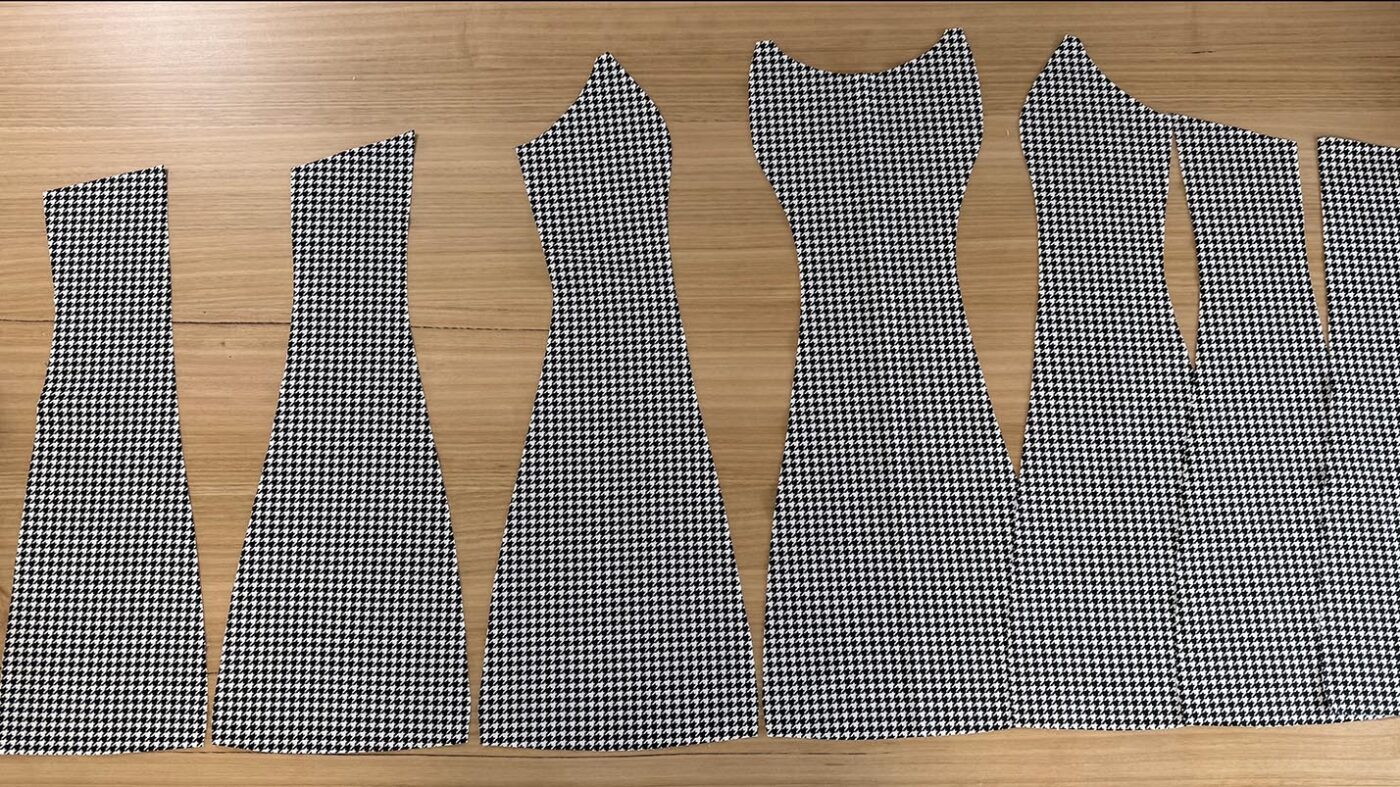
PANEL SEAMS
Step 2
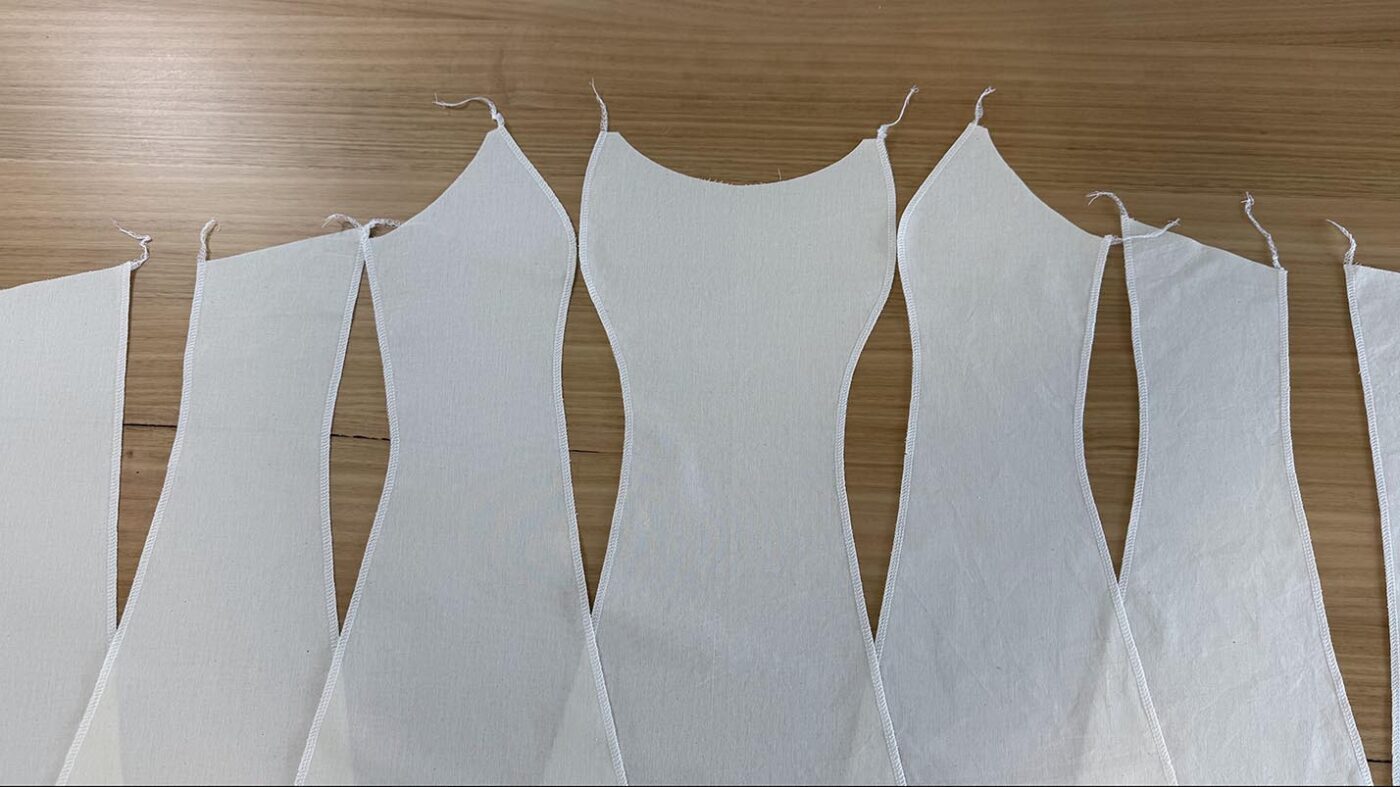
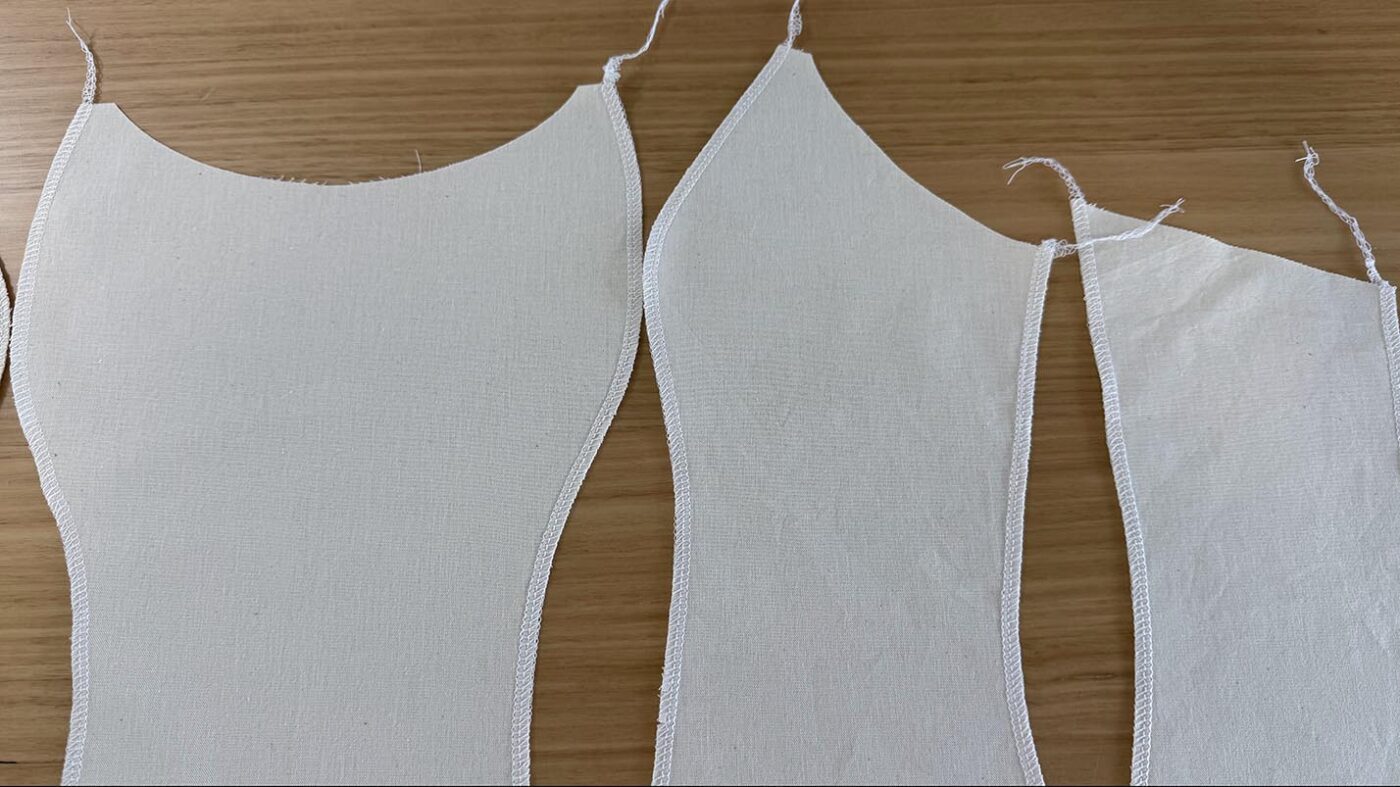
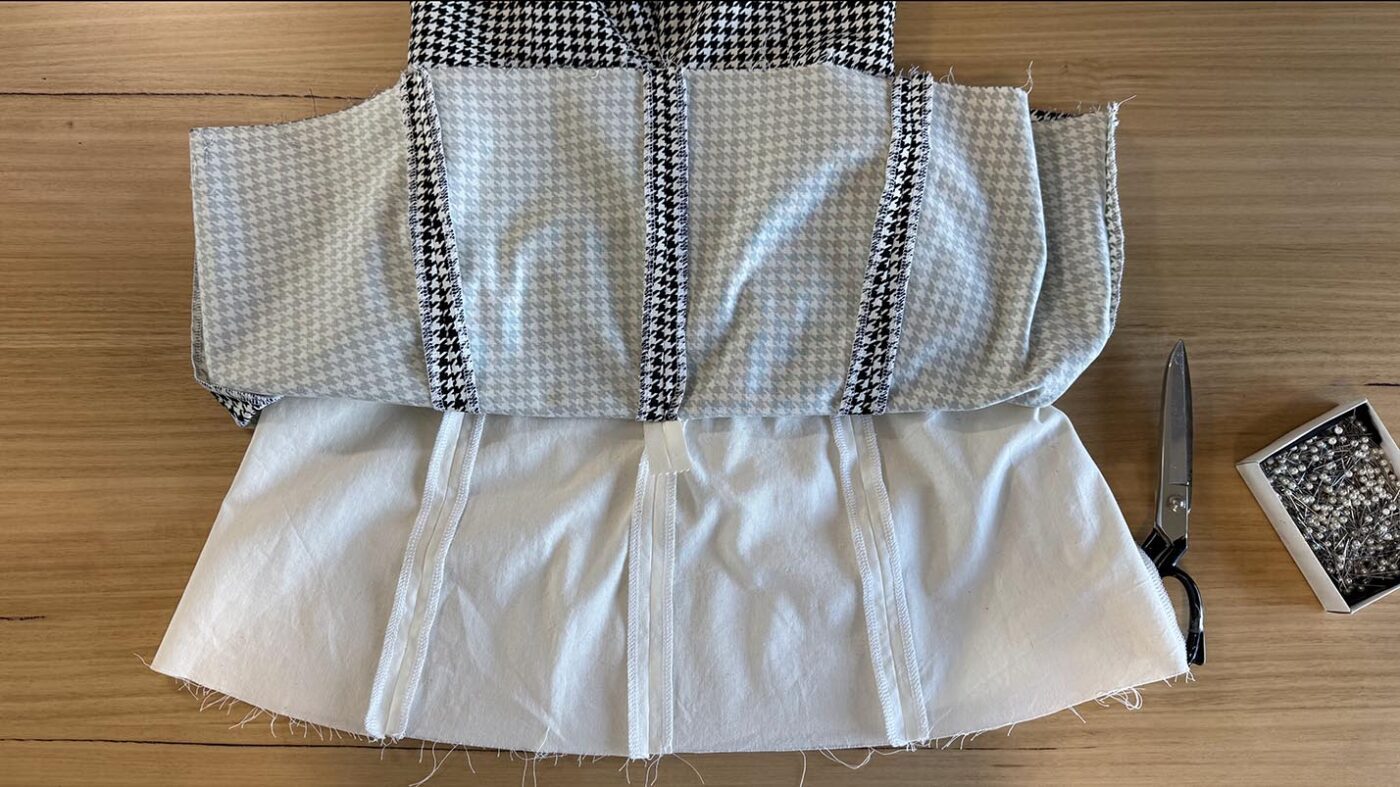
Overlock all vertical edges of the main and lining pieces from the right side of the fabric.
It is a good idea to press your pieces again after this to ensure the overlocking tension has not shortened
the edges.
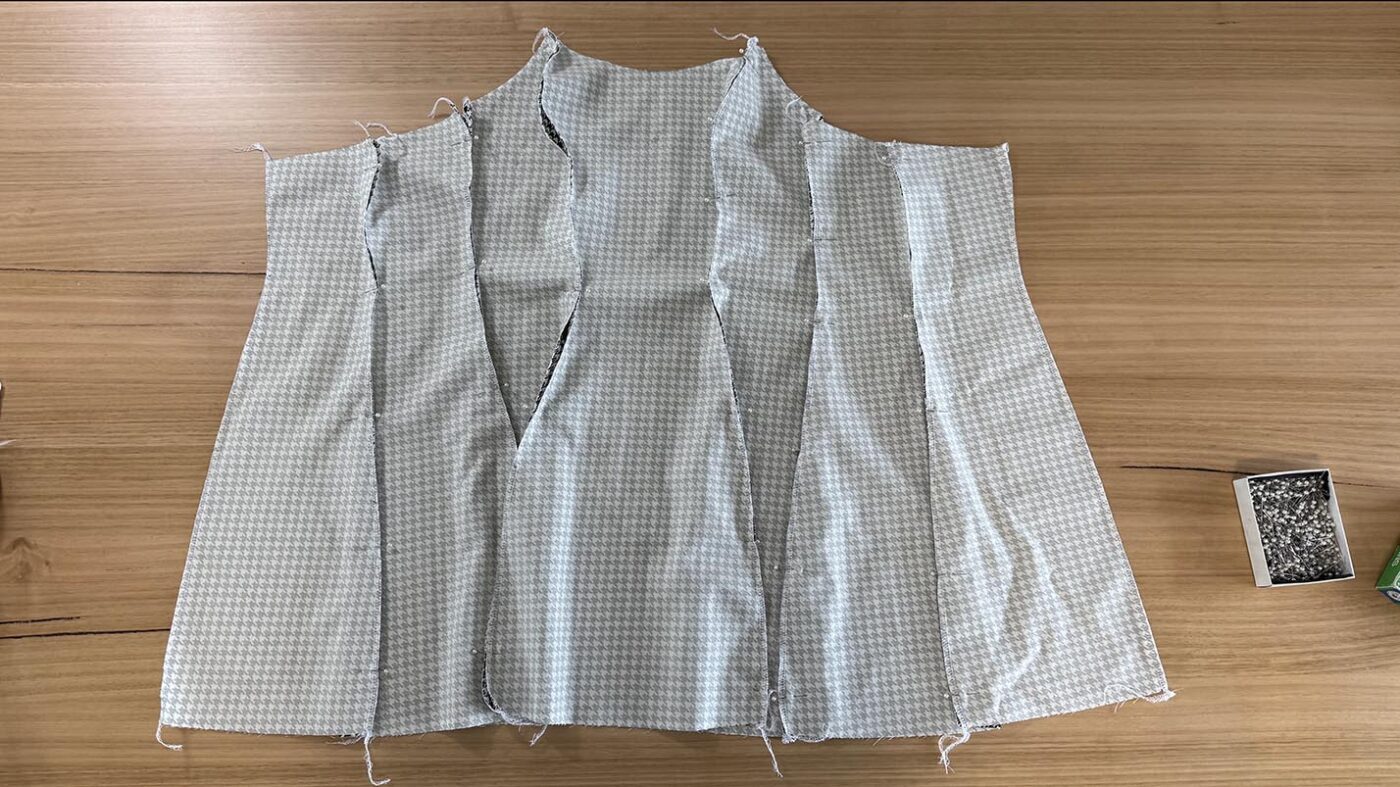
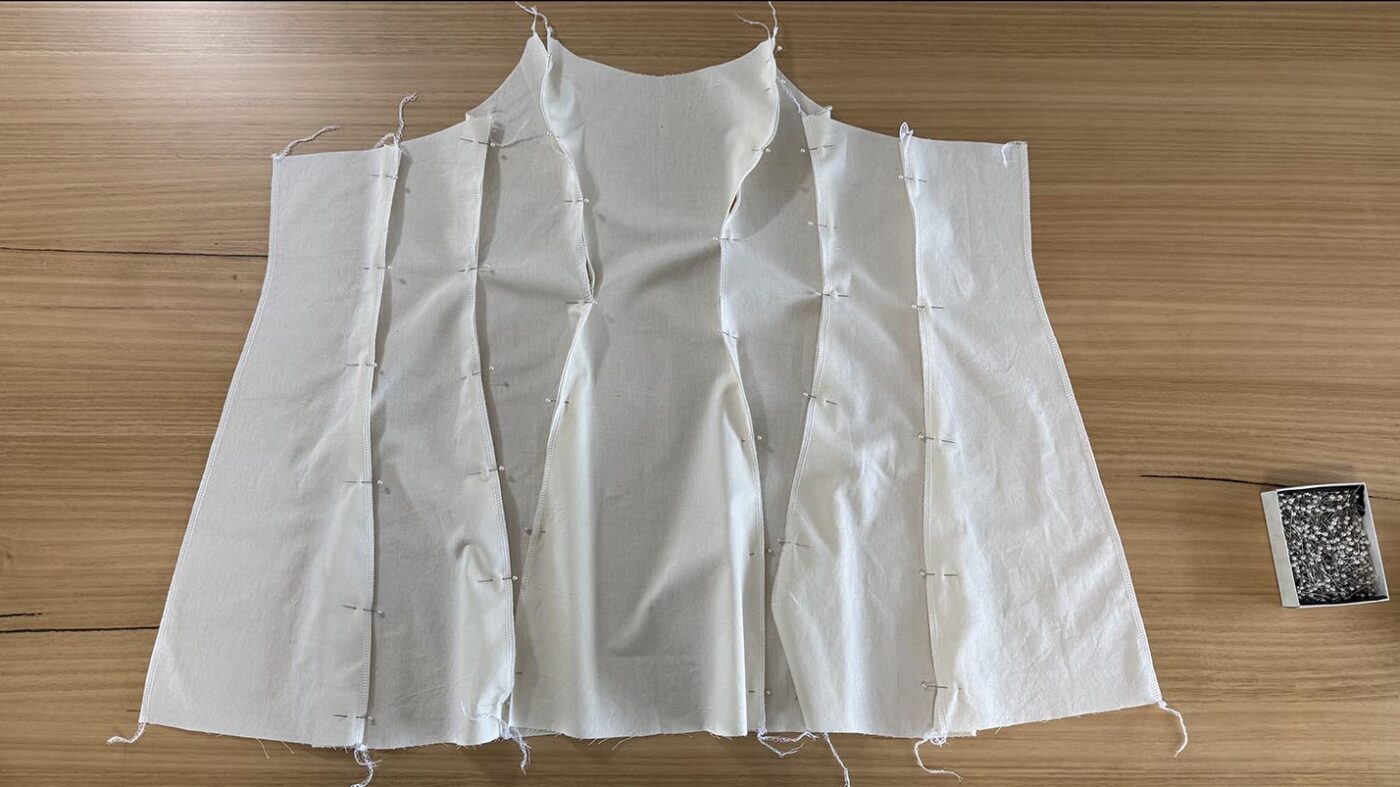
Step 3
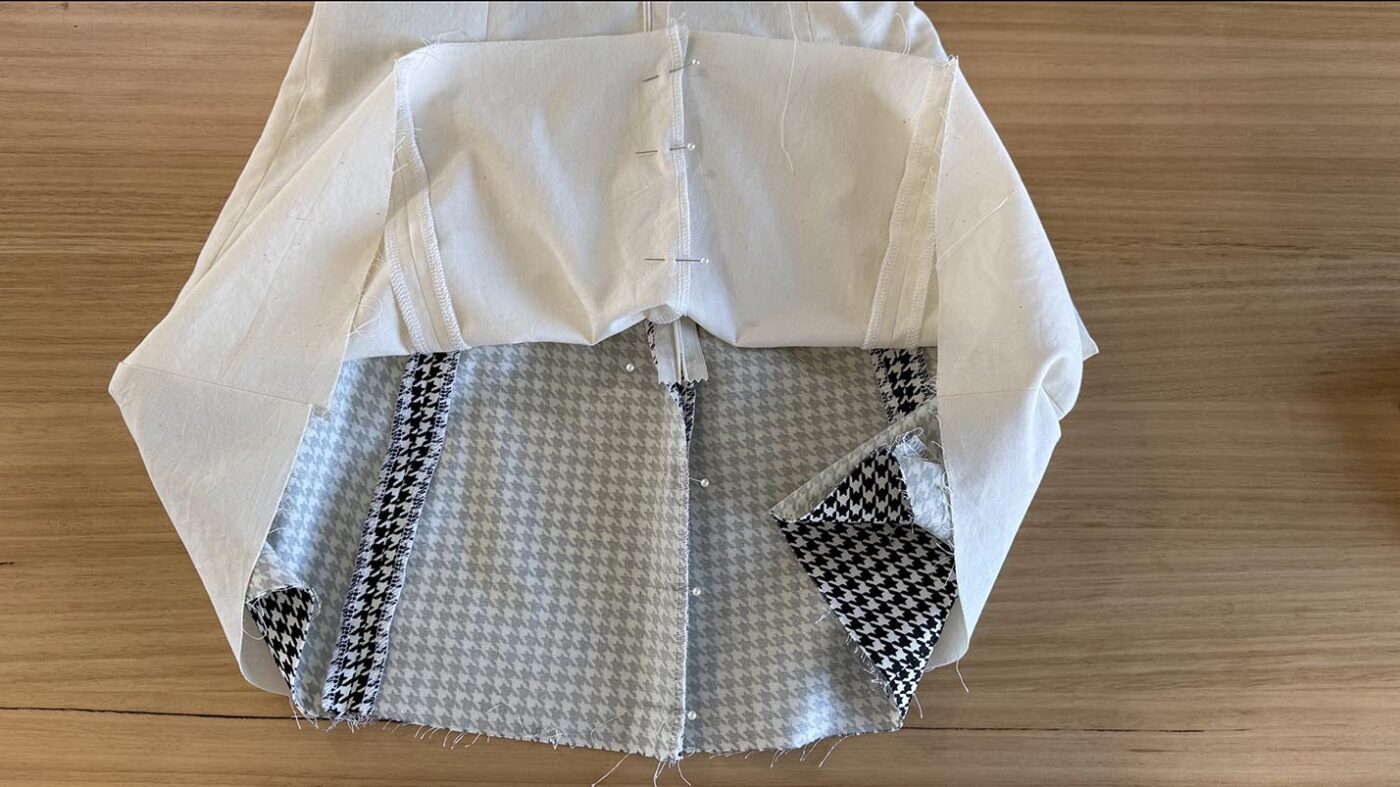
Then, pin all vertical panel seams of the main fabric right sides together, excluding the center back
seam. Use the notches on the pattern to ensure the pieces fit neatly together. (They may be hard to see
after overlocking, so you can mark them with pins or chalk.) Then stitch closed. Press open all seams.
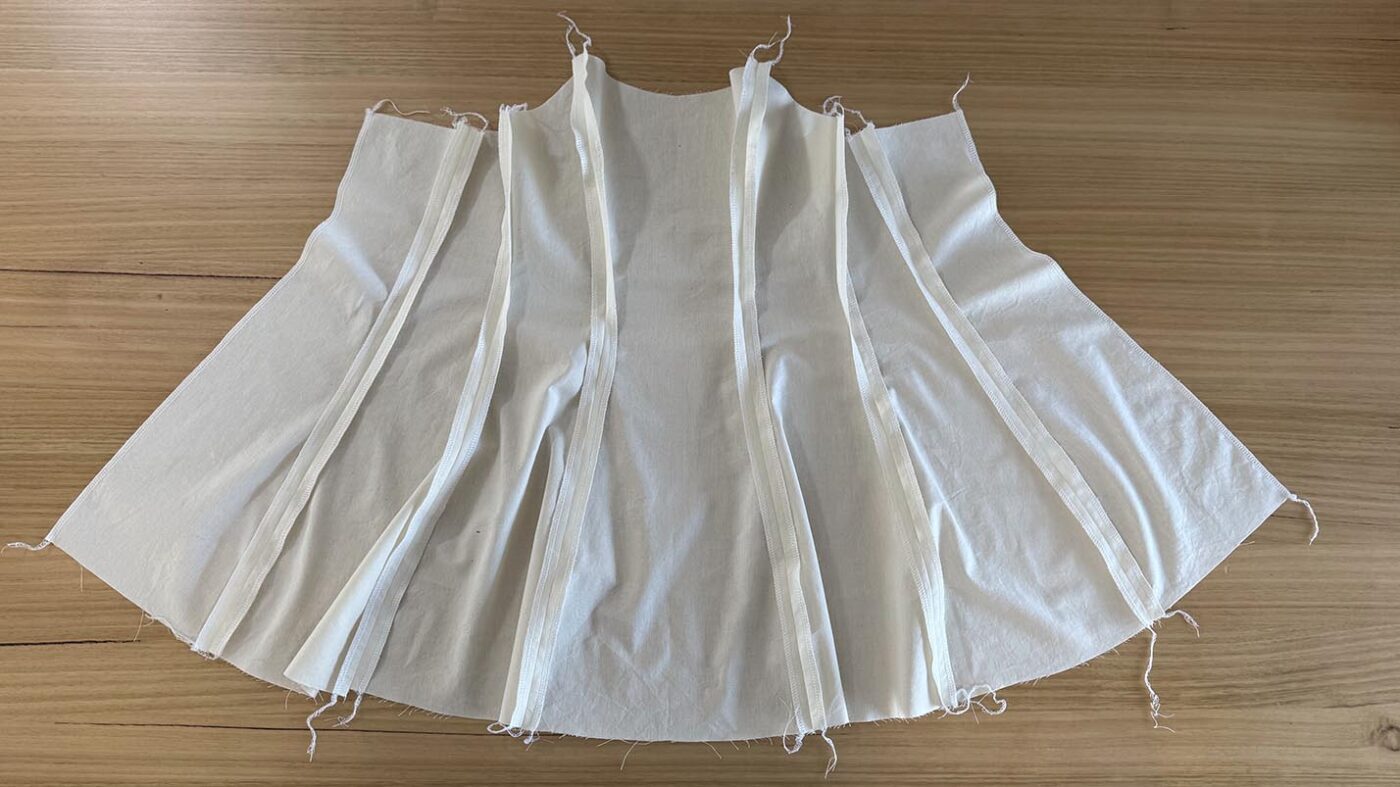
Step 4
Repeat step 2 using your lining fabric.
INVISIBLE ZIPPER
If you need extra help with invisible zippers, there is a more in-depth tutorial here.
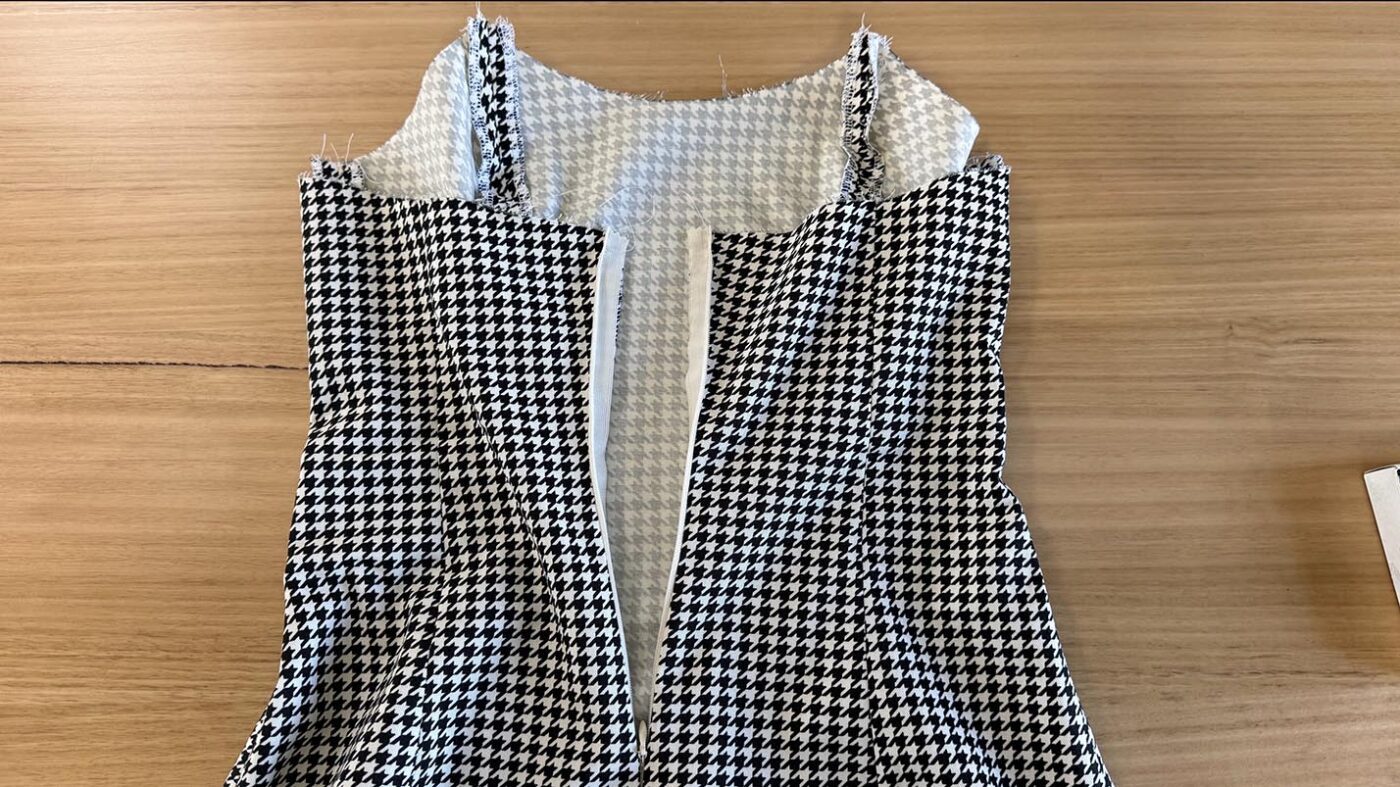
Step 5
Prepare your invisible zipper for sewing by pressing it open.
Step 6
Lay the main fabric part of the dress down on the table right side up and pin the zipper onto the
edges. Take care to pin the zipper inwards of the edge of the fabric to ensure a 1.5cm seam allowance.
Also, ensure that your zipper is facing the correct way. It can help to mark the wrong side of the zipper
with chalk.
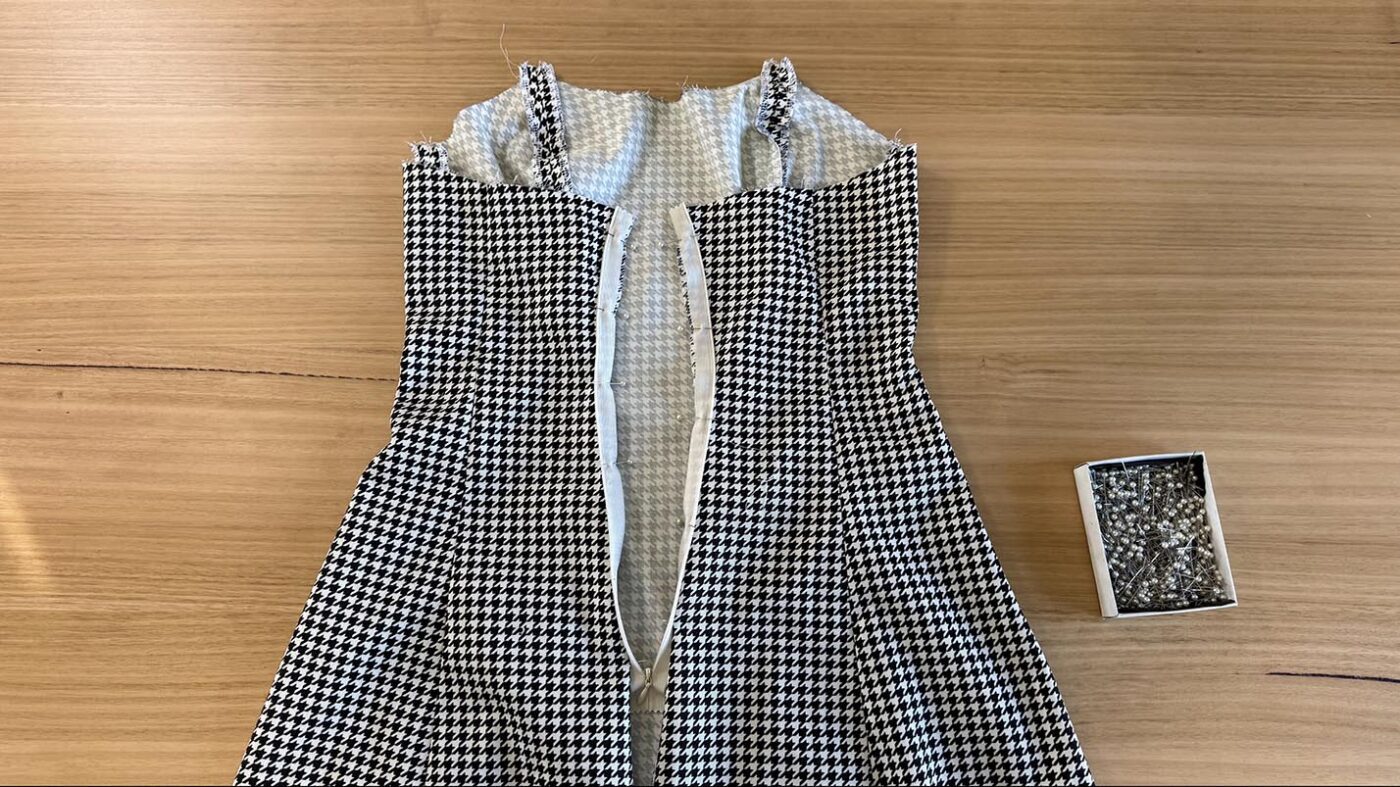
Step 7
Stitch to secure with an invisible zipper foot. Double check the zipper has been attached the correct way.
This is also a good time to check the fit of your garment and make any changes if required. If
changes are made, remember to also adjust the lining.
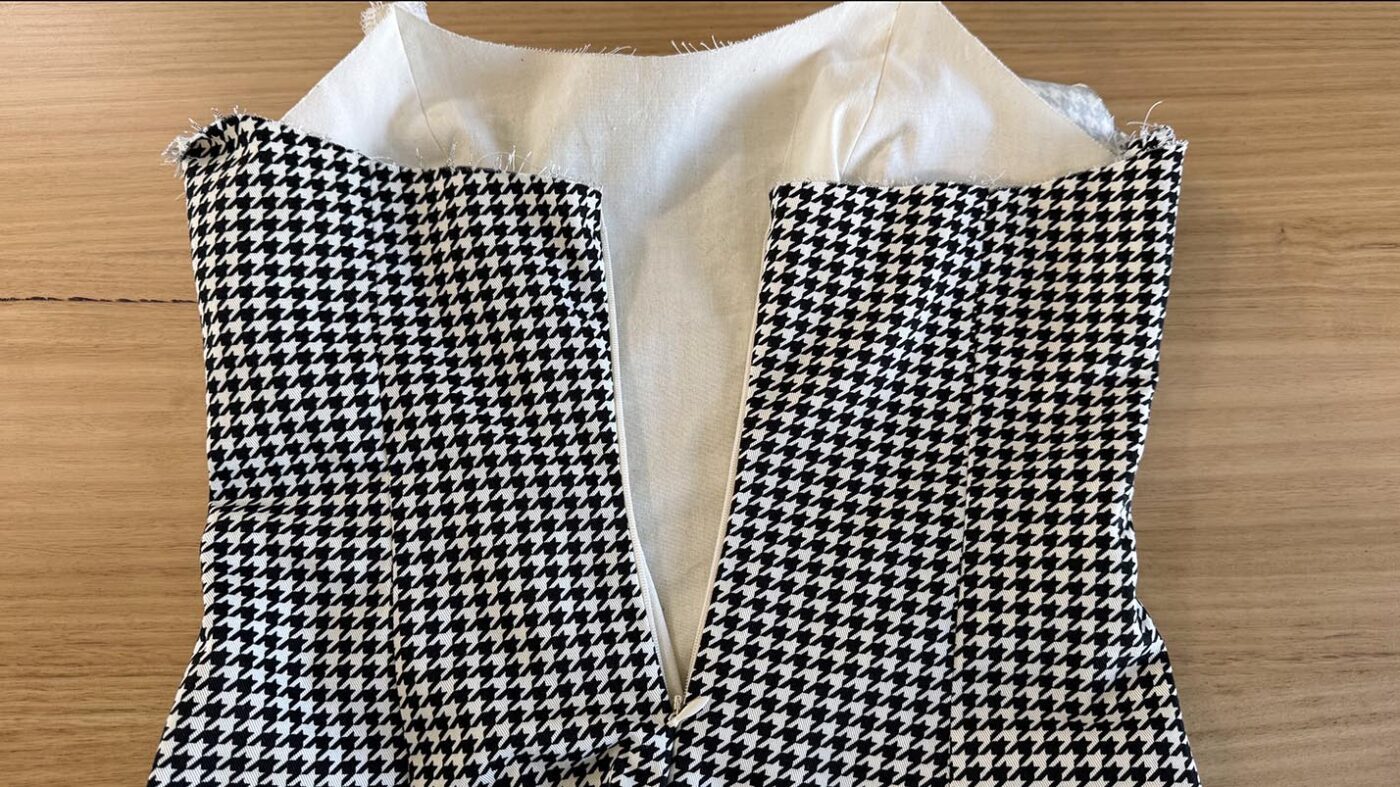
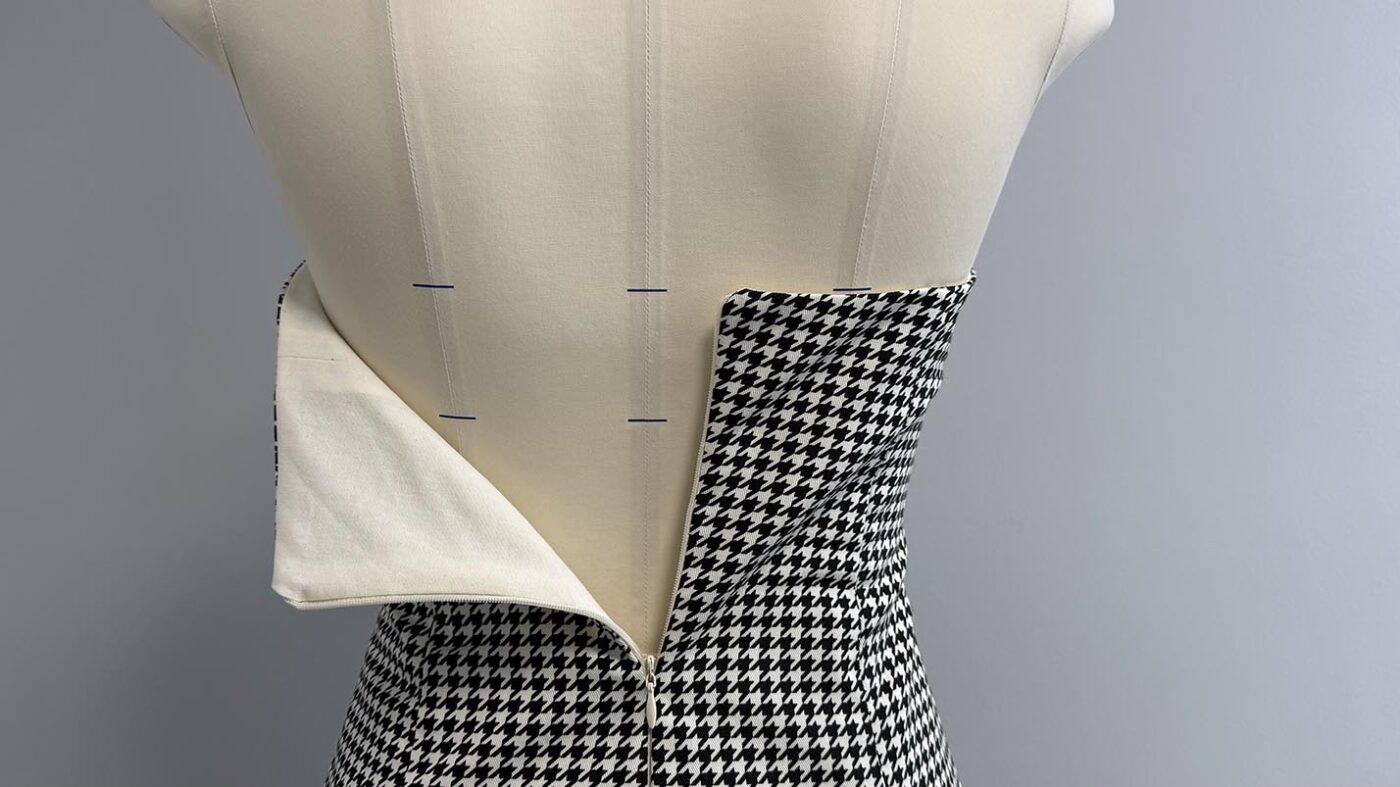
Step 8
Turn the garment back inside out and place the lining inside so that the right sides of the fabric are
facing. Pin the lining to the zipper so that the zipper is sandwiched between the main and lining.

Beginner tip* Be sure to double check the lining is facing the correct way. You want to be able to turn your garment inside out and see no seam allowances. So main fabric seam allowances will face inwards and lining seam allowances will face outwards once that garment is complete.
Step 9
Then, using a standard zipper foot, stitch over the original zipper stitch line to secure the lining.
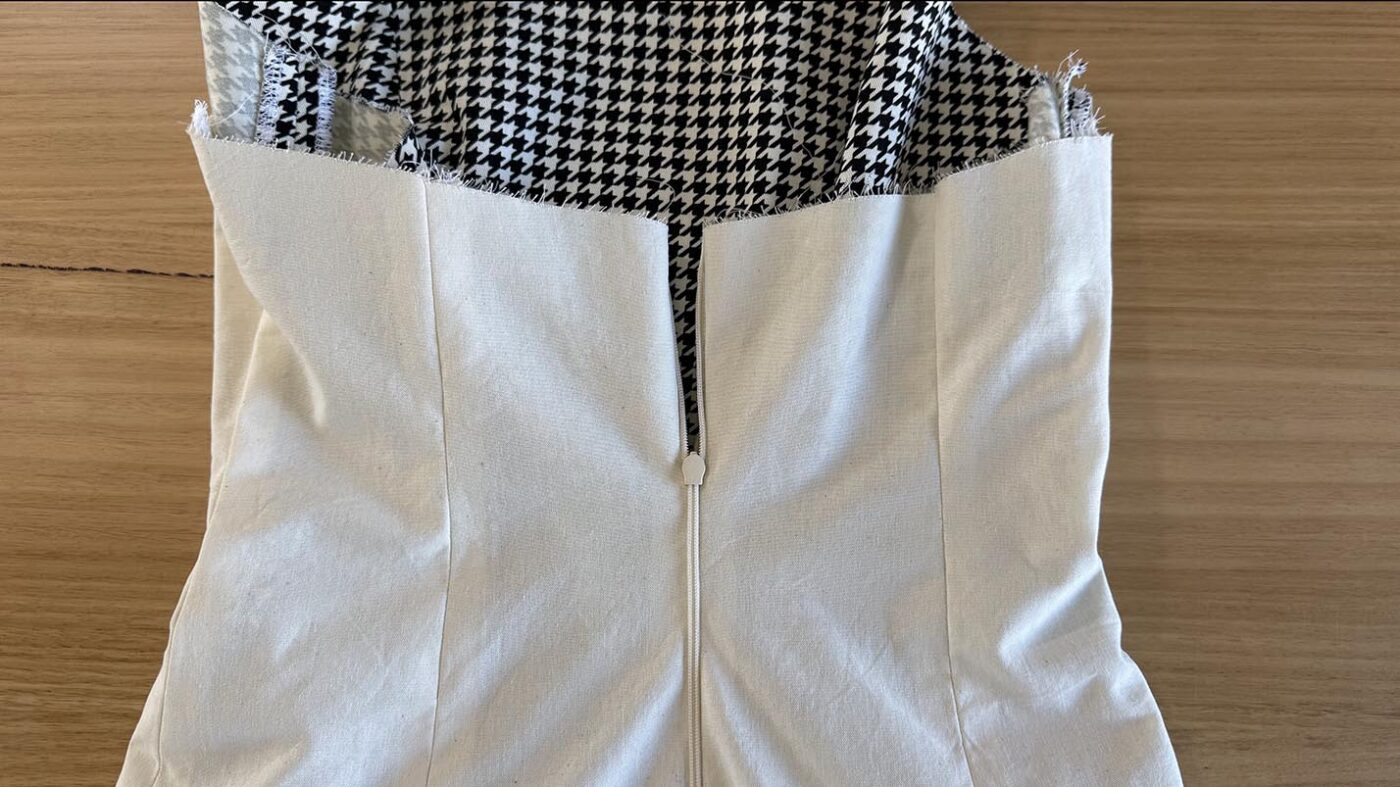
Step 10
Still using the standard zipper foot, sew the center back seam closed on the main fabric from
the hem to the bottom of the zipper stitching, then press the seam open.
Step 11
Repeat step 10 on the lining.
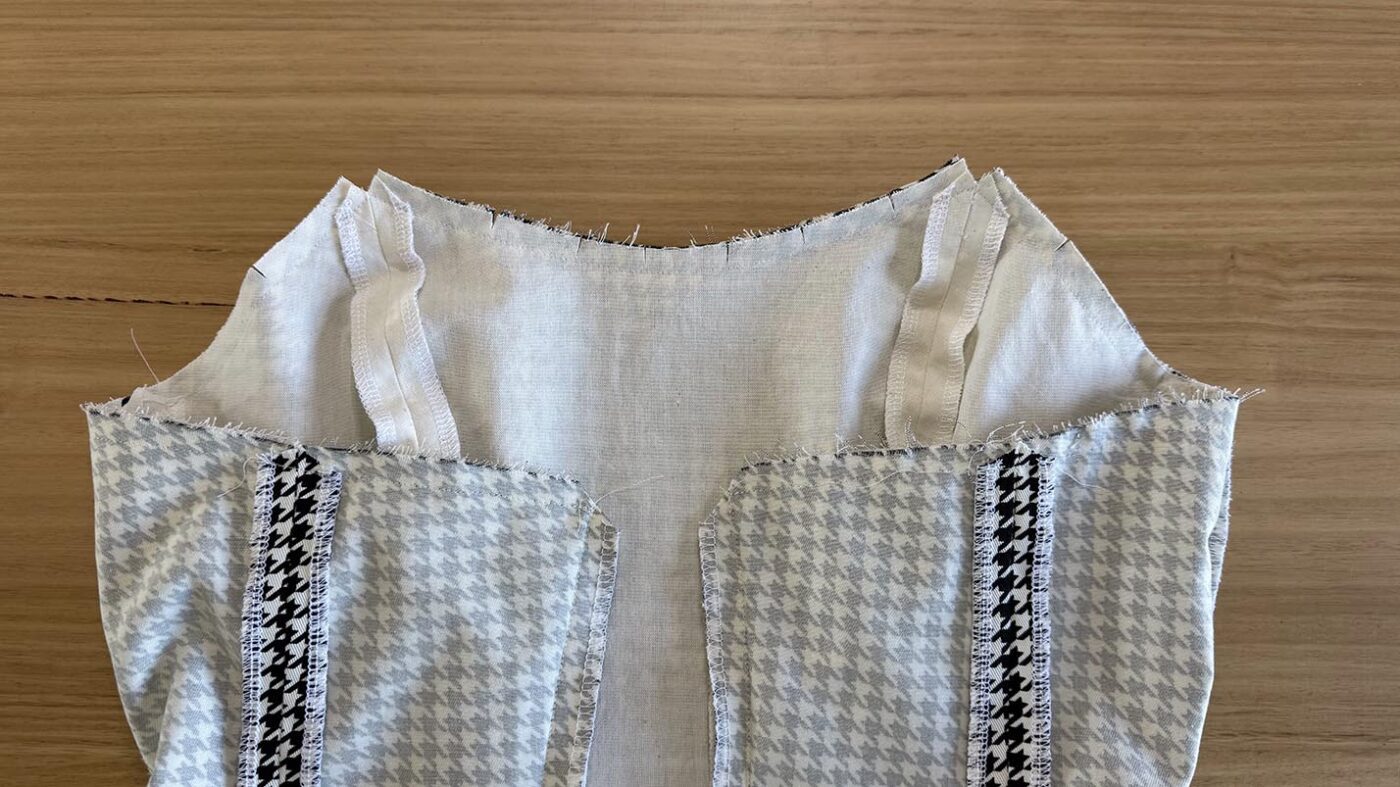
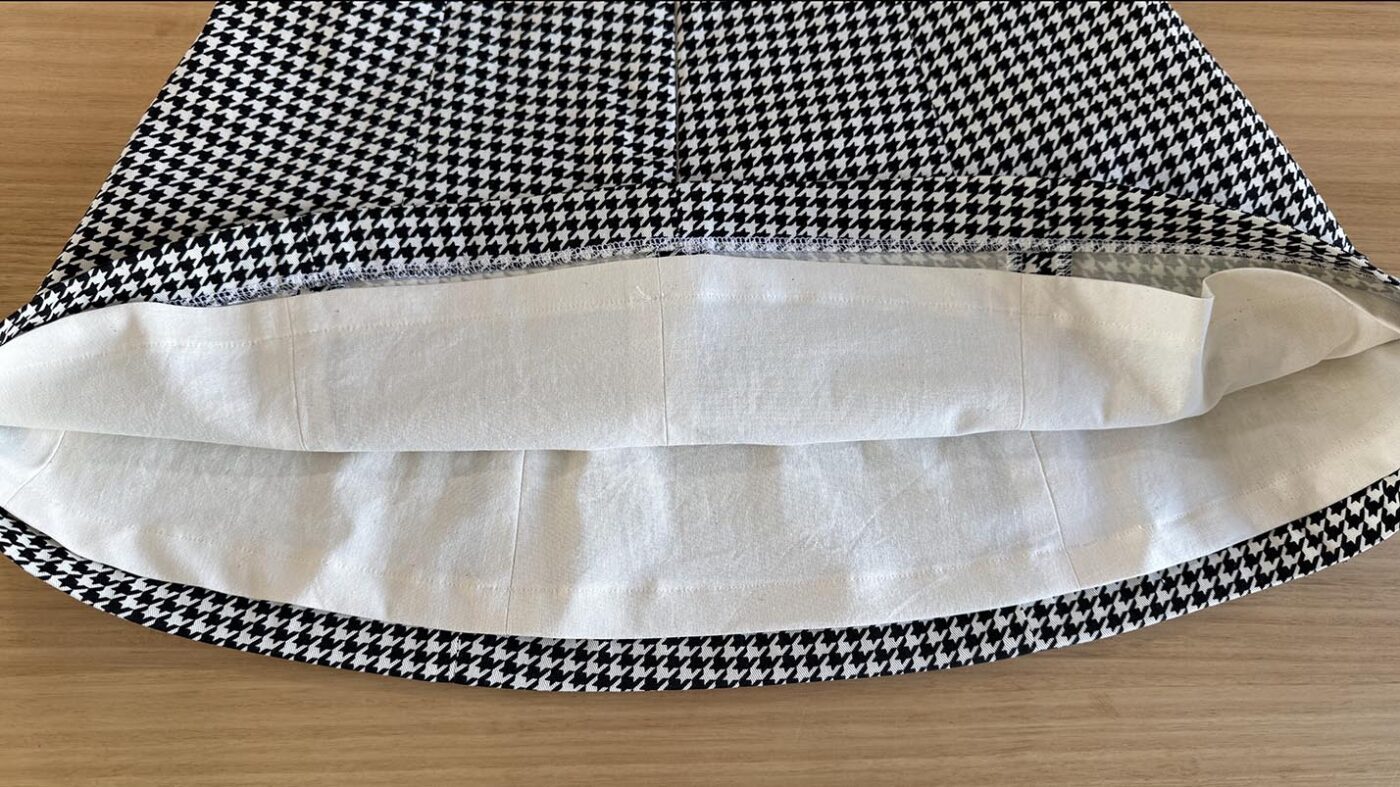
TOP EDGE
Step 12
Next, pin the main and lining together along the top edge of the garment, ensuring all seam junctions
line up. Stitch closed and clip your seam allowance along the top edge. Ensure the front neck
curve and the top of the zipper are clipped correctly so that the garment turns through neatly at the
end.
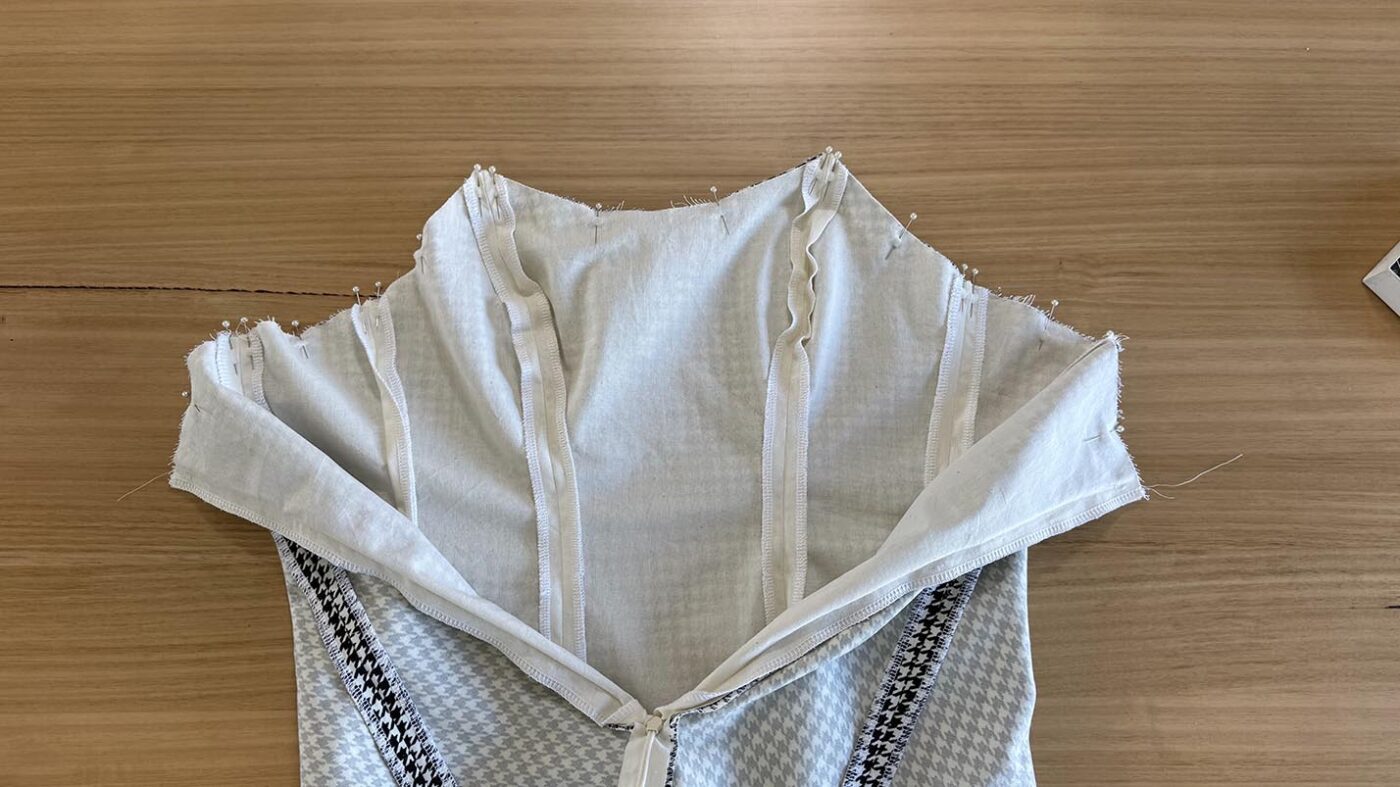
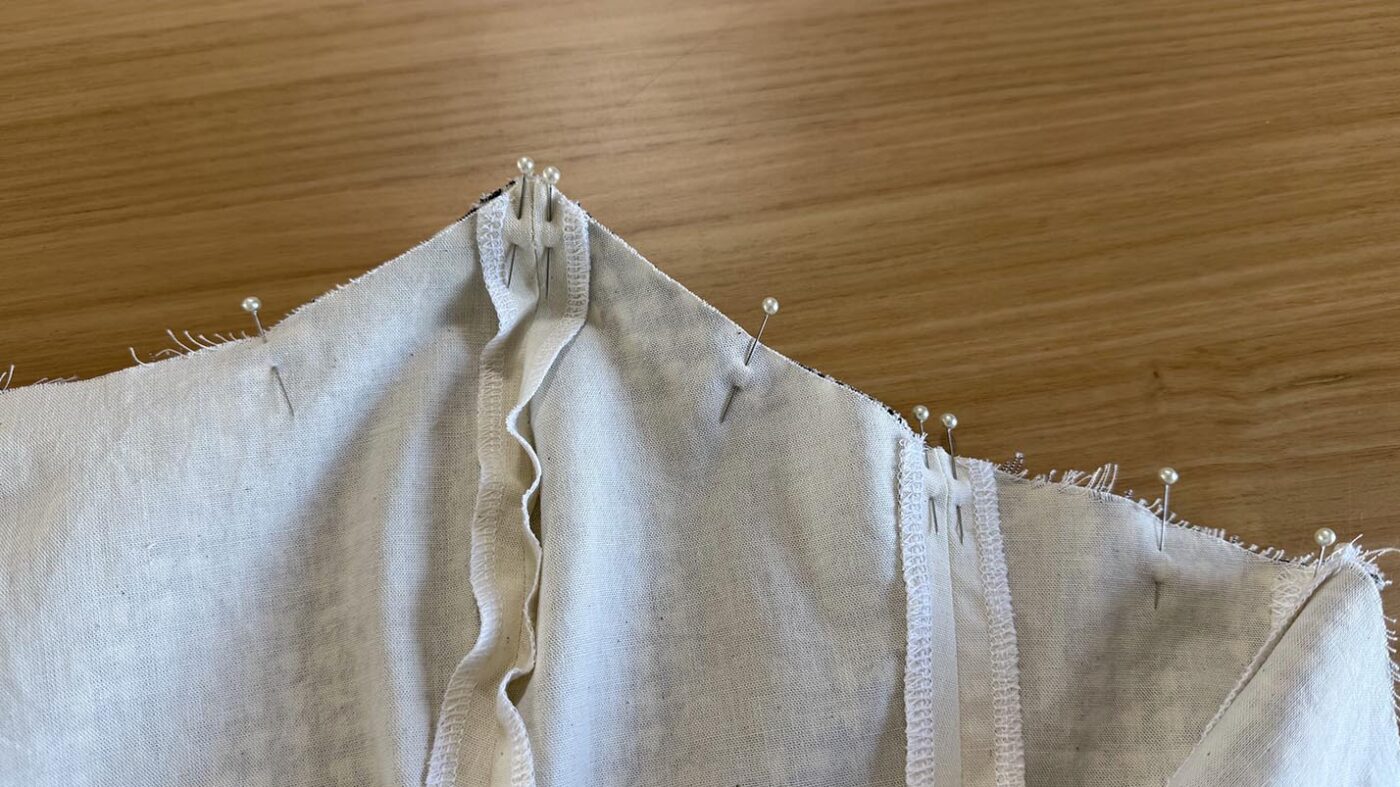
Beginner tip* Don’t skip clipping your corners, by clipping the corners the seams sit neatly inside and your corners will be neat and sharp instead of bulky.

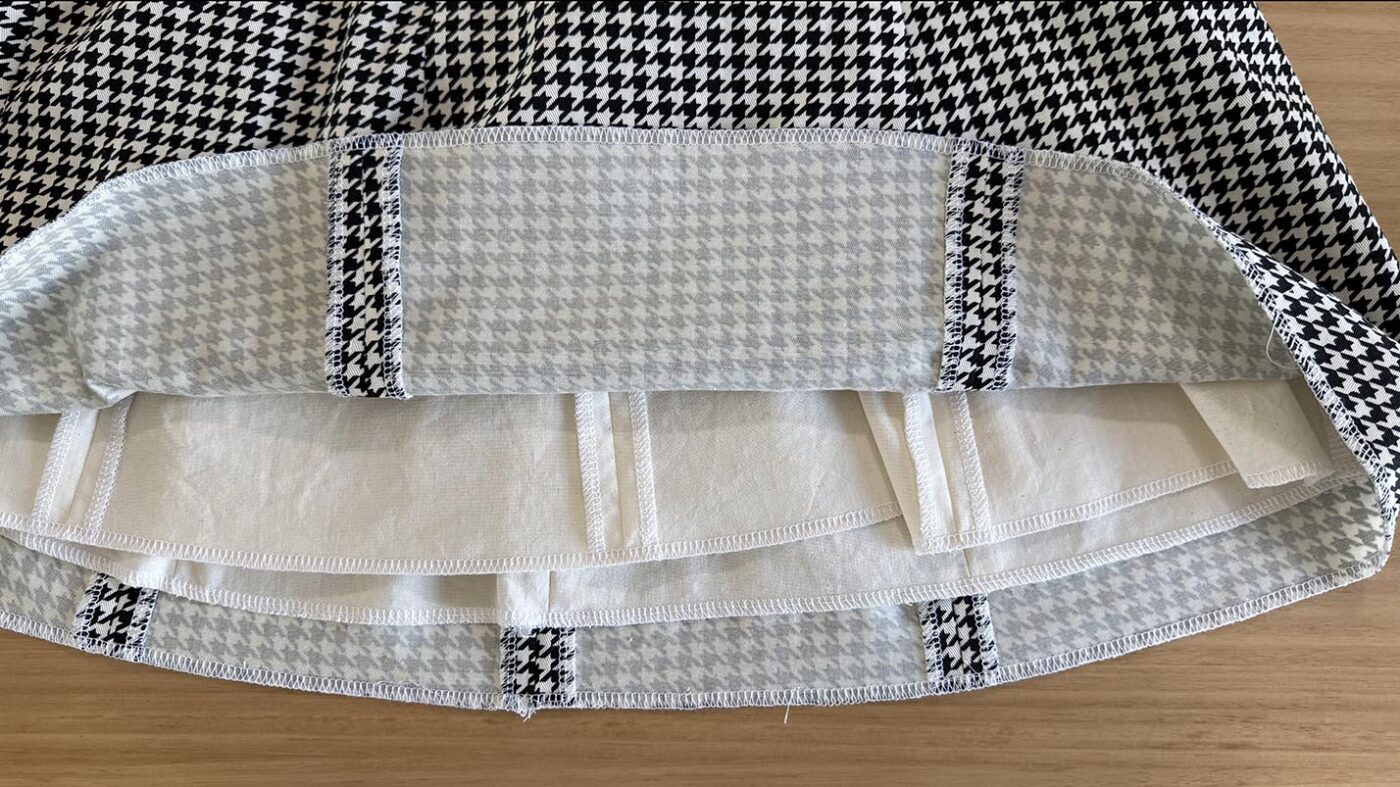
HEM
Step 13
Overlock the hem of the main fabric from the right side of the fabric. Ensure the vertical panel seams are overlocked open.
Step 14
Repeat step 10 on the lining.
Step 15
Fold the hem of the main over 3cm and press. Pin the horse hair braid (if using) so that it fits into the folded edge.
Step 16
Then fold the hem of the lining over 2cm and press.
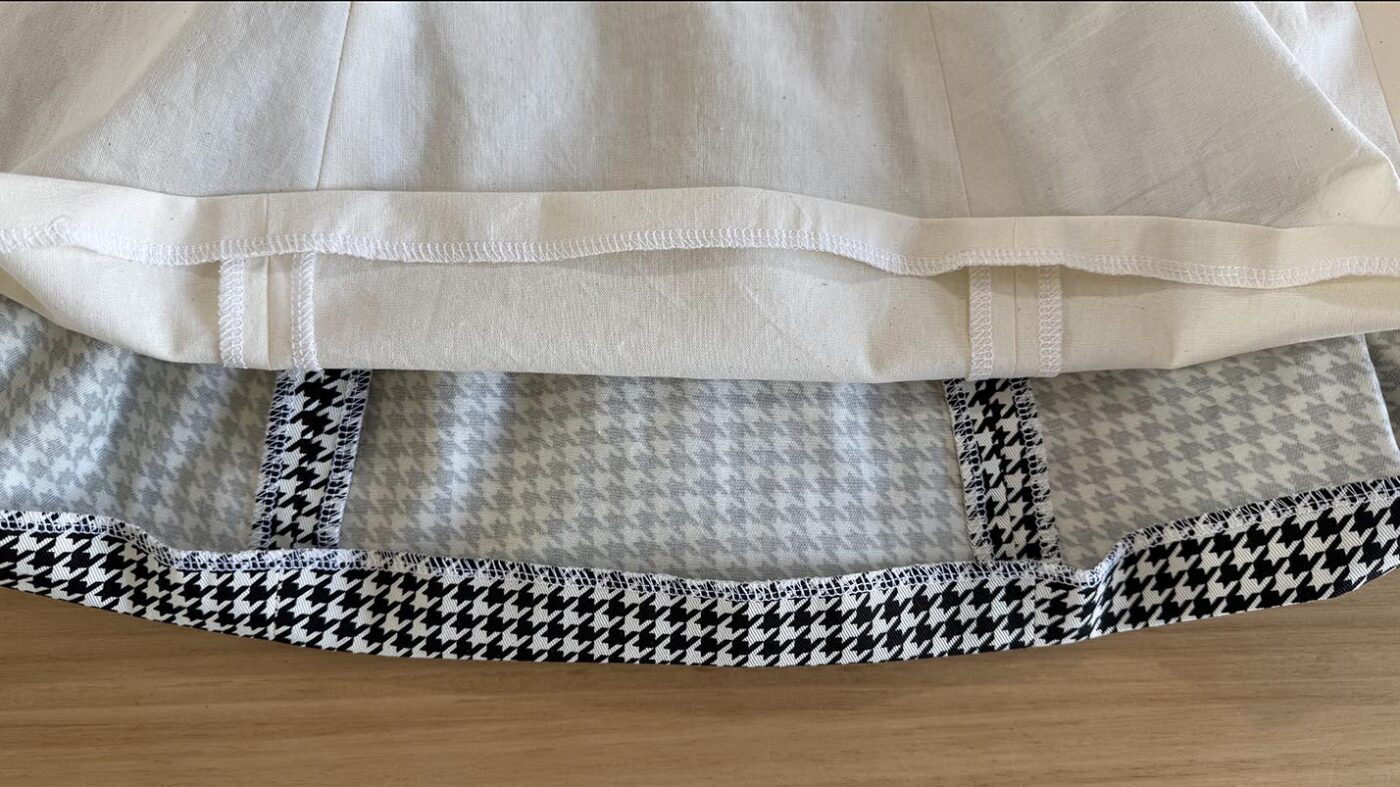
Step 17
Then stitch both hems to secure.
Your Carla Mini Dress is now complete.
I also have a number of other patterns where you can practice your sewing skills, which are available for purchase here.
I’d love to see your creations, feel free to tag me on Instagram at @at_the_seams_patterns
x
Want to stay up to date with new information and pattern releases? Join the community below: