Accessories, Sewing Tutorials
Sewing Tutorial: Halloween Bat Cape
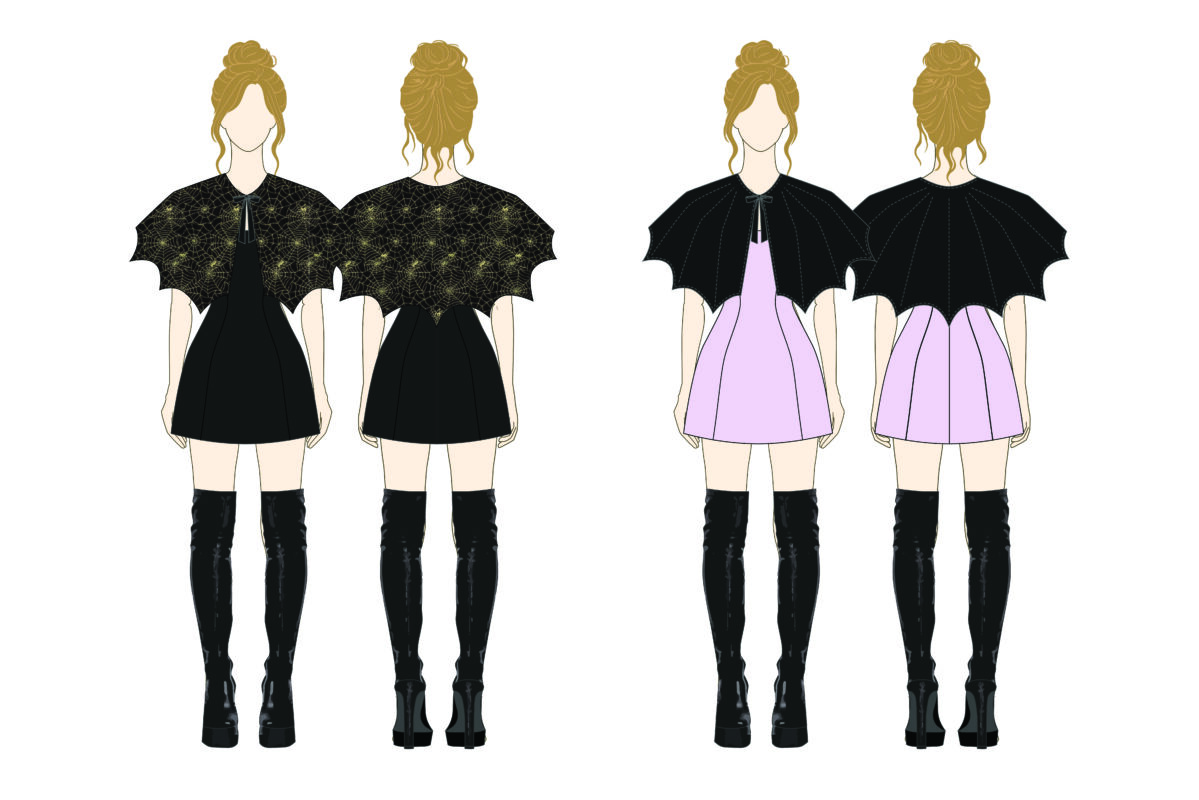
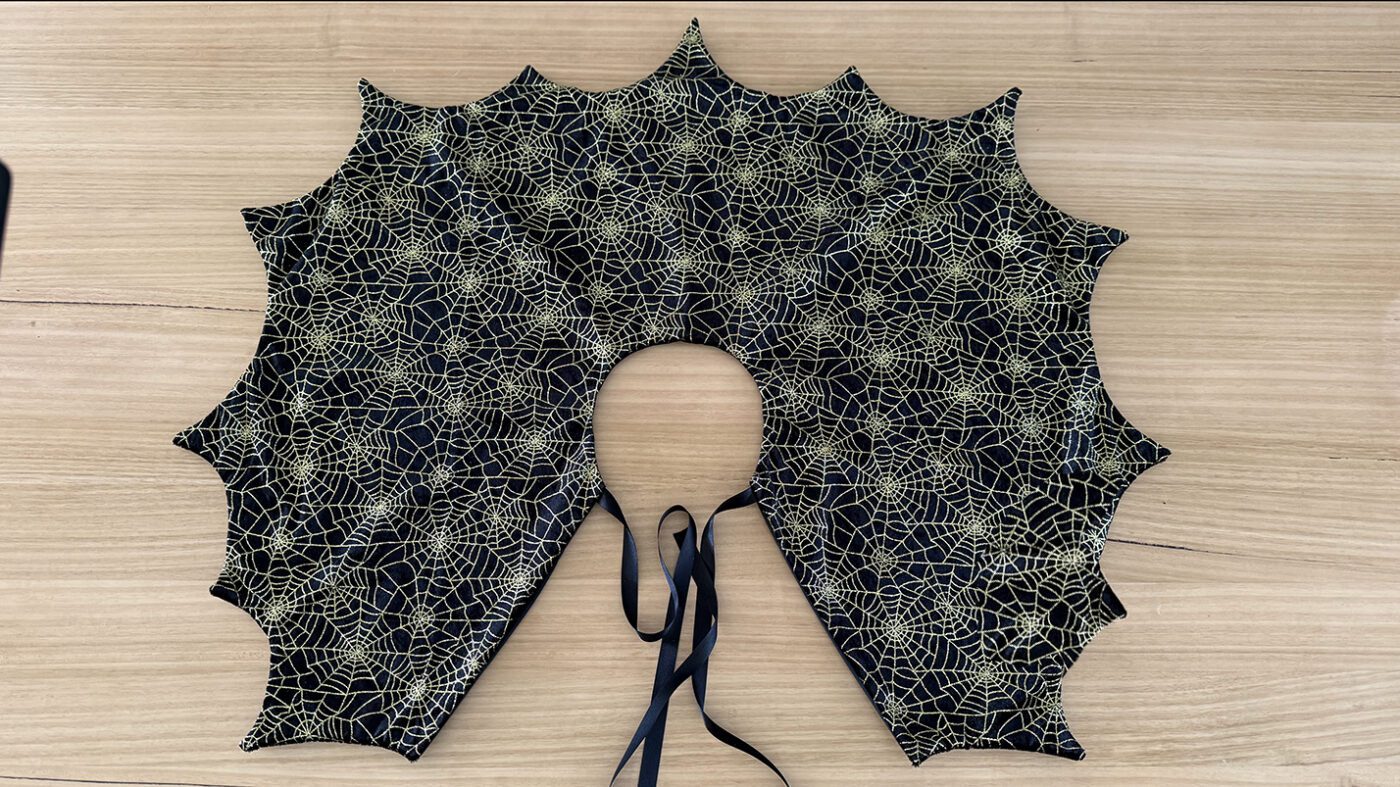
Need a costume for Halloween? The Reversible Halloween Bat cape is the perfect item to drape over your already cute outfit. Featuring striking wing-shaped panels and a delicate tie-front closure, this cape is the perfect combination of spooky and stylish.
Made in 2 contrasting fabrics, the style lets you choose between two different looks in one garment.
This beginner-friendly PDF pattern includes step-by-step instructions and is ideal for confident beginners looking to create a fun statement accessory. The best part – no overlocker needed.
Whether you’re heading to a Halloween party, cosplay event, or just want to make everyday feel a little more mysterious, this bat cape will turn heads as you walk by.
SEWING ABILITY – Beginner
To begin, you will need the following things:
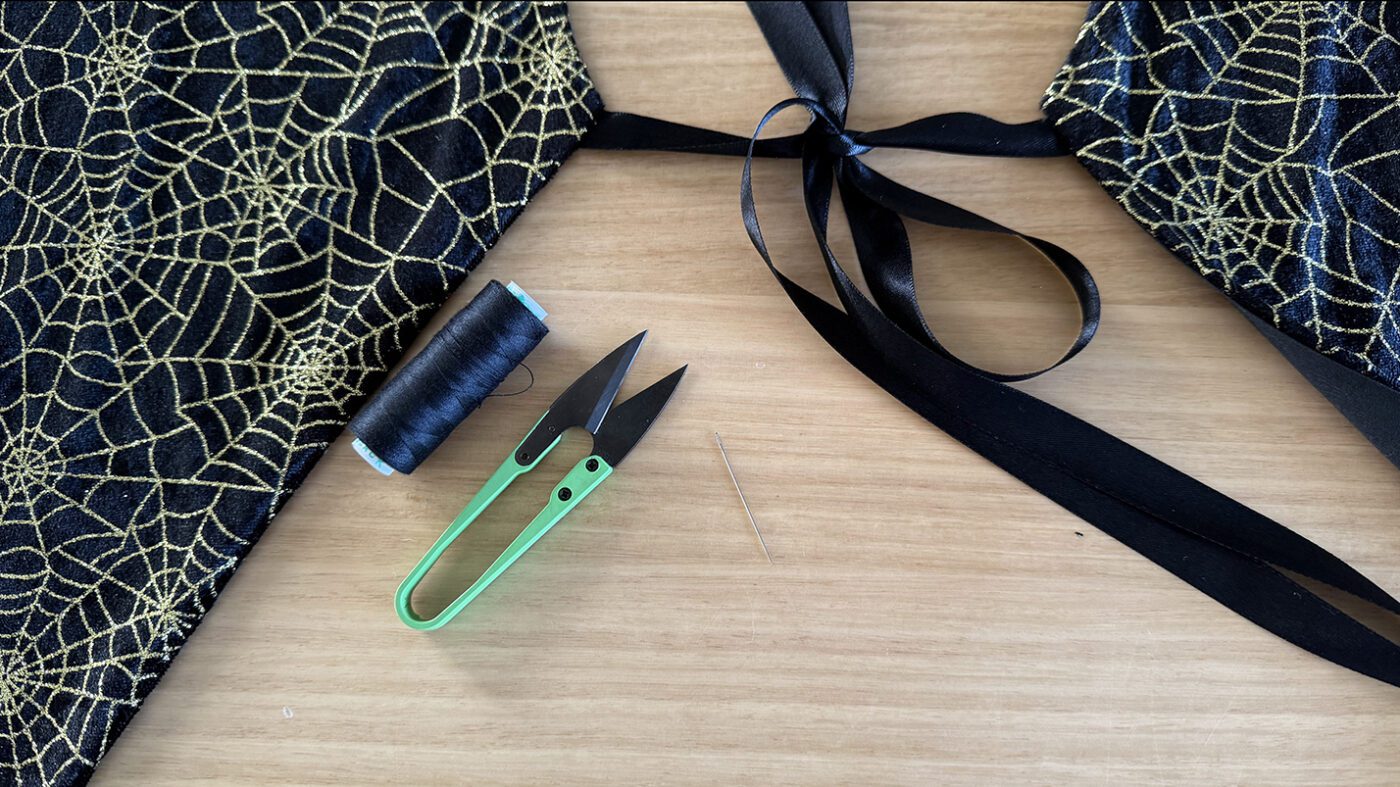
Materials
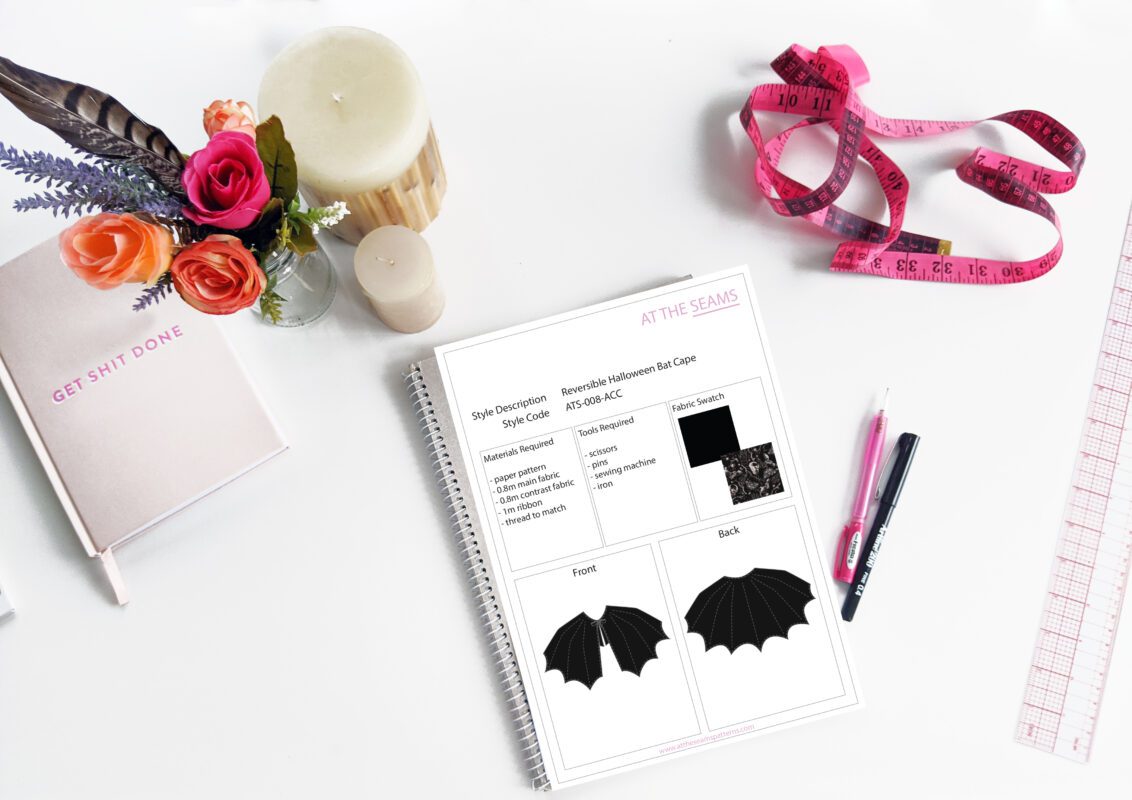
- The Halloween Bat Cape paper pattern , or if you prefer to shop on Etsy
- 0.9m fabric
- 0.9m contrast fabric
- ribbon of your choice 2 x 50cm lengths
- cotton thread
Tools
- scissors
- pins
- dressmakers chalk
- sewing machine with a standard foot
- iron
Fabric Requirements
Soft, Draping Look (sits close to the arms): Choose medium-weight fabrics with good drape, such as cotton, satin, rayon, crepe, or lightweight velvet.
Structured Look (stands away from the arms): Choose medium to heavy-weight fabrics that hold their shape, such as cotton twill, drill, canvas, or heavier velvets.
Tips
- Ensure your fabric is washed, dried, and pressed before you start cutting. There is nothing worse than washing your beautiful garment and it shrinks, or even more annoying, the lining shrinks and the main doesn’t, so it’s all pulled out of shape and is unwearable.
If you prefer video instructions – please head over to youtube.
Sewing Instructions
Step 1
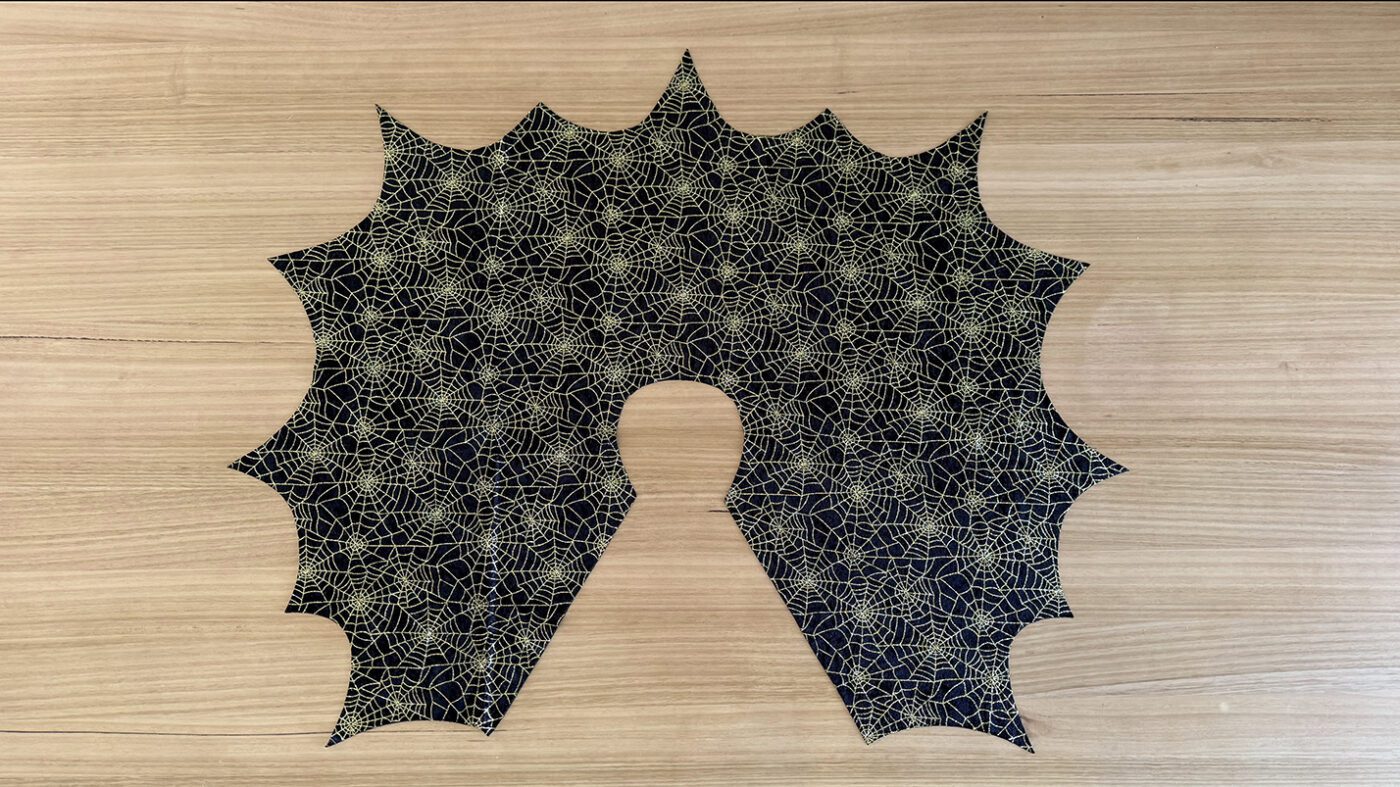
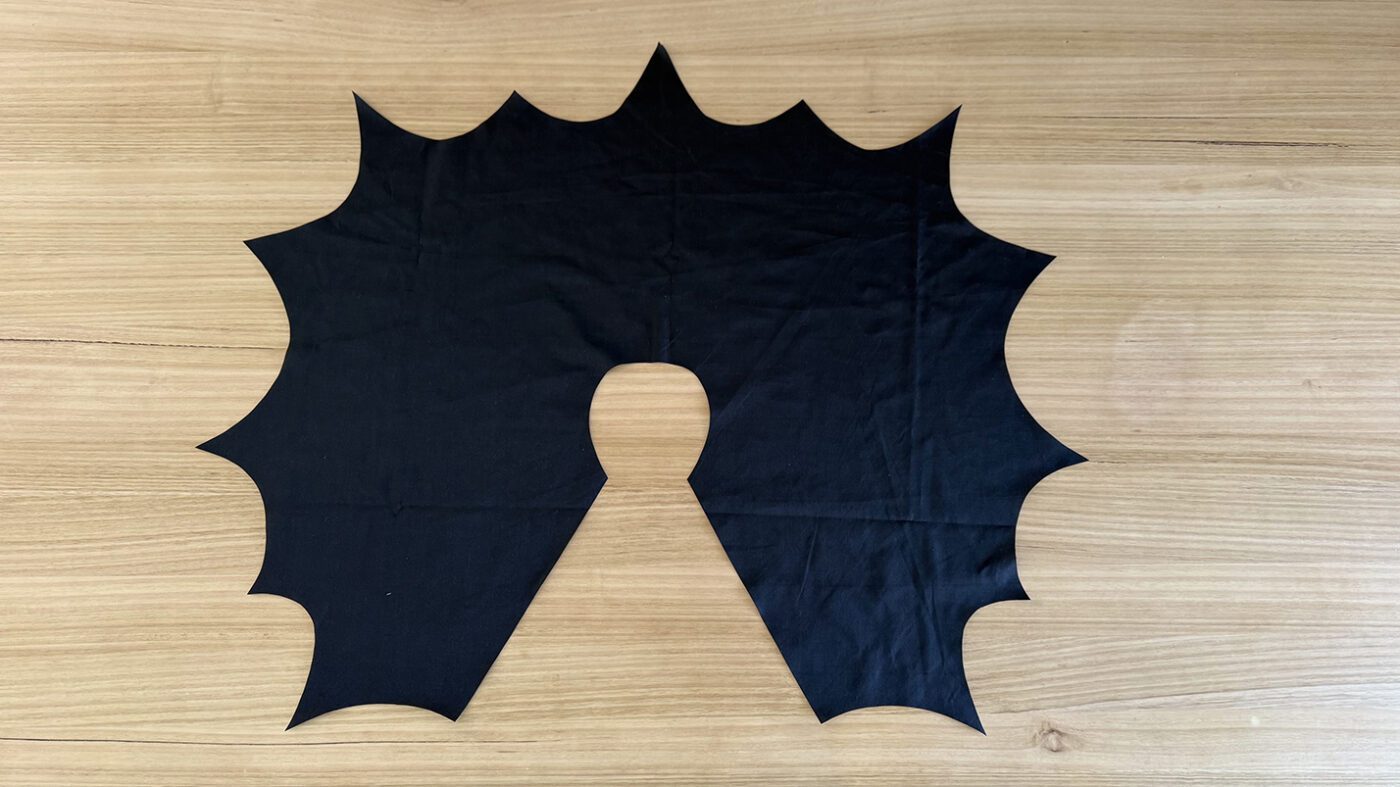
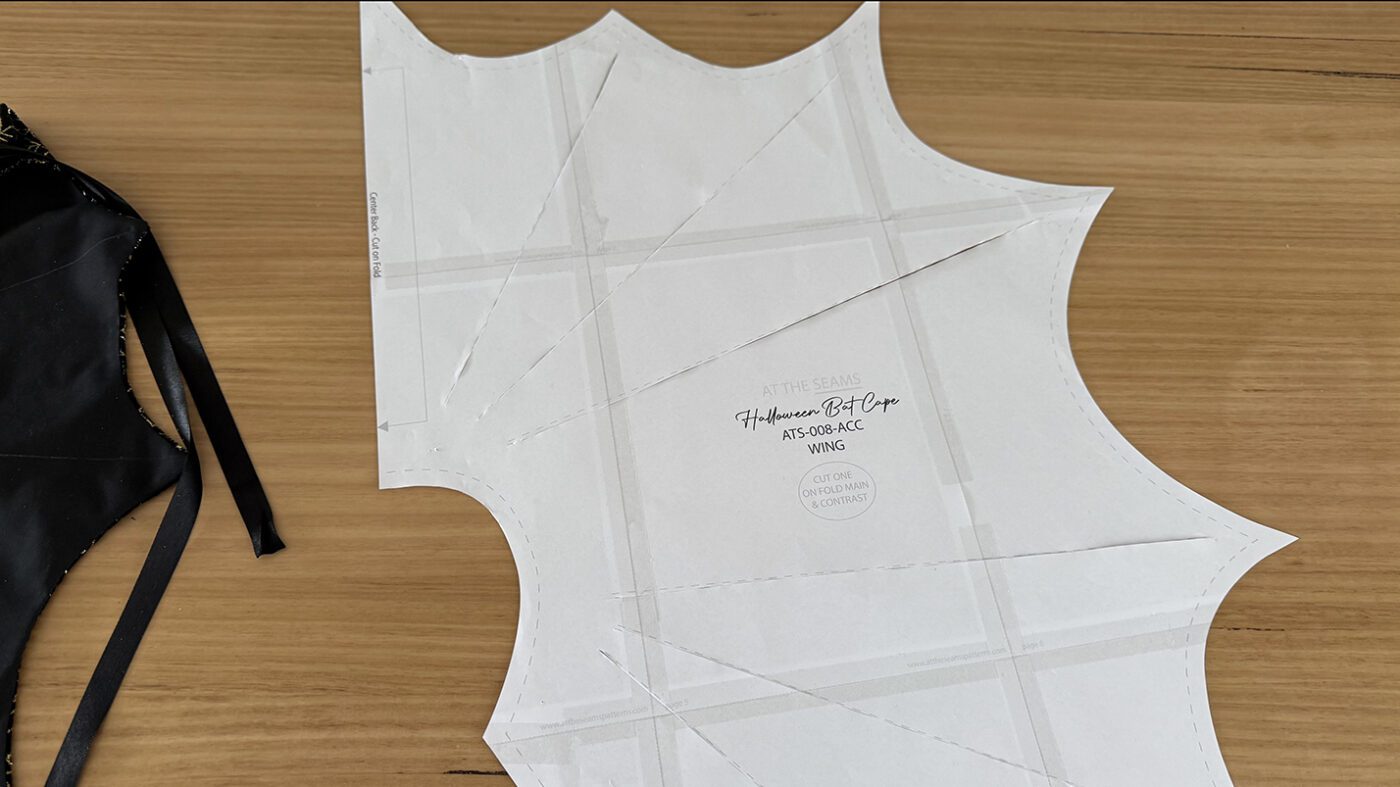
Cut all main and lining pieces accurately on the correct grain, ensuring all notches are clipped. Please
note that the seam allowance is marked on the pattern and is listed on page 2 of the booklet provided.
Beginner tip* If you can afford to purchase a rotary cutter and cutting mat, I find this more accurate and time-efficient.
Step 2
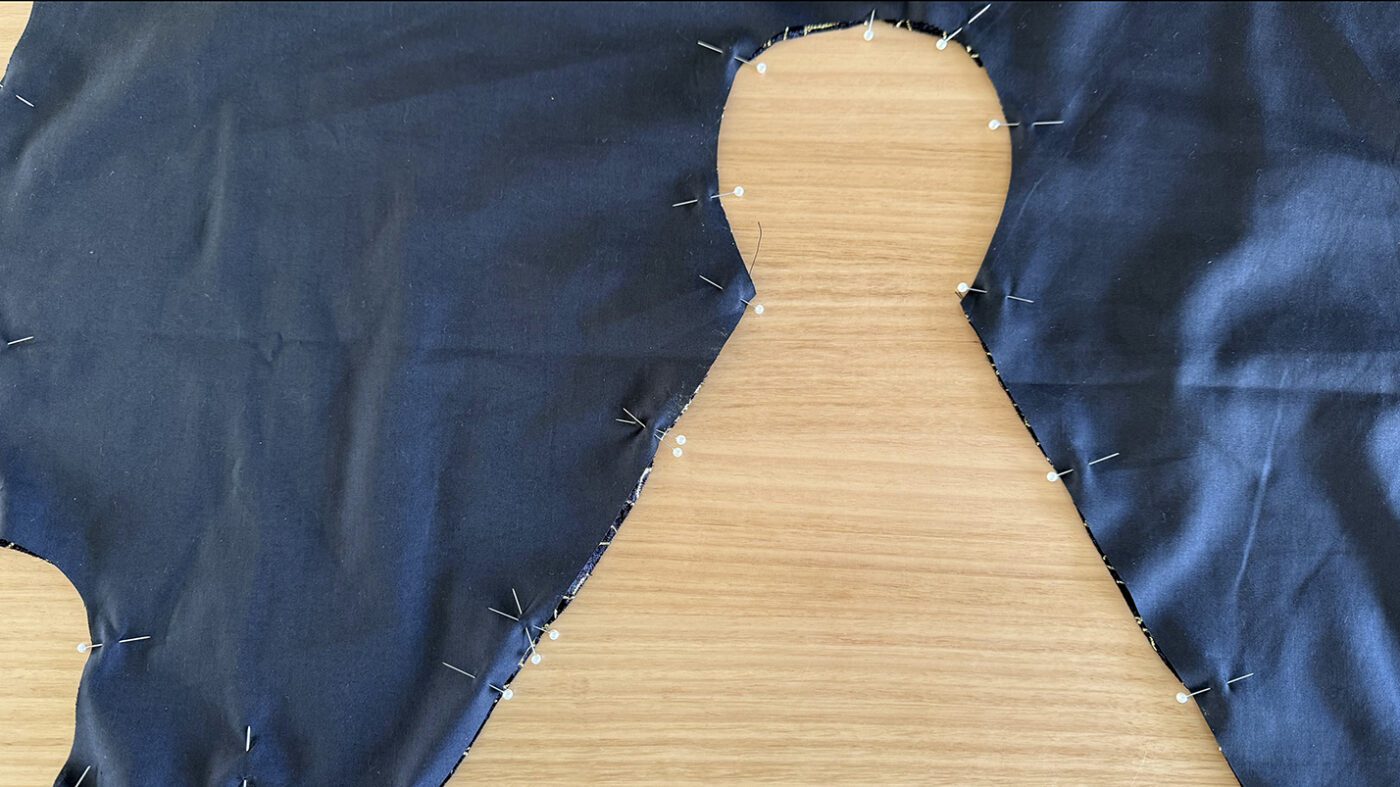
Place the main fabric piece right side up on the table and pin the CF neck tie to each side of the front opening 1cm from the top neck edge.

Step 3
Stitch in place 5mm from the edge to secure in place for the next step.
Step 4
Place the main and contrast pieces right sides together and pin along all edges, leaving a 10cm gap on one side of the center front. This opening is where the cape will be turned through later. The CF ties will be sandwiched between the layers.
Step 5
Stitch closed using a 1cm seam allowance. Take care to leave the needle down and lift the foot to turn on each of the corners so they are nice and sharp when turned through. Also, ensure the CF tie is kept clear of any stitching.
Step 6
Trim the curved seam allowances on the hem and neck edge back to 5mm. Clip the points off the end of each point. Then clip the corners of the CF neck and hem.
Beginner tip* Don’t skip clipping your corners, by clipping the corners, the seams sit neatly inside and your corners will be neat and sharp instead of bulky.
Step 7
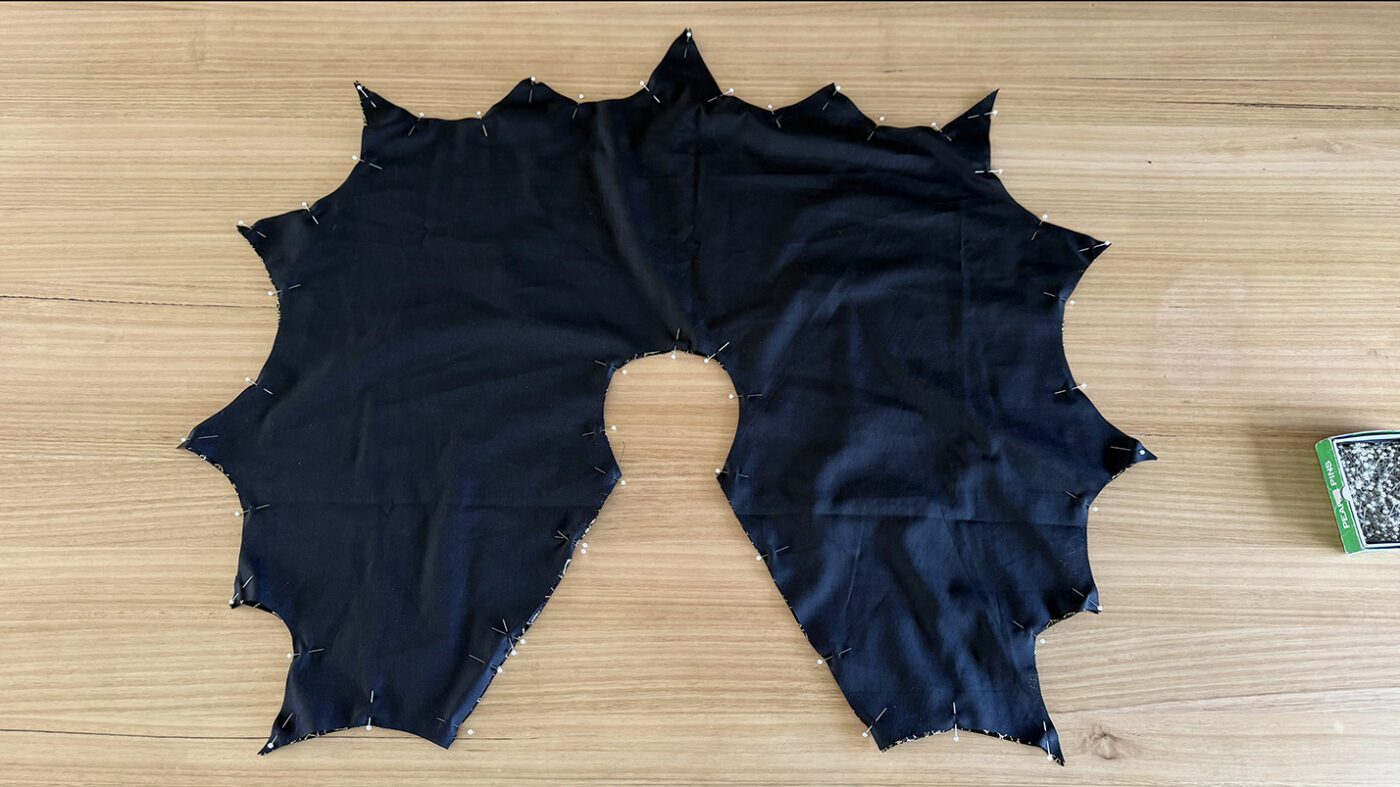
Turn the cape through the hole left in step 3. Use a sharp object to push out the corners of the wings.
Step 8
Press the edges well.
Step 9
Hand sew the opening that the cape was turned through closed using an invisible ladder stitch.
Step 10
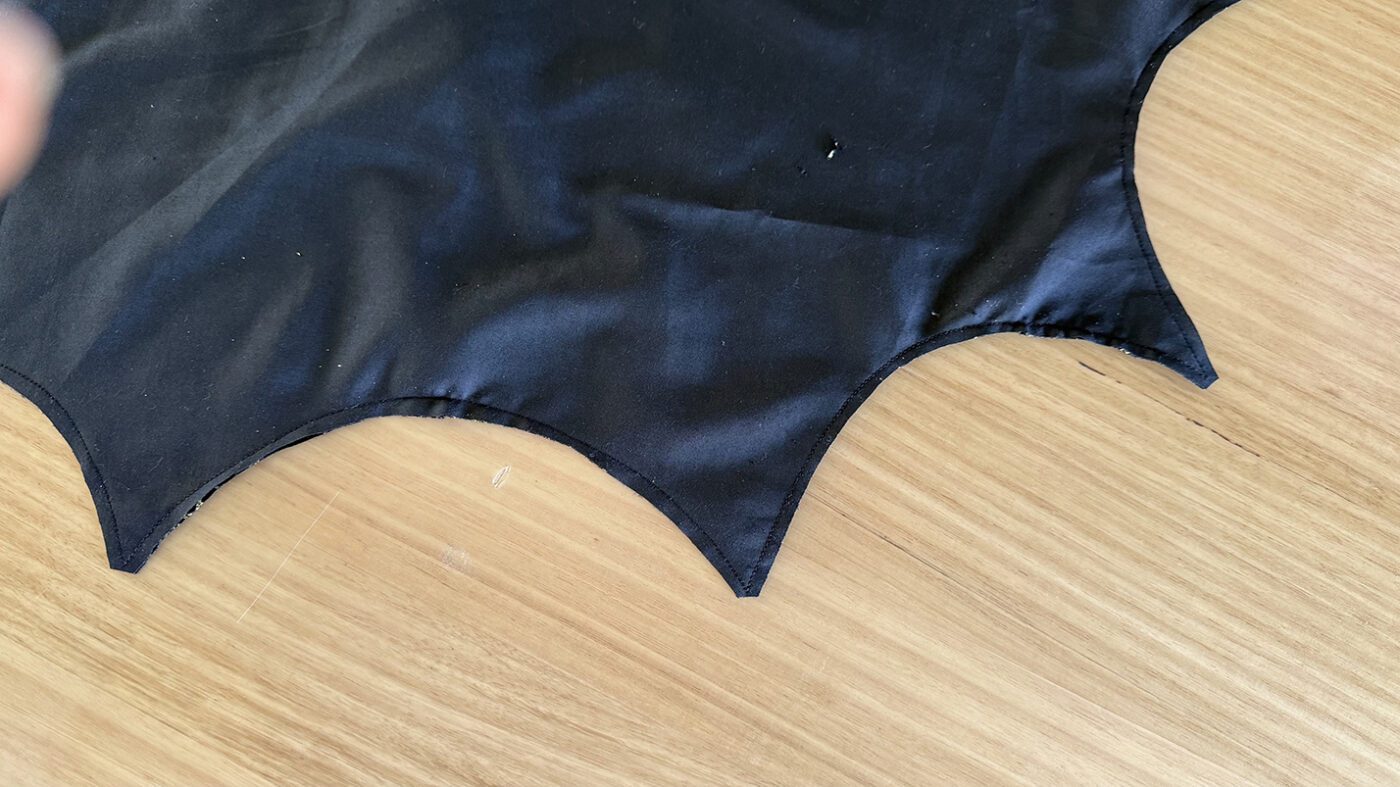
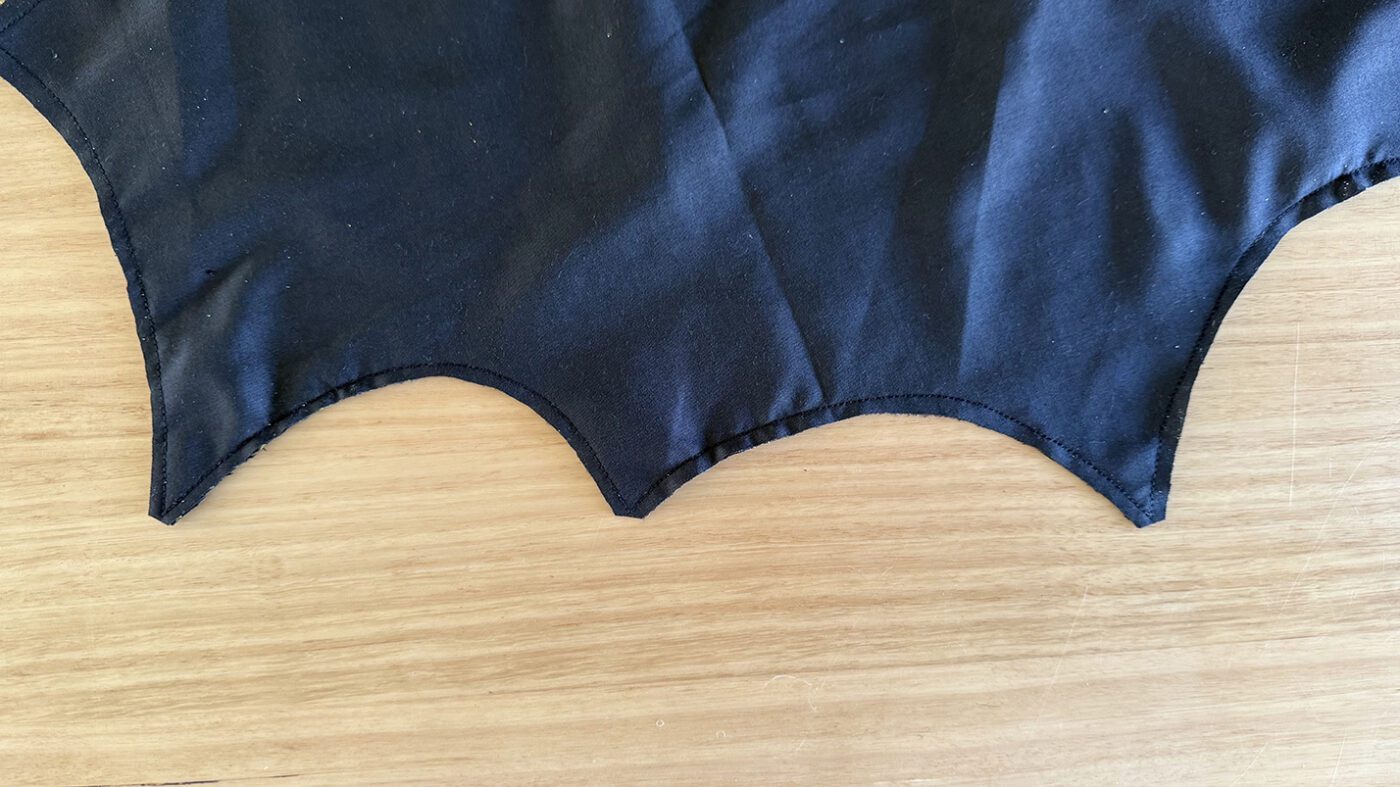
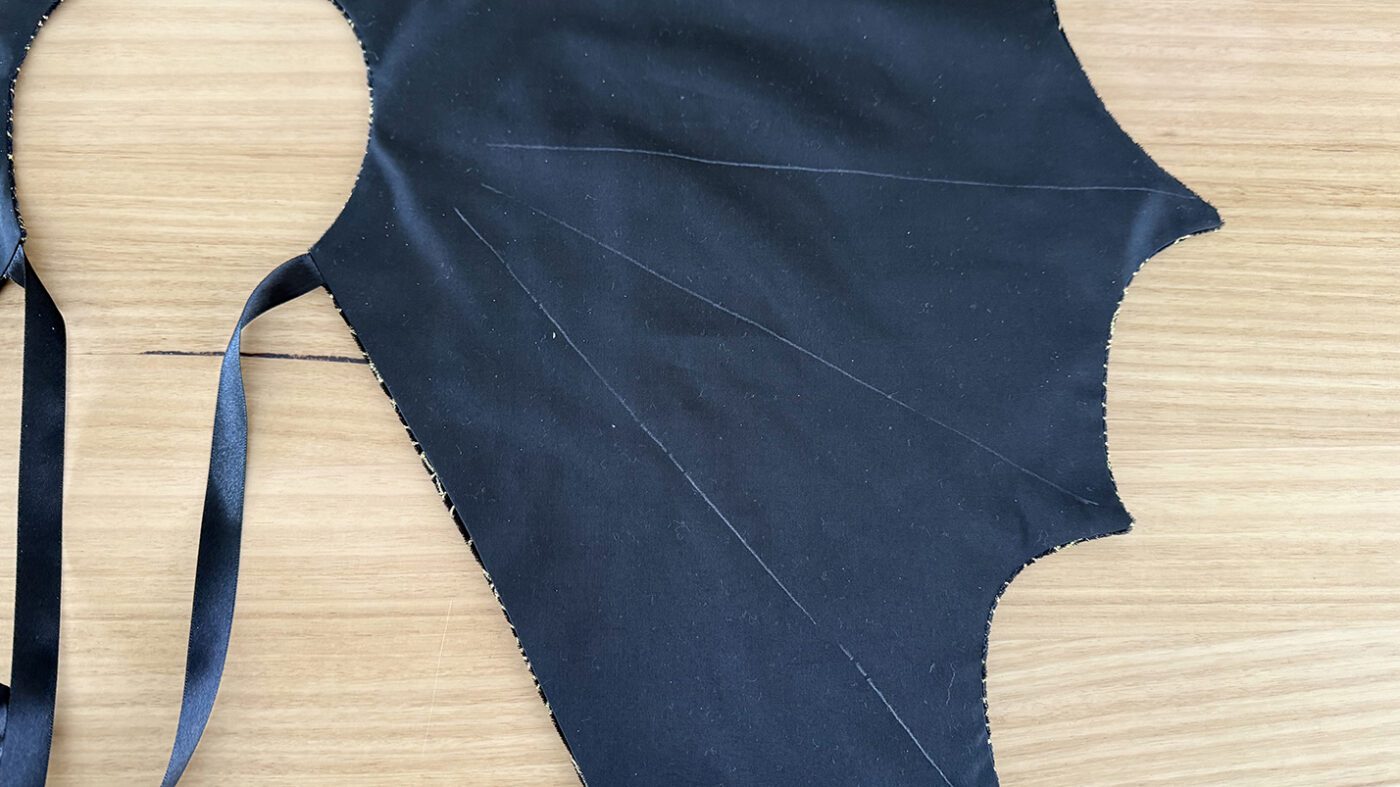
Using the paper pattern – cut along the dashed lines of the wing top stitching. Then using dressmakers chalk, transfer the markings through to the cape.
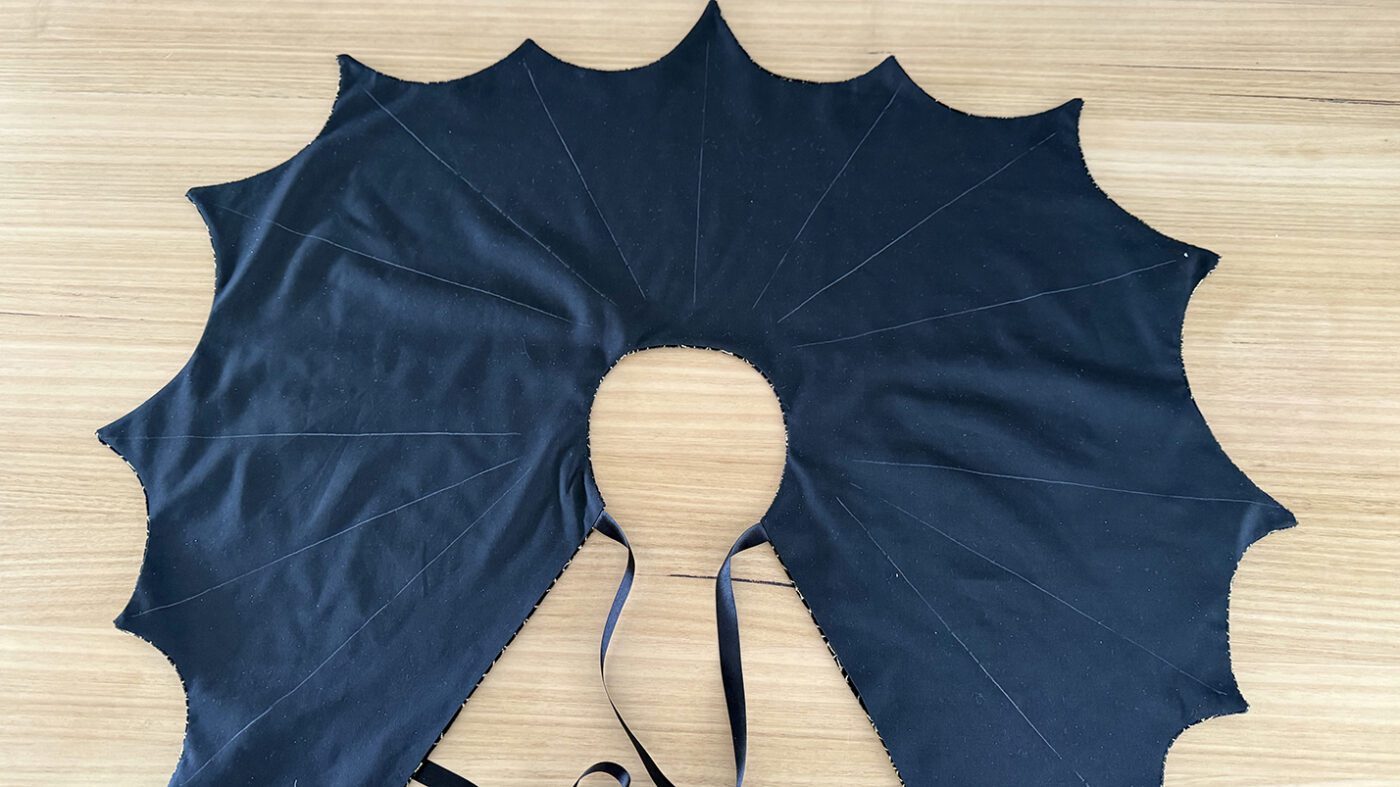
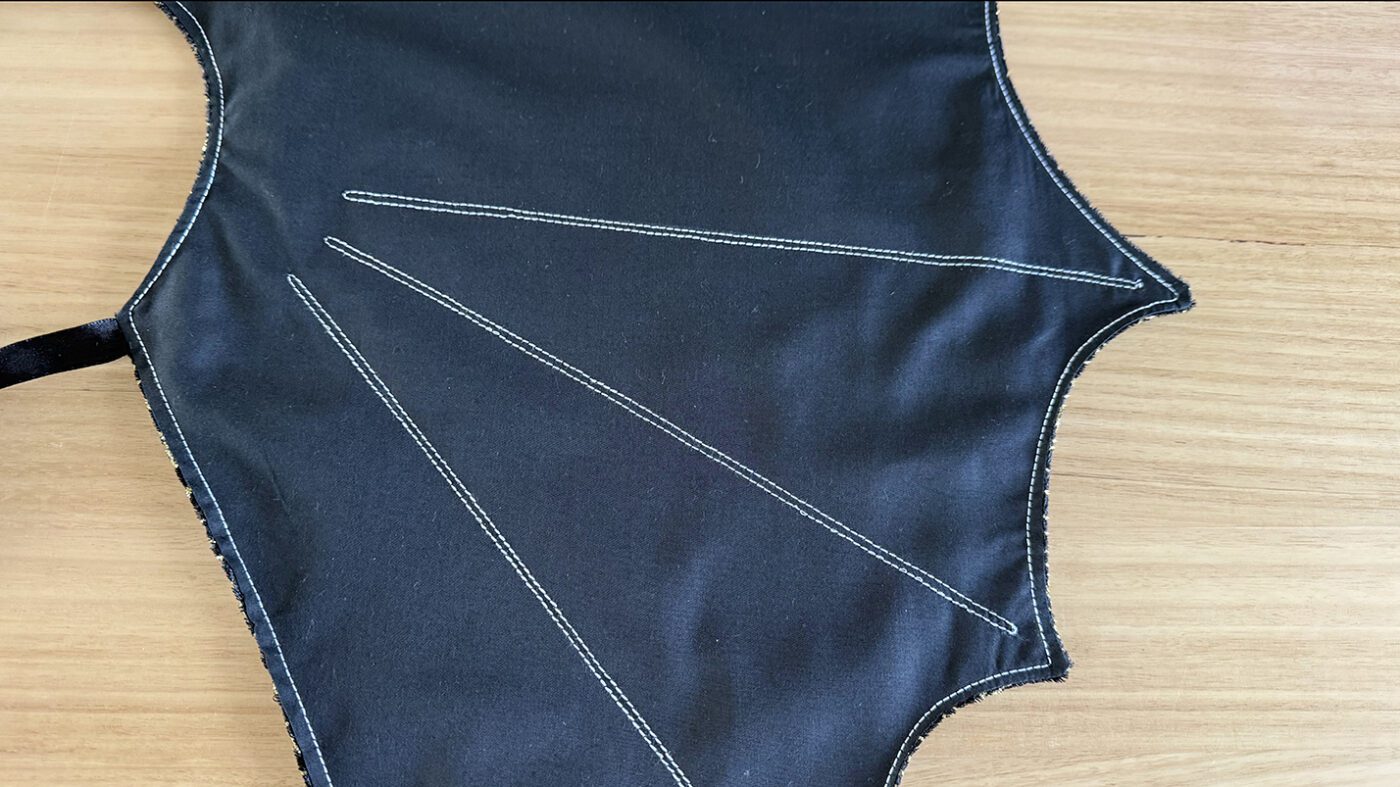
Step 11
Top stitch along the outer edges of the cape and along the marked top stitching wing lines. You can choose matching top stitching thread or contrast for something that stands out more.
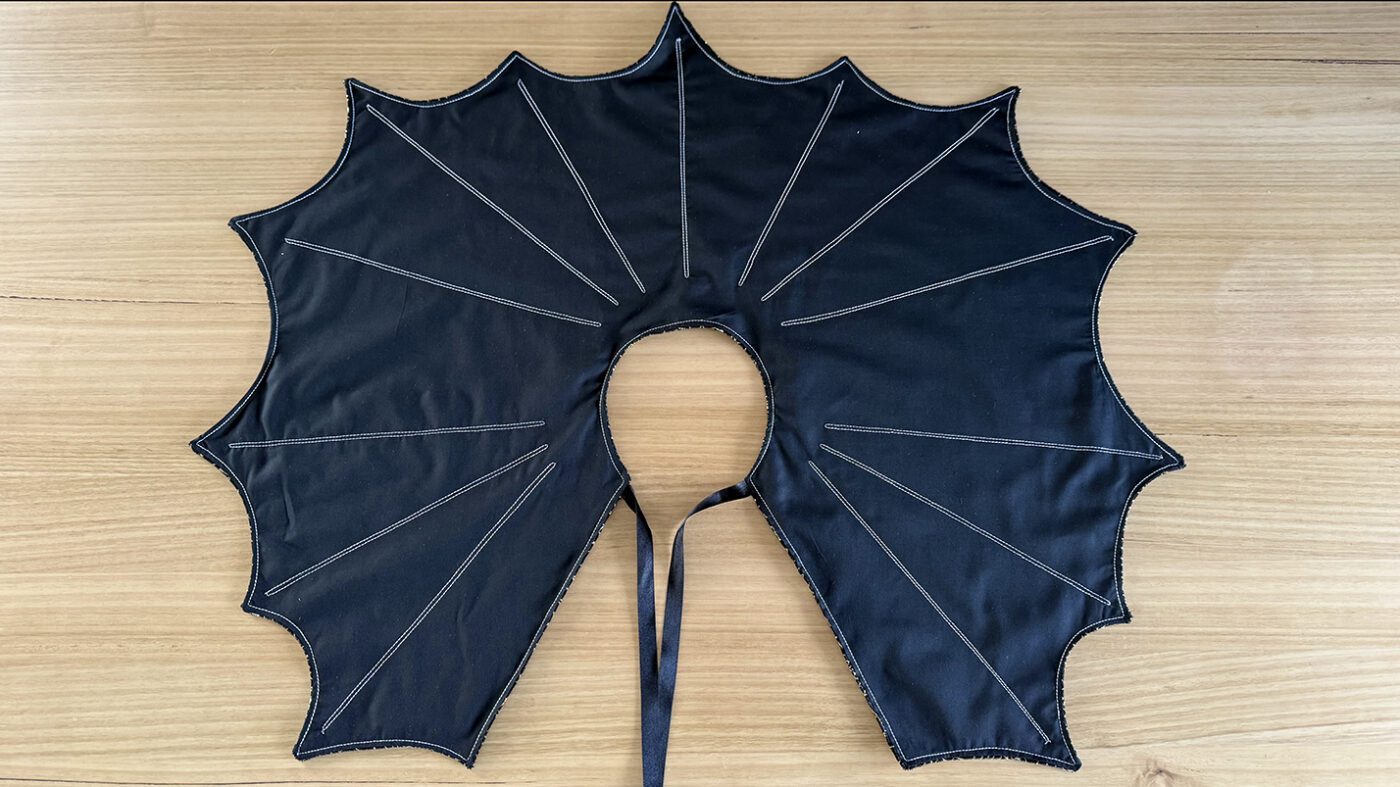
The Halloween Bat Cape is now complete.
I also have a number of other patterns where you can practice your sewing skills, which are available for purchase here.
I’d love to see your creations, feel free to tag me on Instagram at @at_the_seams_patterns
x
Want to stay up to date with new information and pattern releases? Join the community below: